Adding a pine tongue and groove ceiling to your home can be an easy and affordable way to transform the look and feel of any room. Pine tongue and groove boards are easy to install and can provide a unique, rustic look to your home. This guide provides an overview of the steps involved in installing a pine tongue and groove ceiling.
Gather the Necessary Materials
Before beginning the installation process, you will need to gather the necessary materials. This includes the pine tongue and groove boards, nails, hammer, saw, level, and other tools. You may also want to purchase some sealant or stain to protect the wood and enhance the look.
Prepare the Room
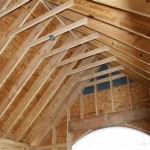
Before you begin installing the boards, you will need to prepare the room. This includes removing any existing ceiling materials such as drywall, insulation, and other materials. You will also need to make sure the ceiling is level and that there are no gaps or cracks. This will ensure the boards fit properly and that the installation is secure.
Install the Boards
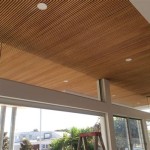
Once the room is prepared and the materials are gathered, you can begin installing the boards. Start by measuring the length of the wall and cutting the boards to fit. Make sure to leave a small gap between the boards to allow for expansion. Secure the boards with nails and use a level to ensure they are even and level. Continue this process until the entire ceiling is covered.
Finishing Touches
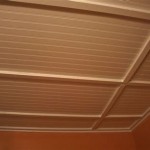
Once the boards are installed, you can add the finishing touches. This includes adding sealant or stain to protect the wood and enhance the look. You may also want to add some decorative trim around the edges to give the ceiling a finished look. This is an optional step, but it can be a great way to add character to the room.
Conclusion
Installing a pine tongue and groove ceiling can be a great way to add character and charm to any room. With the right materials and some patience, you can easily install a beautiful and unique ceiling in your home. Follow this guide to learn more about the steps involved in installing a pine tongue and groove ceiling.


Related Posts