Mounting a Ceiling Fan to a Sloped Ceiling
Mounting a ceiling fan to a sloped ceiling presents unique challenges compared to installing one on a standard, flat ceiling. The primary difference lies in the need to ensure the fan hangs plumb (perfectly vertical) to prevent wobbling, noise, and potential safety hazards. While the core principles of electrical wiring remain the same, the hardware and installation techniques must be adapted to compensate for the angled surface.
This article provides a comprehensive guide to successfully mounting a ceiling fan to a sloped ceiling, covering essential considerations, necessary tools and materials, step-by-step instructions, and safety precautions. Careful planning and execution are vital for a safe and functional installation.
Key Considerations Before Installation
Before beginning the installation process, several critical factors must be assessed to ensure a successful and safe outcome. Ignoring these preliminary steps can lead to problems during and after installation.
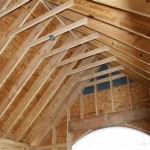
1. Ceiling Slope Assessment: The degree of the ceiling's slope is paramount. Standard ceiling fan mounting kits are generally designed for slopes up to a certain angle, typically around 19 degrees. If the slope exceeds this limit, a specialized angled mounting bracket is required. Measuring the slope can be done using a protractor and level. Place the level horizontally against the ceiling and measure the angle between the ceiling and the level. Accurate measurement ensures that the correct mounting hardware is selected.
2. Structural Support: The ceiling joist or structural member to which the fan will be attached must be strong enough to support the weight of the fan and any dynamic forces generated during operation. A standard electrical junction box attached only to the drywall is insufficient. Ideally, the fan should be mounted to a solid wood joist that is part of the building's framing. If this is not possible, a fan-rated electrical box specifically designed for ceiling fans, braced between two joists, should be installed. These boxes are built to handle the increased weight and vibrations of a ceiling fan. Attempting to install a fan without adequate structural support creates a significant safety risk.
3. Electrical Wiring: Verify the presence of properly wired electrical circuitry at the intended installation location. This generally involves a 120-volt circuit with a ground wire. Use a circuit tester to confirm that the power is off before handling any wires. Ensure that the existing wiring is of sufficient gauge (typically 14-gauge or 12-gauge) to handle the electrical load of the fan and any associated light fixtures. Any frayed, damaged, or undersized wiring should be replaced by a qualified electrician. Compliance with local electrical codes is essential.
4. Blade Clearance: Evaluate the surrounding area to ensure adequate clearance for the fan blades. A minimum clearance of 18 inches from any wall or obstruction is recommended. Insufficient clearance can impede airflow, create noise, and potentially damage the fan or surrounding objects. Consider the size and sweep of the fan blades during this assessment. Larger fans require more clearance.
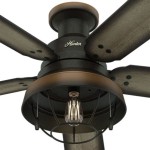
5. Downrod Length: The length of the downrod, the pole connecting the fan motor to the mounting bracket, is crucial for optimal performance and appearance. On sloped ceilings, a longer downrod is often necessary to lower the fan and ensure the blades are a safe distance from the ceiling. Generally, a downrod long enough to position the blades at least 7 feet from the floor is recommended. Consider the ceiling height, slope, and furniture placement when selecting the appropriate downrod length.
Tools and Materials Required
Having the necessary tools and materials readily available will streamline the installation process and minimize potential delays. Proper tools also contribute to a safer and more professional installation.
Tools:
- Screwdrivers (Phillips and flathead)
- Wire strippers/crimpers
- Pliers
- Adjustable wrench
- Voltage tester
- Level
- Measuring tape
- Drill with appropriate drill bits
- Ladder
- Stud finder
- Protractor or angle finder (for measuring ceiling slope)
Materials:
- Ceiling fan mounting kit, suitable for sloped ceilings
- Ceiling fan
- Wire connectors (wire nuts)
- Electrical tape
- Downrod (if not included with the fan)
- Fan-rated electrical box (if needed)
- Wood screws or lag bolts (for securing the mounting bracket to the joist)
- Optional: Decorative ceiling medallion
Ensure all tools are in good working order and that the materials are compatible with the electrical and structural requirements of the installation. Do not attempt to use substandard or damaged tools or materials, as this can compromise safety and the quality of the installation.
Step-by-Step Installation Process
The following steps outline the general procedure for mounting a ceiling fan to a sloped ceiling. Always refer to the manufacturer’s instructions for your specific fan model, as variations may exist.
1. Safety First: Turn off the Power: Before commencing any electrical work, locate the circuit breaker that controls the power to the installation location and switch it to the "off" position. Verify that the power is indeed off using a voltage tester. This is a critical safety precaution that should never be skipped.
2. Remove the Existing Fixture (If Applicable): Carefully remove any existing light fixture or ceiling fan from the mounting location. Disconnect the wires, taking note of their positions (typically black to black, white to white, and green or bare copper to green or the electrical box). Use wire connectors to cap off the wires for safety after disconnecting them.
3. Install the Mounting Bracket: Locate the ceiling joist using a stud finder. Position the mounting bracket so that it is centered on the joist. If using a specialized angled mounting bracket, ensure it is oriented correctly to compensate for the slope of the ceiling. Secure the bracket to the joist using appropriate wood screws or lag bolts. The bracket must be firmly attached to provide adequate support for the fan. If a fan-rated electrical box is necessary, install it according to the manufacturer's instructions, ensuring it is securely braced between the joists.
4. Assemble the Fan Motor and Downrod: Assemble the fan motor according to the manufacturer's instructions. This typically involves attaching the fan blades and the downrod. Ensure all screws and bolts are tightened securely. The downrod should be the appropriate length for the ceiling height and slope, as determined earlier. Pass the fan wires through the downrod during assembly.
5. Hang the Fan Motor: Carefully lift the fan motor and hang it on the mounting bracket. Most mounting brackets feature a hook or loop that allows the fan to hang temporarily, freeing up your hands for wiring. Ensure the fan is securely supported by the bracket before proceeding.
6. Connect the Wiring: Connect the fan wires to the house wiring using wire connectors (wire nuts). Typically, you will connect the black (hot) wire from the fan to the black wire from the house, the white (neutral) wire from the fan to the white wire from the house, and the green or bare copper (ground) wire from the fan to the green or bare copper wire from the house. Ensure all connections are secure and properly insulated with electrical tape. If the fan has a light kit, connect the light kit wires according to the manufacturer's instructions.
7. Tuck the Wires into the Electrical Box: Carefully tuck the connected wires into the electrical box, ensuring they are not pinched or strained. Proper wire management is essential for safety and reliability.
8. Attach the Canopy: Attach the canopy, the decorative cover that conceals the wiring and mounting bracket, to the mounting bracket. The canopy typically attaches with screws or clips. Ensure the canopy is securely fastened and flush with the ceiling.
9. Install the Fan Blades: Attach the fan blades to the fan motor according to the manufacturer's instructions. Ensure all screws are tightened securely. Verify that the blades are properly balanced to prevent wobbling.
10. Install the Light Kit (If Applicable): If the fan includes a light kit, install it according to the manufacturer's instructions. This typically involves connecting the light kit wires to the fan wires and attaching the light fixture to the fan motor.
11. Test the Fan: Restore power to the circuit breaker and test the fan. Turn on the fan and check for proper operation at different speeds. Also, test the light kit (if applicable). If the fan wobbles, you may need to balance the blades using the balancing kit included with the fan.
12. Final Inspection: Perform a final inspection to ensure all connections are secure, all screws are tightened, and the fan is operating smoothly and quietly. Clean up any debris and dispose of packaging materials properly.
Safety Precautions
Safety should be the paramount concern during any electrical installation. Adhering to the following safety precautions can significantly reduce the risk of accidents and injuries.
1. Always Turn Off the Power: As previously emphasized, turning off the power at the circuit breaker is the most critical safety precaution. Always verify that the power is off using a voltage tester before touching any wires.
2. Use Appropriate Tools and Materials: Use only tools and materials that are designed for electrical work. Do not use damaged or substandard tools or materials.
3. Follow Manufacturer's Instructions: Always refer to the manufacturer's instructions for your specific fan model. The instructions provide detailed information about the installation process and safety precautions.
4. Wear Safety Glasses: Wear safety glasses to protect your eyes from debris and falling objects.
5. Use a Sturdy Ladder: Use a sturdy ladder that is properly positioned and stable. Do not overreach or lean excessively while working on the ladder.
6. Get Help if Needed: If you are not comfortable with any aspect of the installation process, seek assistance from a qualified electrician. Electrical work can be dangerous, and it is always better to be safe than sorry.
7. Consult Local Codes: Ensure that the installation complies with all applicable local electrical codes. These codes are designed to ensure the safety and reliability of electrical installations.
By carefully following these guidelines and prioritizing safety, you can successfully mount a ceiling fan to a sloped ceiling and enjoy its benefits for years to come.

How To Install A Ceiling Fan On Sloped Lemon Thistle

Mounting Ceiling Fan On Sloped Home Improvement Stack Exchange

How To Choose A Ceiling Fan For Vaulted Ceilings Lightology

How To Install A Ceiling Fan On Sloped Lemon Thistle

Electrical Mount Ceiling Fan At The Peak Of A Sloped Home Improvement Stack Exchange

Install Ceiling Fan On Sloped Simple Modern Handmade Home

Ensuring Proper Ceiling Fan Installation With Vaulted Ceilings

Vaulted Sloped Ceiling Adapter For Modern Fan Co Fans Stardust

How To Install A Ceiling Fan On Sloped Lemon Thistle

How To Choose A Ceiling Fan For Vaulted Ceilings Lightology
Related Posts