Mounting a Ceiling Fan on a Cathedral Ceiling: A Comprehensive Guide
Installing a ceiling fan on a cathedral ceiling, also known as a vaulted ceiling, presents unique challenges compared to a standard flat ceiling. The angled surface requires specialized hardware and careful planning to ensure the fan hangs correctly and operates safely. This article provides a detailed guide to mounting a ceiling fan on a cathedral ceiling, covering necessary preparations, hardware options, and installation steps.
A key consideration is safety. Ceiling fans are heavy and generate significant centrifugal force during operation. Improper installation can lead to the fan detaching from the ceiling, causing damage and potential injury. Therefore, adherence to building codes, manufacturer instructions, and employing proper techniques are paramount. If there is any doubt about one's ability to perform the installation safely and correctly, consulting or hiring a qualified electrician or contractor is strongly recommended.
Before commencing the installation process, it is essential to gather all the necessary tools and materials. This includes items such as a ladder or scaffolding suitable for reaching the ceiling, a stud finder, a drill with various bits, screwdrivers (both Phillips head and flathead), wire strippers, wire connectors, electrical tape, a voltage tester, a level, a measuring tape, safety glasses, and work gloves. Having these items readily available will streamline the installation and minimize interruptions.
Determining the Appropriate Downrod Length
One of the most critical aspects of mounting a ceiling fan on a cathedral ceiling is selecting the correct downrod length. The downrod is the metal pipe that extends from the fan motor to the mounting bracket. The ideal downrod length depends on the ceiling's pitch and the desired distance between the fan blades and the floor. As a general rule, the fan blades should be at least 7 feet above the floor for optimal airflow and safety. The higher the ceiling, the longer the downrod required.
To calculate the appropriate downrod length, one must first determine the ceiling's pitch, which is the angle of the slope relative to the horizontal. This can be measured using a protractor or level and a measuring tape. Alternatively, a simple online calculator can be used if the rise and run of the ceiling slope are known. The manufacturer's documentation for the fan often provides guidelines for downrod length based on ceiling pitch.
Once the ceiling pitch is known, the required downrod length can be estimated using the following formula: Downrod Length = (Ceiling Height - Desired Blade Height) / Cosine(Ceiling Angle) - Fan Motor Height. For example, if the ceiling height is 12 feet, the desired blade height is 7 feet, the motor height is 1 foot, and the ceiling angle is 30 degrees, the calculation would be: Downrod Length = (12 - 7) / Cosine(30) - 1 = 5 / 0.866 - 1 = 5.77 - 1 = 4.77 feet. Therefore, a 4.77-foot downrod would be appropriate. Given that downrods are typically available in standard lengths, the next longest available size (likely a 5-foot or 6-foot downrod) should be selected.
It is also crucial to consider the aesthetic impact of the downrod length. A downrod that is too short can make the fan appear cramped and less effective, while one that is too long can make the fan look disproportionate to the room. In cases where there is a significant ceiling pitch, using a longer downrod might be unavoidable to achieve the required blade height and optimal performance.
Ensuring Adequate Structural Support
Another critical aspect of mounting a ceiling fan is ensuring that the ceiling structure can adequately support the fan's weight and the dynamic forces it generates during operation. A standard ceiling electrical box, designed only for light fixtures, is typically insufficient. A specialized ceiling fan-rated electrical box, which is designed to be securely attached to a ceiling joist or support structure, is essential.
The ideal scenario is to locate a ceiling joist directly above the desired fan location. A stud finder can be used to identify the location of ceiling joists. If a joist is present, a fan-rated electrical box can be securely attached to it using appropriate screws or lag bolts. It is crucial to ensure that the screws or bolts penetrate deeply into the joist to provide a solid and secure connection.
If a joist is not located directly above the desired fan location, alternative methods must be employed. One option is to install a brace between two adjacent joists to provide a mounting point for the electrical box. A common approach is to use a hanger bar or brace designed specifically for ceiling fan installations. These hanger bars typically consist of a metal bar that extends between two joists and provides a secure platform for mounting the electrical box. The hanger bar should be securely fastened to the joists using appropriate screws or lag bolts.
An alternative approach, particularly in situations where access to the ceiling joists is limited or difficult, is to use a specialized ceiling fan mounting bracket designed for cathedral ceilings. These brackets are often adjustable and can be secured to the ceiling using multiple screws or bolts, distributing the fan's weight over a larger area. It is essential to choose a mounting bracket that is specifically designed for use with cathedral ceilings and that is rated to support the weight of the fan being installed.
In all cases, it is crucial to consult local building codes to ensure that the chosen mounting method complies with all applicable regulations. Building codes often specify the minimum acceptable load-bearing capacity of ceiling support structures for ceiling fans.
Wiring the Ceiling Fan Safely and Correctly
Proper electrical wiring is paramount for the safe and reliable operation of a ceiling fan. Before commencing any wiring work, it is essential to turn off the power to the circuit at the circuit breaker. A voltage tester should be used to verify that the power is indeed off before touching any wires.
The ceiling fan's wiring should be connected to the household electrical wiring following the manufacturer's instructions and local electrical codes. Typically, the fan will have three or four wires: a black wire (hot), a white wire (neutral), a green or bare copper wire (ground), and sometimes a blue wire (for controlling the fan's light kit independently). These wires should be connected to the corresponding wires in the electrical box using wire connectors (wire nuts). The connections should be tight and secure. Electrical tape can be used to further secure the wire connectors and provide additional insulation.
The ground wire is particularly important, as it provides a path for electricity to flow in the event of a fault, preventing electrical shock. The ground wire should be securely connected to the grounding terminal in the electrical box and to the grounding terminal on the ceiling fan. If the electrical box is metal and is properly grounded, the fan's ground wire can be connected directly to the box.
If the ceiling fan has a light kit, the blue wire (if present) should be connected to the wire that controls the light switch. This will allow the light to be turned on and off independently of the fan. If the fan does not have a light kit, the blue wire should be capped off with a wire connector and tucked away inside the electrical box.
After all the wiring connections have been made, the wires should be carefully tucked into the electrical box, ensuring that they are not pinched or damaged. The ceiling fan's canopy, which covers the electrical box and wiring, should then be installed according to the manufacturer's instructions. The canopy should be securely fastened to the mounting bracket to prevent it from rattling or falling down.
Once the installation is complete, the power can be turned back on at the circuit breaker. The ceiling fan should be tested to ensure that it is operating correctly. The fan should rotate smoothly and quietly, and the light kit (if present) should turn on and off properly. If any issues are detected, the power should be turned off immediately, and the installation should be carefully inspected to identify and correct the problem.
Installing a ceiling fan on a cathedral ceiling requires careful planning, proper hardware, and adherence to safety guidelines. Selecting the correct downrod length, ensuring adequate structural support, and wiring the fan correctly are crucial steps in the installation process. While this guide provides a comprehensive overview, consulting a qualified electrician or contractor is recommended if there are any doubts or concerns about the installation.

Ensuring Proper Ceiling Fan Installation With Vaulted Ceilings

Cathedral Ceiling Fan Installation Instructions

How To Install A Ceiling Fan On Sloped Lemon Thistle

Fan Fixture Mounting Box For New Construction Fits Cathedral Ceiling

How To Choose A Ceiling Fan For Vaulted Ceilings Lightology

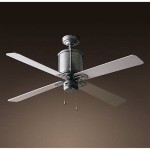
Modern Ceiling Fan On Cathedral Vaulted

Diy Cathedral Mount Ceiling Fan Box The Shabinlife

Arlington Fan Fixture Mounting Boxes

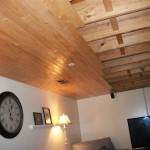
Vaulted Ceiling Adapter Fan Ideas Makeover

Arlington Fan Fixture Mounting Boxes
Related Posts