Mounting A Fan On A Sloped Ceiling: A Comprehensive Guide
Installing a ceiling fan can significantly improve airflow and comfort within a room. However, mounting a ceiling fan on a sloped ceiling presents unique challenges compared to a traditional horizontal ceiling. This article provides a detailed guide to safely and effectively mounting a ceiling fan on a sloped or angled ceiling, ensuring optimal performance and longevity of the installation.
Understanding the Challenges of Sloped Ceiling Fan Installation
The primary challenge with sloped ceilings is maintaining the fan's balance and preventing wobbling. A fan designed for horizontal mounting will be unevenly weighted on a slope, leading to instability and potential damage to the fan motor, ceiling, or surrounding structures. Additionally, the fan blades' proximity to the ceiling can reduce airflow efficiency. Therefore, special considerations and hardware are necessary to address these issues.
Another common hurdle is ensuring the electrical box is adequately supported. Standard electrical boxes may not be designed to handle the additional stress imposed by a fan suspended at an angle. The weight of the fan, combined with the centrifugal force generated during operation, can cause the box to loosen or even detach from the ceiling, creating a serious safety hazard. Employing a fan-rated electrical box designed for angled installations is crucial.
Finally, aesthetics play a role. A fan mounted directly to a sloped ceiling without proper adjustments can appear awkward and visually unappealing. Selecting a downrod length that complements the ceiling's slope and the room's dimensions is essential for achieving a balanced and aesthetically pleasing result.
Essential Tools and Materials for the Installation
Before commencing the installation, gather all the necessary tools and materials. This proactive step will streamline the process and minimize potential delays. The following list encompasses the essential items required for a successful sloped ceiling fan installation:
1.
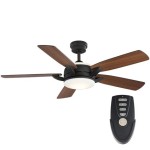
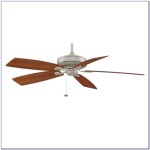
Ceiling Fan with Sloped Ceiling Adapter or Compatible Downrod:
Choose a ceiling fan model specifically designed for sloped ceilings. Many manufacturers offer fans with included adapters or provide compatible downrods for angled installations. Confirm the maximum slope angle the fan can accommodate before purchase.2.
Fan-Rated Electrical Box:
This box is designed to support the weight and motion of a ceiling fan. Ensure it is securely attached to a structural member, such as a ceiling joist.3.
Downrod (Appropriate Length):
The length of the downrod depends on the ceiling's slope and the desired distance between the fan blades and the floor. A longer downrod is typically required for steeper slopes to allow adequate airflow and head clearance.4.
Wire Connectors (Wire Nuts):
Used to safely connect the electrical wires. Choose connectors rated for the wire gauge being used.5.
Electrical Tape:
Used to insulate and protect the wire connections.6.
Screwdrivers (Phillips and Flathead):
Essential for removing and installing screws.7.
Pliers:
For manipulating wires and tightening connections.8.
Wire Strippers/Cutters:
To strip the insulation from the wires and cut them to the appropriate length.9.
Voltage Tester (Non-Contact):
To ensure the power is off before working with electrical wires.10.
Ladder:
A sturdy ladder is essential for reaching the ceiling.11.
Measuring Tape:
To measure the ceiling slope and downrod length.12.
Level:
To ensure the fan is mounted level.13.
Stud Finder:
To locate the ceiling joists for secure mounting of the electrical box.14.
Drill (Optional):
May be required for installing the electrical box or mounting bracket.15.
Safety Glasses:
To protect the eyes from debris.Step-by-Step Installation Process
The installation process involves careful planning and execution to ensure the fan is mounted securely and functions correctly. The following steps provide a comprehensive guide to installing a ceiling fan on a sloped ceiling:
Step 1: Safety First - Disconnect the Power
Before commencing any electrical work, it is absolutely crucial to disconnect the power to the circuit at the breaker box. This is the most important safety precaution to prevent electrical shock. Use a non-contact voltage tester to verify that the power is indeed off before proceeding.
Step 2: Remove the Existing Fixture (If Applicable)
If an existing light fixture is present, carefully remove it. Disconnect the wires, noting their color coding (black for hot, white for neutral, and green or bare copper for ground). Cap off the wires with wire connectors and secure them with electrical tape to prevent accidental contact.
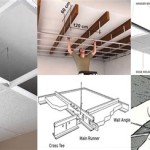
Step 3: Install the Fan-Rated Electrical Box
If a suitable fan-rated electrical box is not already in place, install one. Locate a ceiling joist using a stud finder. The electrical box must be securely attached to the joist to support the fan's weight and movement. If no joist is readily accessible, a brace may need to be installed between two joists to provide adequate support. Ensure the box is rated for the weight of the fan being installed.
Step 4: Assemble the Mounting Bracket and Downrod
Assemble the mounting bracket according to the manufacturer's instructions. The bracket typically includes components specifically designed for sloped ceilings, such as a swivel ball or a pivoting mount. Attach the appropriate downrod to the fan motor. The downrod length should be selected based on the ceiling's slope and the desired distance between the fan blades and the floor. Refer to the fan manufacturer's recommendations for determining the correct downrod length.
Step 5: Wire the Fan
Carefully lift the fan motor assembly and attach the downrod to the mounting bracket, ensuring the swivel ball or pivoting mount is properly engaged. Connect the electrical wires from the fan to the wires in the electrical box, matching the color codes (black to black, white to white, and green or bare copper to green or bare copper). Use wire connectors to securely join the wires, and then wrap the connections with electrical tape for added insulation and protection.
Step 6: Mount the Fan and Secure the Canopy
Carefully maneuver the fan into its final position, ensuring the mounting bracket is properly seated within the electrical box. Secure the canopy to the mounting bracket, concealing the wiring and creating a clean, finished appearance. Follow the manufacturer's instructions for securing the canopy, as the specific method may vary depending on the fan model.
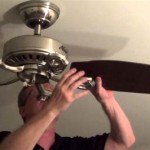
Step 7: Install the Fan Blades and Light Kit (If Applicable)
Attach the fan blades to the motor assembly, ensuring they are securely fastened. Follow the manufacturer's instructions for installing the blades, paying close attention to the correct orientation and alignment. If the fan includes a light kit, install it according to the manufacturer's instructions, connecting the necessary wiring and securing the light fixture to the fan motor.
Step 8: Test the Fan
Restore power to the circuit at the breaker box. Test the fan by turning it on and verifying that it operates smoothly and quietly. Check all speed settings and ensure the light kit functions correctly (if applicable). If the fan wobbles excessively, adjustments may be necessary to balance the blades. Many fans include a balancing kit with small weights that can be attached to the blades to correct imbalances.
Addressing Common Issues and Potential Problems
While the installation process is generally straightforward, certain issues may arise during the process. Understanding these potential problems and their solutions can help ensure a successful installation.
Excessive Wobbling:
As mentioned earlier, excessive wobbling is a common problem with ceiling fans, particularly those mounted on sloped ceilings. This can be caused by imbalances in the fan blades. Use the balancing kit included with the fan to correct any imbalances. Start by attaching the weights to the blade farthest from the direction of the wobble. Experiment with different positions until the wobble is minimized.Electrical Issues:
If the fan does not turn on or the light kit does not function, double-check all wiring connections. Ensure the wires are securely connected and that the wire connectors are properly seated. Verify that the power is indeed on at the breaker box and that the circuit is not overloaded. Consult a qualified electrician if electrical problems persist.Downrod Length:
Selecting the appropriate downrod length is crucial for optimal airflow and aesthetics. If the downrod is too short, the fan blades may be too close to the ceiling, reducing airflow and creating excessive noise. If the downrod is too long, the fan may appear disproportionate and could pose a safety hazard. Refer to the fan manufacturer's recommendations for determining the correct downrod length based on the ceiling's slope and the room's dimensions.Noise Issues:
Ceiling fans can sometimes generate noise during operation. This can be caused by loose screws, imbalanced blades, or interference with the ceiling. Tighten all screws and check the balance of the blades. Ensure the fan blades are not rubbing against the ceiling or any other objects. If the noise persists, consider replacing the fan motor or consulting a qualified technician.Structural Support:
A crucial aspect of sloped ceiling fan installation is ensuring adequate structural support. The electrical box must be securely attached to a ceiling joist or a properly installed brace. If the existing structure is not strong enough to support the fan's weight, reinforcement may be necessary. Consult a qualified contractor to assess the structural integrity of the ceiling and recommend appropriate reinforcement measures.Properly mounting a ceiling fan on a sloped ceiling requires careful planning, the right tools and materials, and meticulous execution. By following the steps outlined in this guide and addressing any potential issues that may arise, a homeowner can successfully install a ceiling fan that provides improved airflow, enhanced comfort, and an aesthetically pleasing addition to their living space.

How To Install A Ceiling Fan On Sloped Lemon Thistle

Install Ceiling Fan On Sloped Simple Modern Handmade Home

How To Install A Ceiling Fan On Sloped Lemon Thistle

Electrical Mount Ceiling Fan At The Peak Of A Sloped Home Improvement Stack Exchange

How To Choose A Ceiling Fan For Vaulted Ceilings Lightology

Mounting Ceiling Fan On Sloped Home Improvement Stack Exchange

How To Install A Ceiling Fan On Vaulted Quora

Ensuring Proper Ceiling Fan Installation With Vaulted Ceilings

Kichler Ceiling Fan Fast Facts Sloped

Vaulted Sloped Ceiling Adapter For Modern Fan Company Fans Stardust
Related Posts