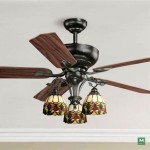
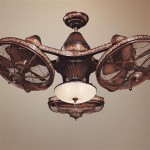
Installing a Fan on a Sloped Ceiling: A Comprehensive Guide
Installing a ceiling fan on a sloped ceiling presents a unique set of challenges compared to a standard, flat ceiling installation. The primary concern is ensuring the fan hangs correctly and operates safely, avoiding any wobbling or potential detachment. This article provides a detailed guide for successfully installing a ceiling fan on a sloped ceiling, covering essential considerations, necessary tools, step-by-step instructions, and safety precautions.
Before commencing the installation, it is crucial to assess the ceiling's slope and structural integrity. A ceiling's slope is typically measured in degrees or as a ratio of rise over run. Most ceiling fan manufacturers specify the maximum slope their fans can accommodate. Exceeding this limit can compromise the fan's stability and performance. Furthermore, verifying the ceiling's structural capacity to support the weight of the fan is paramount. Existing electrical boxes may only be designed for lightweight fixtures, and a reinforced box specifically rated for ceiling fans is generally required.
Determining Ceiling Slope and Required Hardware
The first step involves accurately measuring the angle of the sloped ceiling. A protractor or a level combined with a digital angle finder can be used to determine the angle in degrees. Alternatively, the slope can be calculated using the rise-over-run method. Measure the vertical rise over a known horizontal run (e.g., 12 inches). The ratio of the rise to the run represents the slope. Once the slope is determined, consult the ceiling fan's installation manual to confirm compatibility.
Based on the slope, specialized hardware might be required. A downrod is a metal extension connecting the fan motor to the mounting bracket. For sloped ceilings, a longer downrod is often necessary to ensure adequate clearance between the fan blades and the ceiling. The optimal downrod length depends on the ceiling height and slope. Generally, the blades should be at least 7 feet from the floor.
Additionally, a sloped ceiling adapter, also known as an angled mounting bracket, may be needed. This adapter allows the fan to hang plumb, regardless of the ceiling's angle. The adapter compensates for the slope, ensuring the fan rotates evenly and reduces the risk of wobbling. When selecting a downrod and adapter, ensure compatibility with the specific ceiling fan model and the ceiling's slope. Some fans come with a universal joint or gimbal system that allows for a certain degree of tilt, eliminating the need for a separate adapter for minor slopes.
Preparing for Installation: Safety and Tools
Prior to any electrical work, safety must be prioritized. Disconnect the power supply to the circuit at the breaker box. Verify the power is off using a non-contact voltage tester. It's advisable to have a second person present during the installation, especially when working at heights. Wear appropriate safety gear, including eye protection and work gloves.
Gather all necessary tools before starting. A standard toolkit should include: a screwdriver set (Phillips head and flathead), a wire stripper, wire connectors (wire nuts), electrical tape, a drill (for pilot holes, if needed), a stud finder, a level, a measuring tape, pliers, and a ladder that provides a stable and secure working platform. If the existing electrical box needs replacement, additional tools such as a hammer and a reciprocating saw might be required.
Ensure the replacement electrical box is rated for ceiling fan installation. These boxes are typically labeled as "fan-rated" and are designed to support the weight and dynamic load of a rotating ceiling fan. The box should be securely attached to a structural member of the ceiling, such as a joist. If a joist is not accessible, a fan brace can be installed between joists to provide a secure mounting point.
Step-by-Step Installation Process
The following steps outline the general process for installing a ceiling fan on a sloped ceiling. Always refer to the specific instructions provided by the fan manufacturer, as variations may exist between models.
Step 1: Remove the Existing Fixture. Carefully remove the existing light fixture, remembering the wiring configuration. Disconnect the wires and use wire connectors to cap them off temporarily. Ensure the circuit breaker remains off during this process.
Step 2: Install the Mounting Bracket. If replacing the electrical box, remove the old box and install the fan-rated box according to the manufacturer's instructions. Secure the mounting bracket to the electrical box, ensuring it is properly aligned and firmly attached. If using a sloped ceiling adapter, attach it to the mounting bracket at this stage.
Step 3: Assemble the Fan Motor and Downrod. Attach the downrod to the fan motor, following the manufacturer's instructions. Typically, this involves threading the downrod into the motor housing and securing it with screws or pins. Route the fan's wiring through the downrod.
Step 4: Hang the Fan Motor on the Bracket. Carefully lift the fan motor assembly and hang it on the mounting bracket. Most brackets have a hook or loop that allows the fan to hang securely while you connect the wiring. This step can be challenging and may require assistance.
Step 5: Connect the Wiring. Connect the fan's wiring to the house wiring according to the color-coded connections. Typically, black wires connect to black wires (hot), white wires connect to white wires (neutral), and green or bare copper wires connect to green or bare copper wires (ground). Use wire connectors (wire nuts) to secure the connections and wrap them with electrical tape for added safety. Ensure all connections are tight and secure.
Step 6: Mount the Fan Canopy. Slide the fan canopy up to cover the mounting bracket and wiring. Secure the canopy to the bracket with screws. The canopy should fit snugly against the ceiling.
Step 7: Install the Fan Blades. Attach the fan blades to the motor housing using the provided screws. Ensure the blades are properly aligned and securely fastened. Follow the manufacturer's instructions for blade installation, as variations may exist.
Step 8: Install the Light Kit (if applicable). If the fan includes a light kit, install it according to the manufacturer's instructions. This typically involves connecting the light kit's wiring to the fan's wiring and attaching the light fixture to the motor housing.
Step 9: Test the Fan. Turn the power back on at the breaker box. Test the fan's operation at different speeds and ensure the light kit (if installed) functions correctly. Observe the fan for any wobbling or unusual noises. If wobbling occurs, refer to the troubleshooting section or the manufacturer's instructions for balancing the fan blades.
Addressing Wobbling and Other Issues
Even after careful installation, some ceiling fans may exhibit wobbling. This is often caused by unbalanced blades. Many fans come with a balancing kit that includes small weights. By strategically placing these weights on the blades, the fan can be balanced, reducing or eliminating the wobble. The kit typically includes instructions on how to determine the correct placement of the weights.
Other potential issues include clicking noises, humming sounds, or the fan not operating at all. Clicking noises can be caused by loose screws or connections. Inspect all screws and connections to ensure they are tight. Humming sounds can be caused by electrical interference or a problem with the fan motor. Ensure the wiring is properly shielded and consider contacting a qualified electrician if the problem persists.
If the fan does not operate at all, double-check the wiring connections and the circuit breaker. Verify that the fan's pull chain (if applicable) is in the correct position. If the problem persists, consult a qualified electrician.
Installing a ceiling fan on a sloped ceiling requires careful planning, attention to detail, and adherence to safety precautions. By following these guidelines and consulting the manufacturer's instructions, a homeowner can successfully install a ceiling fan that enhances both the aesthetics and functionality of their living space.

How To Install A Ceiling Fan On Sloped Lemon Thistle

How To Install A Ceiling Fan On Sloped Lemon Thistle

How To Choose A Ceiling Fan For Vaulted Ceilings Lightology

How To Install A Fan On Steep Ceiling Faro Barcelona

Fans On An Angle Installing Ceiling Angled Or Raked

Ensuring Proper Ceiling Fan Installation With Vaulted Ceilings

How To Choose A Ceiling Fan For Vaulted Ceilings Lightology

Ceiling Fans For Angled Ceilings

Hunter Fans How To Install Your Ceiling Fan Cpo S

How To Choose A Ceiling Fan For Vaulted Ceilings Lightology
Related Posts