Essential Aspects of Installing a Ceiling Fan on a Pitched Roof
Installing a ceiling fan on a pitched roof presents unique challenges compared to flat ceilings. The angled surface requires special considerations to ensure safe and effective installation. Here's a comprehensive guide to help you through the essential aspects of this task:
1. Determine the Slope of the Roof
The first step is to determine the slope of your roof. This will help you choose the correct mounting kit and ensure the fan is installed at the appropriate angle. Use a protractor or a roofing slope calculator to measure the angle.
2. Choose the Right Mounting Kit
Pitched roof ceiling fans require a specialized mounting kit that accommodates the angled surface. These kits include an extension rod and a mounting plate designed to compensate for the slope. Select a kit that is compatible with the fan model and the roof's slope.
3. Locate the Joists
Before installing the fan, it's crucial to locate the roof joists. These structural members provide support for the fan and ensure its stability. Use a stud finder to identify the joists, keeping in mind that they may not run parallel to the roofline.
4. Install the Mounting Bracket
The mounting bracket should be attached to the joists according to the manufacturer's instructions. Use screws that are long enough to penetrate both the bracket and the joists. Ensure the bracket is securely fastened and aligned properly.
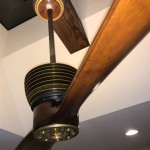
5. Assemble the Fan
Assemble the fan according to the manufacturer's manual. This typically involves connecting the motor housing to the mounting bracket and attaching the blades. Follow the instructions carefully to ensure proper assembly and functionality.
6. Hang the Fan
Carefully hang the assembled fan on the mounting bracket. Use a stable ladder or a partner to assist you with this step. Connect the fan's electrical wires to the appropriate wires in the ceiling box.
7. Adjust the Angle of the Blades
Once the fan is installed, adjust the angle of the blades to optimize airflow. Pitched roof fans typically have adjustable blades that can be set at an angle between 15 and 30 degrees. Experiment with different angles to find the optimal setting.
8. Ensure Proper Balance
After installing the fan, it's essential to check its balance. Turn on the fan and observe if it wobbles or vibrates excessively. If it does, use the included balancing kit to adjust the weight distribution of the blades until the fan operates smoothly.
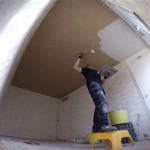
Safety Precautions
* Always turn off the power at the breaker box before starting any electrical work. * Use a ladder that is of appropriate height and stability. * Wear appropriate safety gear, including gloves and safety glasses. * If you are not comfortable installing the fan yourself, hire a qualified electrician.
How To Install A Ceiling Fan On Sloped Lemon Thistle

How To Choose A Ceiling Fan For Vaulted Ceilings Lightology

Electrical Mount Ceiling Fan At The Peak Of A Sloped Home Improvement Stack Exchange

Vaulted Sloped Ceiling Adapter For Modern Fan Company Fans

How To Choose A Ceiling Fan For Vaulted Ceilings Lightology

Vaulted Ceiling Fans Sloped Lightology

Vaulted Sloped Ceiling Adapter For Modern Fan Company Fans

Ceiling Fans For Angled Ceilings

Vaulted Sloped Ceiling Adapter For Modern Fan Company Fans

Mounting Ceiling Fan On Sloped Home Improvement Stack Exchange
Related Posts