Installing Ceiling Fans on Sloped Walls in Georgia Houses
Houses in Georgia, like those in many other regions, often feature architectural elements such as sloped ceilings or vaulted ceilings. While aesthetically pleasing, these features can present unique challenges when installing ceiling fans. Proper installation is crucial, not only for the fan's performance and longevity but also for the safety of the occupants. This article will outline the key considerations and steps involved in installing ceiling fans on sloped walls in Georgia homes, adhering to standard practices and addressing potential code requirements.
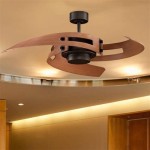
The primary difference between installing a ceiling fan on a flat ceiling versus a sloped ceiling lies in the mounting hardware. A standard ceiling fan installation kit is designed for a level surface. On a sloped ceiling, a specialized mounting bracket or adapter is required to ensure the fan hangs properly and operates safely. These brackets compensate for the angle of the ceiling, allowing the fan motor to hang plumb and prevent it from wobbling or putting undue stress on the mounting point. Additionally, the downrod length becomes a critical factor, impacting both aesthetics and functionality.
Georgia's building codes typically follow the International Residential Code (IRC) and any local amendments. While specific requirements for ceiling fan installation may vary by jurisdiction, the underlying principles remain consistent: the fan must be securely mounted to a structural member capable of supporting its weight and operating load, and electrical connections must be made safely and in accordance with the National Electrical Code (NEC). Homeowners in Georgia should consult with their local building department or a qualified electrician to confirm specific regulations before beginning any installation project.
Selecting the Right Mounting Hardware
The selection of appropriate mounting hardware is paramount for a successful and safe installation. Several options are available, each designed for different slope angles and structural conditions.
Sloped Ceiling Adapter/Mounting Bracket: These brackets are designed to pivot and adjust to the angle of the ceiling. They typically consist of two main components: a bracket that attaches to the ceiling joist and a pivoting ball-and-socket joint that connects to the fan's downrod. The angle of adjustment varies between models, so it's essential to choose a bracket that accommodates the specific slope of the ceiling. Measuring the ceiling slope accurately is a critical first step in the selection process. This measurement can be done using a level and a protractor, or specialized slope measuring tools are available.
Extended Downrod: Even with a sloped ceiling adapter, an extended downrod is often necessary to ensure proper blade clearance. The blades should be at least 7 feet from the floor to prevent accidental contact and to maximize airflow. The length of the downrod required depends on the ceiling height and the angle of the slope. A steeper slope will necessitate a longer downrod to maintain the minimum blade height. It’s important to note that some ceiling fan models come with a specific maximum downrod length. Exceeding this length can compromise the fan's stability and potentially void any warranty.
Reinforcement: The ceiling joist to which the fan is mounted must be capable of supporting the fan's weight, plus a reasonable safety factor. Standard ceiling joists may not always be sufficient, especially in older homes. In such cases, reinforcement may be necessary. This can involve adding additional bracing between joists or installing a dedicated support structure specifically designed for ceiling fan installation. The chosen reinforcement method should be compatible with the house's existing structure and comply with local building codes.
Step-by-Step Installation Process
The following outlines a general step-by-step process for installing a ceiling fan on a sloped ceiling. It is strongly recommended to consult the fan manufacturer's instructions and to hire a qualified electrician if you are not comfortable working with electricity.
1. Safety First: Turn off the power to the circuit at the breaker box before beginning any work. Verify that the power is off using a non-contact voltage tester.
2. Remove Existing Fixture: Carefully remove any existing light fixture or ceiling fan. Disconnect the wiring, taking note of the wire colors and connections. It’s helpful to take photographs of the wiring before disconnecting it for reference during re-installation.
3. Install Mounting Bracket: Attach the sloped ceiling adapter/mounting bracket to the ceiling joist. Ensure that the bracket is securely fastened using appropriate screws or lag bolts. The screws must penetrate deep enough into the joist to provide adequate support. Using a stud finder to locate the center of the joist is essential for proper alignment and secure attachment.
4. Assemble the Fan: Assemble the ceiling fan motor, blades, and light kit according to the manufacturer's instructions. This typically involves attaching the blades to the blade holders and connecting the light kit to the motor housing.
5. Connect Wiring: Connect the fan's wiring to the house wiring according to the NEC and local codes. Typically, this involves connecting the black wire (hot) from the fan to the black wire from the house, the white wire (neutral) from the fan to the white wire from the house, and the green or bare copper wire (ground) from the fan to the grounding wire from the house. Use wire connectors (wire nuts) to ensure secure and insulated connections. Each wire nut should be properly tightened to prevent loose connections, which can cause electrical hazards.
6. Mount the Fan: Carefully lift the fan motor and attach it to the mounting bracket. This usually involves hanging the fan motor on the ball-and-socket joint of the sloped ceiling adapter. Ensure that the fan is securely seated in the bracket and that the downrod is properly aligned.
7. Install Canopy: Slide the canopy up to cover the mounting bracket and wiring. Secure the canopy to the mounting bracket according to the manufacturer's instructions. The canopy should fit snugly against the ceiling and hide all wiring connections.
8. Test the Fan: Restore power to the circuit breaker. Test the fan to ensure that it operates properly and that the blades are balanced. If the fan wobbles, adjust the blade weights or re-tighten the blade screws. Wobbling can be caused by several factors, including unbalanced blades or a loose mounting bracket. Identifying and addressing the cause of the wobble is critical for the fan's performance and longevity.
Addressing Specific Challenges in Georgia Homes
Houses in Georgia present several challenges when installing ceiling fans, particularly in older homes or those with unique architectural features.
Attic Access: Access to the attic space above the sloped ceiling can be crucial for inspecting the joists and adding reinforcement if necessary. Limited attic access can complicate the installation process and may require creating an access point or working from below.
Wiring: Older homes may have outdated wiring that is not compatible with modern ceiling fans. It is essential to inspect the wiring and upgrade it if necessary to ensure safety and compliance with current electrical codes. Aluminum wiring, commonly found in homes built in the 1960s and 1970s, requires special considerations when connecting to copper wiring due to the risk of corrosion and fire. A qualified electrician can assess the wiring and recommend appropriate solutions.
Insulation: Proper insulation is essential for energy efficiency. When installing a ceiling fan, it is important to ensure that the insulation around the electrical box is not disturbed and that any gaps are properly sealed. Gaps in insulation can lead to drafts and increased energy costs. Consider using foam sealant or fiberglass insulation to fill any gaps around the electrical box.
Humidity: Georgia's humid climate can affect ceiling fan performance and longevity. Choose fans with moisture-resistant components, especially for installation in bathrooms or kitchens. Fans designed for wet locations are specifically engineered to withstand high humidity levels and prevent corrosion.
Installing ceiling fans on sloped walls in Georgia houses requires careful planning, appropriate hardware selection, and adherence to safety guidelines and local building codes. Consulting with a qualified electrician or contractor is highly recommended, especially for complex installations or when dealing with electrical wiring.

Installing A Ceiling Fan In Home Or Office Pro Tool Reviews

Ceiling Fans Faqs Arc Angel Electric

How To Install Outdoor Fans Young House Love

Ceiling Fan Installation Service Near Atlanta Ga

The 10 Best Ceiling Fan Installers In Atlanta Ga With Free Estimates

Georgia Patio Ceiling Fan By Quorum International At Lumens Com

Why You Need Ceiling Fan Installation In Metro Boston

How To Decorate An Angled Wall With Custom Media Room Built Ins

Quorum International Georgia 52 In Indoor Outdoor Old World Ceiling Fan With Wall Control 174525 995 The Home Depot

Before And After Sunroom With Vaulted Ceiling Newlywoodwards
Related Posts