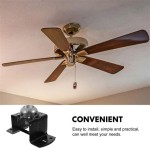
How To Wire a Ceiling Fan With a Separate Light Switch
Installing a ceiling fan with independent control of the fan motor and the light fixture offers enhanced functionality and energy efficiency. This setup allows users to operate the fan and the light separately, catering to specific needs and preferences. This article provides a comprehensive guide to wiring a ceiling fan with a separate light switch, empowering homeowners to undertake this project with confidence.
Safety Precautions
Working with electrical wiring necessitates strict adherence to safety protocols. Before commencing any electrical work, always disconnect the power supply to the circuit at the breaker box. Verify the power disconnection using a non-contact voltage tester. If uncertain about any aspect of the wiring process, consulting a qualified electrician is strongly recommended. Using appropriate personal protective equipment, such as safety glasses and insulated gloves, is crucial.
Understanding the Wiring
Ceiling fans designed for dual switching typically have separate wires for the fan motor and the light kit. These wires are often color-coded for easy identification. The fan motor wires are commonly black and blue, while the light kit wires are typically black and white. The house wiring supplying power to the fan location will include a black (hot), white (neutral), and green or bare copper (ground) wire. Understanding these wire designations is fundamental to correct wiring.
Preparing the Ceiling Fan and Junction Box
Begin by carefully unpacking the ceiling fan and reviewing the manufacturer's instructions. Identify the wires emanating from the fan motor and the light kit. Ensure the mounting bracket is securely attached to the ceiling junction box, capable of supporting the fan's weight. The junction box should be rated for ceiling fan installation and properly grounded.
Connecting the Fan Motor Wires
Inside the junction box, connect the black wire from the fan motor to the black (hot) wire from the house wiring using a wire connector. Securely fasten the connector and ensure a tight connection. Next, connect the blue wire from the fan motor to the black wire leading to the fan switch. This dedicated switch leg will control the fan's operation independently. This wire may be marked with a different color in your home’s wiring.
Connecting the Light Kit Wires
Connect the black wire from the light kit to the black wire leading to the light switch. Similar to the fan switch, this provides a dedicated circuit for the light. The white wire from the light kit should be connected to the white (neutral) wires from both the house wiring and the fan. Combine all three white wires with a suitably sized wire connector, ensuring a secure connection.
Grounding the Ceiling Fan
Proper grounding is essential for safety. Connect the green or bare copper ground wire from the ceiling fan to the green or bare copper ground wire in the junction box. If the junction box does not have a ground wire, consult a qualified electrician to ensure proper grounding procedures are followed. Use a wire connector to secure the ground wires together.
Completing the Installation
Carefully tuck the connected wires into the junction box and mount the ceiling fan to the mounting bracket according to the manufacturer's instructions. Attach the fan blades and light kit components as directed. Restore power to the circuit at the breaker box and test the operation of the fan and the light independently using their respective switches. Verify that both the fan and the light function correctly at all speed settings. If any issues arise, immediately disconnect the power and troubleshoot the connections, or contact a qualified electrician.
Troubleshooting Tips
If the fan or light does not operate correctly after installation, double-check all wire connections to ensure they are secure and properly matched. Verify that the correct wires are connected to the appropriate switches. If the problem persists, consult the manufacturer’s troubleshooting guide or seek professional assistance.
Choosing the Right Ceiling Fan
Selecting the appropriate ceiling fan depends on factors such as room size, ceiling height, and desired airflow. Consider factors like blade pitch and motor size for optimal performance. Ensure the fan is rated for the intended application, such as indoor or outdoor use.
Working with Existing Wiring
If replacing an existing light fixture with a ceiling fan, carefully examine the existing wiring to determine its configuration. Identify the hot, neutral, and ground wires. If the existing wiring does not include separate switch legs for the fan and light, additional wiring may be required. Consult a qualified electrician if unsure about modifying existing wiring.

How To Wire A Ceiling Fan For Separate Control Fo The And Light

Ceiling Fan Wiring Diagram Two Switches

How To Wire A Fan With Separate Light Switch

How To Wire A Ceiling Fan Control Using Dimmer Switch

Wiring A Ceiling Fan And Light With Diagrams Ptr

Ceiling Fan Wiring Diagram Power Into Light Dual Switch

How To Install A Ceiling Fan Two Wall Switches What Bb Built

How To Wire A Ceiling Fan Light Switch Quora

How To Wire A Ceiling Fan Control Using Dimmer Switch

How To Wire A Ceiling Fan Temecula Handyman
Related Posts