How to Replace an Integrated LED Ceiling Light Fixture
Replacing an integrated LED ceiling light fixture may seem like a daunting task, but it's actually a straightforward process that can be completed in a few simple steps. This guide will provide you with all the information you need to safely and effectively replace your old light fixture with a new LED model.
Safety First
Before you begin any electrical work, it's important to take proper safety precautions. Turn off the power to the circuit that supplies the light fixture. You can do this by flipping the breaker or removing the fuse that corresponds to the circuit. Once the power is off, verify that it's safe to proceed by using a non-contact voltage tester to ensure that there is no live electricity present.
Removing the Old Fixture
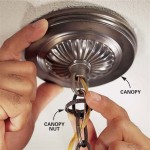
Once the power is off, you can begin removing the old light fixture. Most ceiling light fixtures are held in place by screws or clips. Locate the screws or clips and carefully remove them. Once the screws or clips are removed, gently pull the light fixture down to detach it from the ceiling.
Preparing the New Fixture
While the old fixture is removed, take a moment to prepare the new LED light fixture. Remove any packaging materials and check to make sure that all necessary components are included. Most LED light fixtures come with everything you need, but it's always a good idea to double-check.
Mounting the New Fixture
Now it's time to mount the new LED light fixture. Align the mounting bracket of the fixture with the electrical box in the ceiling. Carefully lift the fixture into place and secure it with the screws or clips that were removed earlier. Make sure that the fixture is securely mounted and that there is no play or movement.
Connecting the Wires
With the fixture mounted, it's time to connect the wires. Most LED light fixtures have three wires: black (hot), white (neutral), and ground (green or bare copper). Connect the black wire from the fixture to the black wire from the electrical box. Connect the white wire from the fixture to the white wire from the electrical box. Finally, connect the ground wire from the fixture to the ground wire from the electrical box.
Finishing Up
Once the wires are connected, tuck them neatly into the electrical box. Push the fixture up into place until it is flush with the ceiling. Turn on the power and test the light fixture to make sure it's working properly. If everything is working as it should, you've successfully replaced your integrated LED ceiling light fixture.
Tips for Success
- Use a non-contact voltage tester to verify that the power is off before beginning any work.
- Carefully follow the instructions that come with the new light fixture.
- If you're not comfortable working with electricity, it's best to consult a qualified electrician.
- Make sure that the new light fixture is compatible with the electrical box in your ceiling.
- Always wear eye protection when working with electrical fixtures.

Easy Ways To Replace An Led Recessed Light Bulb 13 Steps

How To Replace An Led Ceiling Fan Light Bulb

Change Integrated Led Light In Ceiling Fan Or Dome

Easy Led Light Fixture Install For Every Homeowner

How To Replace Recessed Lighting With Led The Home Depot

Easy Installation Of The Modern Style Led Integrated Light Fixture

How To Replace Recessed Lighting With Led The Home Depot

Can An Integrated Led Bulb Be Replaced Local Electrical Group

Your Guide To Integrated Led Light Fixtures

Integrated Leds
Related Posts

