How to Replace a Flush Mount Ceiling Fan
Ceiling fans are a great way to add style and comfort to any room. They can help to circulate the air, keep you cool in the summer, and warm in the winter. If your ceiling fan is starting to show its age or is no longer working properly, you may need to replace it. Replacing a flush mount ceiling fan is a relatively simple project that can be completed in a few hours.
Tools and Materials You'll Need
* Screwdriver * Pliers * Electrical tape * Wire nuts * New ceiling fan * StepladderSafety First
* Before you start, make sure to turn off the power to the ceiling fan at the breaker box. * Also, be sure to wear safety glasses when working with electrical wires.Step 1: Remove the Old Ceiling Fan
* Start by removing the light bulbs from the fan. * Next, remove the screws that are holding the fan canopy to the ceiling. * Carefully lower the fan canopy and fan blades from the ceiling. * Disconnect the electrical wires from the fan. * Unscrew the mounting bracket from the ceiling.Step 2: Install the Mounting Bracket for the New Fan
* Place the new mounting bracket over the electrical wires and secure it to the ceiling with the screws provided. * Make sure that the mounting bracket is level.Step 3: Connect the Electrical Wires
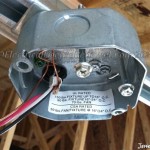
* Connect the black wire from the fan to the black wire from the ceiling. * Connect the white wire from the fan to the white wire from the ceiling. * Connect the green wire from the fan to the ground wire from the ceiling. * Use wire nuts to secure the connections.Step 4: Install the Fan Canopy and Blades
* Lift the fan canopy up to the ceiling and secure it to the mounting bracket with the screws provided. * Install the fan blades onto the fan canopy. * Tighten the screws that hold the blades in place.Step 5: Install the Light Bulbs
* Install the light bulbs into the fan.Step 6: Turn on the Power and Test the Fan
* Turn on the power to the ceiling fan at the breaker box. * Test the fan to make sure that it is working properly.Tips
* If you are not comfortable working with electrical wiring, you should hire an electrician to replace your ceiling fan. * Make sure to follow the manufacturer's instructions carefully when installing your new ceiling fan. * If you have any questions, please consult a qualified electrician.
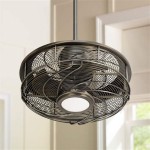
How To Install A Flush Mount Ceiling Fan Hunter 42 Inch

Diy Flush Mount Ceiling Fan Installation

How To Install The 52 In Blair Ceiling Fan By Hampton Bay

Diy Flush Mount Ceiling Fan Installation

How To Replace A Ceiling Light With Fan Diy Installation

How To Remove A Ceiling Fan The Home Depot

How To Install A Flush Mount Ceiling Fan Hunter 42 Inch

Ceiling Fan Installation Harbor Breeze Lake Canton Flush Mount

Ceiling Fan Installation Harbor Breeze Lake Canton Flush Mount

Steps In Installing A Flush Mount Ceiling Fan
Related Posts