How to Replace a Ceiling Fan Pull Chain Light Switch
The pull chain light switch in a ceiling fan is a small but frequently used component that can wear out over time. Constant use, excessive force when pulling, or simply age can lead to failure. A faulty switch can manifest itself in several ways: the light may not turn on or off consistently, the chain may break, or the switch may become stuck. Replacing the switch is a relatively straightforward repair that can be performed by most homeowners with basic electrical knowledge and tools, preventing the need to replace the entire ceiling fan.
Before commencing any electrical work, safety must be the paramount concern. Always disconnect the power to the ceiling fan at the circuit breaker. This step is non-negotiable. Even when the fan appears to be off, there is still live voltage present in the wiring. Confirm that the power is off using a non-contact voltage tester. Place the tester near the wires of the fan; if it illuminates or beeps, the power is still on. Double-check the circuit breaker to ensure it is properly switched off. This precautionary measure safeguards against electrical shock.
Once the power is confirmed to be off, gather the necessary tools and materials. This typically includes a replacement pull chain light switch (ensure it's compatible with the fan's voltage and amperage), a screwdriver (usually a Phillips head), wire strippers/cutters, needle-nose pliers, electrical tape, and wire connectors (wire nuts). Having all these items readily available will streamline the replacement process. Consider taking a picture of the existing wiring configuration before disconnecting anything; this photograph will serve as a valuable reference during reassembly.
Understanding the Anatomy of a Ceiling Fan Light Switch
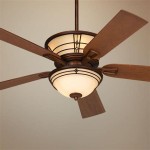
A typical ceiling fan light switch is a single-pole, single-throw (SPST) switch responsible for controlling the flow of electricity to the light fixture. It operates via a pull chain that mechanically activates or deactivates the switch's internal contacts. The switch itself is usually housed within the fan's switch housing, situated near the motor. Wires connect the switch to the fan's wiring harness, typically using wire connectors. Understanding the switch's basic function and components aids in diagnosing the problem and safely performing the replacement.
The vast majority of ceiling fan light switches are rated for a specific voltage and amperage. This rating is crucial for ensuring that the replacement switch is compatible with the fan's electrical system and can safely handle the load of the light fixture. Typically, the rating information is printed directly on the switch housing. When purchasing a replacement, verify that the voltage and amperage ratings match the original switch. Using a switch with a lower rating than required can lead to overheating, switch failure, and potentially a fire hazard.
Ceiling fan light switches are available in a variety of configurations, including those with multiple speeds or dimming capabilities. Some fans also have integrated remote control systems, which may affect the type of switch required. When sourcing a replacement switch, observe the existing switch's features and ensure that the new switch offers the same functionalities. Otherwise, the new switch will not provide all the use cases for the fan. Replacing a multi-speed switch with a standard on/off switch, for instance, would eliminate the speed control functionality.
Disassembly and Removal of the Old Switch
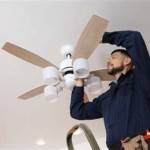
Begin by removing the light kit from the ceiling fan. This often involves loosening screws or releasing clips that hold the light fixture in place. Once the light kit is detached, carefully lower it, ensuring that the wiring connecting the light kit to the fan remains intact. The light kit might consist of a glass cover secured by screws to the fan. Remove screws or other mounting solutions to free the light kit. Place the light kit somewhere secure and out of the way while working on the fan.
Examine the wiring connections to the existing switch. Note the color of the wires and their position within the wire connectors. Taking a photograph, as mentioned earlier, can be extremely helpful. The switch will likely have two or more wires connected to it, typically using wire nuts. Carefully unscrew the wire nuts, disconnecting the wires from the switch. If the wires are difficult to remove, gently wiggle the wire nut while pulling. Avoid pulling directly on the wires, as this could damage the wiring or the fan's internal components.
Next, loosen or remove the nut or screw that secures the switch to the fan's switch housing. The exact method will vary depending on the fan model. Some switches are held in place by a knurled nut on the outside of the housing, while others may be secured by a screw on the inside. Once the nut or screw is removed, carefully pull the old switch out of the housing. If the switch is stuck, gently wiggle it back and forth to loosen it. Be careful not to force the switch, as this could damage the housing or surrounding wires.
Installation of the New Switch and Reassembly
With the old switch removed, it is time to install the new one. Before installing, inspect the new switch for any defects or damage. Ensure that the pull chain is in good working order and that the switch feels smooth and responsive. Insert the new switch into the switch housing, aligning it with the mounting hole. Secure the switch in place by tightening the nut or screw that was removed earlier. Ensure that the switch is firmly attached to the housing but avoid over-tightening, which could damage the switch or the housing.
Reconnect the wires to the new switch, matching the wiring configuration of the old switch. Use the photograph taken earlier as a reference if needed. If the wires are frayed or damaged, use wire strippers to trim the ends and expose fresh wire. Attach the wires to the switch using wire connectors (wire nuts). Twist the wires together tightly and then screw on the wire nut. Ensure that the wire nut is securely fastened and that no bare wire is exposed. Wrap electrical tape around the wire nut to further secure the connection and prevent accidental disconnection or short circuits.
Carefully reattach the light kit to the ceiling fan, reversing the removal procedure. Align the light kit with the fan and secure it using the screws or clips that were removed earlier. Ensure that all wires are tucked neatly inside the fan housing and that they are not pinched or damaged. Once the light kit is securely attached, double-check all connections and wiring to ensure that everything is properly installed.
After reassembly, restore power to the ceiling fan at the circuit breaker. Test the new switch by pulling the chain. The light should turn on and off smoothly and consistently. If the light does not turn on, or if there are any other issues, immediately disconnect the power and re-examine the wiring connections. Look for loose wires, incorrect connections, or any other potential problems. Once the issue is resolved, retest the switch to ensure that it is functioning correctly.
If, after attempting the replacement, issues persist, it is recommended to consult a qualified electrician. Troubleshooting electrical problems can be complex, and improper repairs can be dangerous. A professional electrician has the expertise and tools necessary to accurately diagnose and resolve any electrical issues safely and effectively.

How To Fix Replace A Ceiling Fan Pull Chain Switch

How To Change A Ceiling Fan Pull Chain Switch

Ceiling Fan Pull Chain Switch Replacement How To Replace A On Easy

How To Fix A Ceiling Fan Pull Switch With Light Pulls

Atron Fan Light Switch With Pull 2 Wire The Home Depot

Zing Ear Ze 110 3 Wire Way 2 Circuit Pull Chain Light Switch

1 Replacement Ceiling Fan Light Pull Chain Switch Westinghouse Lighting 77023

Ceiling Fan Light Switch Zing Ear Pull Chain Ze 109 On Off Sd With Compatible Fans Lamps And Wall Lights Broe Com

Ceiling Fan Light Repair Home Tutor Pull Chain Fixture With

4 Ways To Replace A Ceiling Fan Pull Chain Switch Wikihow
Related Posts