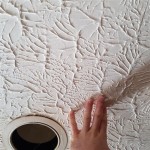
How To Remove Popcorn Ceilings: A Comprehensive Guide
Popcorn ceilings, also known as textured ceilings, were a popular choice in residential construction from the 1950s through the 1980s. Their popularity stemmed from their ability to hide imperfections and dampen sound. However, they have largely fallen out of favor due to their dated appearance and potential health concerns associated with asbestos content in older homes. While the prospect of removing a popcorn ceiling may seem daunting, with the correct tools, preparation, and a methodical approach, it is a manageable DIY project, although completing it *reliably* in just 30 minutes is highly unlikely and depends significantly on the ceiling's size and condition. This article provides a detailed guide on how to safely and effectively remove a popcorn ceiling.
It is crucial to emphasize that this is a guideline for the *process* and not an assurance of completion in 30 minutes. A realistic timeframe for a standard-sized room is several hours to a couple of days, depending on experience and the aforementioned factors. The 30-minute timeframe might be possible for a very small area, perhaps a closet or very small bathroom, but should not be considered the norm for a typical room.
Asbestos Testing: Prioritizing Safety
Before commencing any work, the single most important step is to determine whether the popcorn ceiling contains asbestos. Asbestos was a common ingredient in many building materials prior to its ban in the late 1970s. Disturbing asbestos-containing materials can release harmful fibers into the air, posing significant health risks if inhaled. Homes built before the 1980s should be treated as potentially containing asbestos in their popcorn ceilings.
The only way to definitively confirm the presence or absence of asbestos is through laboratory testing. A professional asbestos testing company should be hired to collect a sample of the ceiling material and analyze it. This typically involves cutting a small piece of the ceiling and sending it to a certified lab. The cost of testing is a worthwhile investment for peace of mind and the health and safety of those occupying the home. If asbestos is detected, it is imperative to hire a licensed asbestos abatement contractor to safely remove the ceiling. Attempting to remove asbestos-containing materials without proper training and equipment is illegal and extremely dangerous.
If the asbestos test comes back negative, you can proceed with the removal process. It is still recommended to take precautions, such as wearing a respirator and eye protection, to minimize exposure to dust and debris.
Preparation: Protecting the Room and Yourself
Thorough preparation is essential for a smooth and less messy removal process. This involves protecting the room and yourself from dust and debris.
Start by removing all furniture from the room. If it is impossible to remove, cover it completely with heavy-duty plastic sheeting and secure it with painter's tape. This will prevent dust and debris from settling on the furniture.
Cover the flooring with drop cloths. Canvas drop cloths are more durable and less slippery than plastic sheeting, providing better protection and safety. Secure the drop cloths to the baseboards with painter's tape to prevent them from shifting during the work.
Turn off the electricity to the room at the breaker box. This is crucial to prevent electric shock, especially if you will be working near light fixtures or electrical outlets. Remove light fixtures and cover the electrical boxes with plastic sheeting and tape.
Wear appropriate personal protective equipment (PPE). This includes a respirator mask rated for dust and particles (N95 or higher), eye protection (goggles or safety glasses), gloves, and a long-sleeved shirt and pants. A disposable coverall suit is also recommended to protect your clothing.
Ventilate the room by opening windows or using a fan to circulate air. This will help to reduce dust levels and improve visibility.
The Removal Process: Step-by-Step Instructions
Once the room is properly prepared, you can begin the removal process. The method outlined below uses water to soften the popcorn texture, making it easier to scrape off.
Fill a garden sprayer with warm water. Adding a small amount of dish soap to the water can help it penetrate the texture more effectively. Do not oversaturate the ceiling, as this can damage the drywall underneath.
Working in small sections (approximately 4x4 feet), spray the popcorn ceiling with water. Allow the water to soak into the texture for about 15-20 minutes. This will soften the material and make it easier to scrape.
Using a wide drywall scraper (4-6 inches), gently scrape the softened popcorn texture off the ceiling. Hold the scraper at a slight angle to prevent gouging the drywall. Apply consistent pressure and avoid excessive force.
Collect the scraped material in a large trash bag or bucket. Keep a damp sponge or cloth nearby to wipe the scraper clean periodically. This will prevent the texture from drying and sticking to the scraper.
Continue spraying, soaking, and scraping the ceiling in small sections until all the popcorn texture has been removed. Overlap the sprayed areas slightly to ensure complete coverage.
After removing the popcorn texture, inspect the ceiling for any remaining residue or adhesive. If necessary, lightly sand the ceiling with fine-grit sandpaper to smooth out any imperfections.
Once the ceiling is dry, apply a coat of drywall primer. This will help to seal the drywall and provide a good surface for painting.
Finally, paint the ceiling with two coats of high-quality ceiling paint. Choose a paint with a matte finish to minimize reflections and hide any remaining imperfections.
It is important to note that the drying time for each step (wetting, priming, and painting) will vary depending on humidity and temperature. Allow adequate drying time between each coat.
This process, conducted meticulously and carefully, is far more likely to take hours or days, not minutes. The 30-minute timeframe is unrealistic for most situations.
Addressing Potential Issues
During the popcorn ceiling removal process, several potential issues may arise. Knowing how to address these issues can help ensure a successful outcome.
Difficulty Removing the Texture: If the popcorn texture is difficult to remove, it may be due to insufficient soaking or a strong adhesive. Try spraying the area more thoroughly and allowing it to soak for a longer period. You can also use a putty knife to score the texture before scraping, which can help to break the bond with the drywall.
Drywall Damage: Accidental gouging or scratching of the drywall is common during popcorn ceiling removal. Small imperfections can be easily repaired with drywall compound. Apply a thin layer of compound to the damaged area, let it dry, and then sand it smooth. For larger areas of damage, you may need to apply multiple coats of compound.
Uneven Ceiling: In some cases, removing the popcorn texture may reveal an uneven ceiling surface. This can be caused by variations in the drywall installation or previous repairs. Leveling the ceiling requires applying multiple layers of drywall compound and sanding it smooth. This is a more advanced repair that may require the assistance of a professional.
Persistent Dust: Even with thorough preparation, some dust is inevitable during popcorn ceiling removal. After completing the work, thoroughly vacuum the room, including the walls, floors, and any remaining furniture. Use a HEPA filter vacuum cleaner to capture fine dust particles. You may also want to wipe down surfaces with a damp cloth.
Mold Growth: If the ceiling has been exposed to moisture, there may be mold growth under the popcorn texture. If you suspect mold, it is important to address the issue before proceeding with the removal. Clean the affected area with a mold-killing solution and allow it to dry thoroughly. In severe cases of mold infestation, it may be necessary to hire a professional mold remediation company.
Staining: Water stains or other discoloration on the ceiling can be more visible after removing the popcorn texture. Prime the ceiling with a stain-blocking primer before painting to prevent the stains from bleeding through. For stubborn stains, you may need to apply multiple coats of primer.
Remember to address these issues as they arise, rather than postponing them. This will help prevent them from becoming larger problems later on in the project. Addressing the issues promptly is critical for a quality finished product.
While the notion of removing a popcorn ceiling in 30 minutes is appealing, it's important to realistically assess the time commitment required. Factors like room size, asbestos testing, the need for careful preparation, the possibility of drywall repairs, and proper dust control all contribute to a more extensive project timeline. A well-executed job prioritizing safety and quality is ultimately more valuable than a rushed attempt based on an unrealistic timeframe.

How To Remove Popcorn Ceilings In 30 Minutes

How To Remove Popcorn Ceilings In 30 Minutes

How To Remove Popcorn Ceilings In 30 Minutes

How To Remove Popcorn Ceilings Easily The Nifty Nester

How To Remove Popcorn Ceilings In 30 Minutes

How To Remove Popcorn Ceilings In 30 Minutes Hometalk

Popcorn Ceiling Removal Tool Instructables

How To Remove Popcorn Ceilings Easily In 5 Minutes

How To Remove Popcorn Ceilings In 30 Minutes

Sc Popcorn Ceilings Removing The Carpet
Related Posts

