How to Remove a Drop Ceiling in a Basement: A Comprehensive Guide
Drop ceilings, also known as suspended ceilings, are a common feature in basements, often installed to conceal ductwork, pipes, wiring, and other utilities. While they offer easy access for maintenance and repairs, they can also lower the ceiling height, trap moisture, and detract from the overall aesthetics of a basement. Removing a drop ceiling can open up the space, allow for better lighting options, and potentially increase property value. This article provides a detailed guide on how to safely and effectively remove a drop ceiling in a basement.
Before beginning the removal process, it is crucial to assess the underlying structure and potential hazards. This involves a careful inspection of everything concealed above the drop ceiling to understand its functionality and potential impact on the rest of the home. Proper preparation, utilizing the right tools, and adhering to safety precautions are paramount to ensuring a smooth and successful removal. This process, while straightforward, requires patience and attention to detail. Failure to properly handle the removal can lead to damage to existing utilities, structural issues, or personal injury.
Key Point 1: Preparation and Safety Precautions
Prior to initiating any demolition work, thorough preparation is essential. This includes gathering the necessary tools, protecting the surrounding area, and understanding the potential hazards involved. These upfront steps minimize risks and streamline the removal process.
1. Gather Necessary Tools and Materials:
A variety of tools will be required for the safe and efficient removal of the drop ceiling. These include:
*Safety Glasses:
Protection for the eyes from falling debris and dust is paramount. *Gloves:
Durable work gloves will protect hands from sharp edges and potential contaminants. *Dust Mask or Respirator:
Essential for preventing the inhalation of dust, mold spores, and insulation particles. *Ladder or Step Stool:
To safely reach the ceiling grid and tiles. *Utility Knife or Putty Knife:
For cutting through sealant or adhesive, if present. *Pry Bar or Flathead Screwdriver:
Useful for gently prying tiles and grid components. *Stud Finder:
To locate ceiling joists if planning to attach anything directly to the ceiling after removal. *Trash Bags or Containers:
For easy disposal of the removed ceiling tiles and grid components. *Work Lights:
Adequate lighting is crucial, especially in basements where natural light is limited. *Measuring Tape:
To measure the room and plan any potential modifications after removal.2. Inspect and Identify Potential Hazards:
A thorough inspection above the drop ceiling is critical before starting any demolition. Potential hazards may include:
*Electrical Wiring:
Carefully examine the location of any electrical wiring and ensure the power is turned off to any circuits in the area being worked on. Avoid touching or disturbing any wiring until it has been de-energized. Consult a qualified electrician if uncertain. *Plumbing:
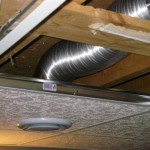
Identify any pipes, especially water pipes, and ensure they are not leaking or damaged before proceeding. Be mindful of their location during the removal process. *HVAC Ductwork:
Note the placement of heating and cooling ducts and avoid damaging them. If the ducts are insulated with potentially hazardous materials like asbestos, professional abatement may be required. *Insulation:
Be aware of the type of insulation present above the ceiling. Older homes may contain asbestos or other hazardous materials. If suspected, have the insulation tested by a qualified professional before disturbing it. *Mold:
Check for signs of mold growth and address it before proceeding with the removal. Mold can cause respiratory problems and other health issues. Professional remediation may be necessary. *Asbestos:
Prior to 1980 Asbestos was a common building material, removing it yourself can result in serious problems. It is important to determine if Asbestos is present prior to remove of a drop ceiling. Asbestos abatement can be costly but is necessary to protect you from harmful chemicals.3. Protect the Work Area:
To minimize the mess and protect the surrounding area:
*Cover the Floor:
Use drop cloths, plastic sheeting, or old blankets to protect the floor from falling debris and dust. *Seal Off the Area:
If possible, seal off the work area with plastic sheeting to prevent dust and debris from spreading to other parts of the basement or the house. *Remove or Cover Furniture:
Remove any furniture from the area or cover it with plastic sheeting to protect it from dust and damage.Key Point 2: Drop Ceiling Removal Process
The removal process follows a systematic approach, starting with the tiles and progressing to the grid system. Gentle and careful handling minimizes damage and ensures a safer working environment.
1. Remove the Ceiling Tiles:
Carefully lift each ceiling tile upwards and tilt it to clear the grid. Lower it gently to the floor. If the tiles are stuck, use a utility knife or putty knife to gently separate them from the grid. Stack the tiles carefully in a designated area for disposal.
2. Remove the Lighting Fixtures:
Before removing any lighting fixtures, ensure the power to the circuit is turned off at the breaker. Disconnect the wiring carefully, following all electrical safety precautions. Remove the fixtures and set them aside.
3. Remove the Grid System:
The grid system consists of main runners, cross tees, and wall angles. Start by removing the cross tees, which are typically held in place by clips or slots in the main runners. Once the cross tees are removed, detach the main runners from the suspension wires. Use wire cutters to cut the suspension wires close to the ceiling joists. Finally, remove the wall angles, which are usually attached to the wall with nails or screws. Use a pry bar or screwdriver to remove them carefully.
4. Bag the Fasteners:
Collect and secure all the nails, screws, and fasteners as they are removed from the drop ceiling. Ensure you do not use a trash bag to secure them in, as this could puncture the bag. Instead opt for a plastic container, or heavy duty bag to ensure nobody gets hurt when emptying the trash later on.
5. Debris Disposal:
When you are confident that all of the fasteners are secured, the next step is to load up all of the debris. When doing so it is important to be mindful of how much you are putting into each bag, as too much weight could cause it to break. If this occurs you will have to resort the debris back into a new bag. This is a tedious process that can be avoided by adding the proper weight to each bag.
6. Clean the Work Area:
Once all the components of the drop ceiling have been removed, thoroughly clean the work area. Sweep up any debris, vacuum the floor, and wipe down any surfaces that may have accumulated dust. Proper cleaning is essential for preventing the spread of dust and allergens.
Key Point 3: Post-Removal Considerations and Potential Next Steps
After removing the drop ceiling, various options are available for finishing the exposed ceiling. These range from simple cleaning and painting to more extensive renovations.
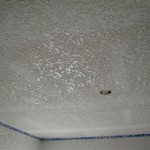
1. Assess the Exposed Ceiling:
Once the drop ceiling is removed, carefully assess the condition of the exposed ceiling. Look for any signs of damage, such as cracks, holes, or water stains. Repair any damage before proceeding with any finishing work.
2. Consider Finishing Options:
Several options are available for finishing the exposed ceiling, depending on the desired aesthetic and budget:
*Painting:
Painting the exposed ceiling is a simple and cost-effective way to improve its appearance. Choose a paint that is suitable for the material of the ceiling, such as drywall or concrete. *Drywall:
Installing drywall is a more involved option, but it can create a smooth, finished surface. This requires framing, drywall installation, taping, and painting. *Exposed Ceiling Design:
Leaving the ceiling exposed can create an industrial or modern look. This may involve painting the joists and any visible pipes or ducts. *Suspended Ceiling Again:
While removing a suspended ceiling can be beneficial, it may be suitable to install another one, but this time focusing on more modern designs.3. Conceal Utilities:
If there are any unsightly pipes, ducts, or wiring exposed on the ceiling, consider ways to conceal them. Options include:
*Boxing In:
Building boxes around pipes or ducts can conceal them while still allowing access for maintenance. *Running Utilities Through Joists:
If possible, run wires, pipes, or ducts through the ceiling joists to conceal them. *Painting Utilities:
Painting utilities can help them blend in with the ceiling.4. Improve Lighting:
With the drop ceiling removed, consider upgrading the lighting in the basement. Options include:
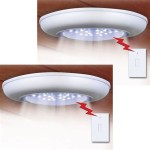
*Recessed Lighting:
Recessed lighting can provide a clean, modern look and increase the amount of light in the basement. *Track Lighting:
Track lighting allows for adjustable lighting and can be used to highlight specific areas of the basement. *Pendant Lighting:
Pendant lights can add a decorative touch to the basement and provide focused lighting over specific areas.5. Address Insulation:
If the insulation above the drop ceiling is inadequate or damaged, consider upgrading it. Proper insulation can help improve energy efficiency and reduce heating and cooling costs. Common insulation options include fiberglass batts, spray foam, and rigid foam boards.
Removing a drop ceiling in a basement, although seemingly simple, requires a structured approach. From the initial assessment and safety measures to the actual removal process and final finishing touches, each step contributes to a successful outcome. By following this guide, homeowners can transform their basements into brighter, more spacious, and aesthetically pleasing areas, while taking safety and functionality into consideration.

How To Remove A Basement Drop Ceiling Lauren Koster Creative
.jpg?strip=all "How To Remove Dated Drop Ceiling Tiles Dream Green Diy")
How To Remove Dated Drop Ceiling Tiles Dream Green Diy

Replacing Drop Ceiling Tiles

How To Easily Update An Ugly Drop Ceiling

How To Remove A Drop Ceiling 1905 Farmhouse

Drop Ceiling Vs Bare

How To Remove Insulation From A Basement Ceiling Semigloss Design

Replacing Drop Ceiling Tiles
.jpg?strip=all "How To Remove Dated Drop Ceiling Tiles Dream Green Diy")
How To Remove Dated Drop Ceiling Tiles Dream Green Diy

How To Remove A Basement Drop Ceiling On Vimeo
Related Posts