How To Remove a Ceiling Vent Cover: A Comprehensive Guide
Ceiling vent covers, also known as registers or grilles, play a crucial role in regulating airflow throughout a building. They conceal ductwork, distribute conditioned air, and prevent debris from entering the ventilation system. Periodic removal of these covers is necessary for cleaning, maintenance, or replacement. This article provides a detailed guide on safely and effectively removing various types of ceiling vent covers.
Understanding the different types of ceiling vent covers is essential before attempting removal. The most common types include: magnetic vent covers, spring-loaded vent covers, screw-secured vent covers, and tab-secured vent covers. Each type requires a slightly different approach for removal, and improper methods can lead to damage to the cover, the ceiling, or even the ductwork.
Identifying the Type of Ceiling Vent Cover
The first step in removing a ceiling vent cover is to accurately identify the type of fastening mechanism used. A close visual inspection will usually reveal this. Look for screws, tabs, or other obvious fixtures. If the cover appears to be flush with the ceiling and has no visible fasteners, it is likely a magnetic or spring-loaded type.
Magnetic vent covers are typically used in newer homes with metal ductwork or adapters. They adhere to the ceiling via magnetic force and are effortless to remove. Spring-loaded vent covers utilize spring-loaded clips that hold the cover in place. These clips are usually located on the sides of the cover and can be compressed to release the cover. Screw-secured vent covers are the most common type and require a screwdriver for removal. Tab-secured vent covers feature small tabs that need to be manipulated to release the cover from the ceiling.
If uncertain of the vent cover type, gently attempt to pull the cover down. If it offers resistance, do not force it. Examine it again more closely for screws, tabs, or clips. Applying excessive force to an improperly identified cover can cause damage.
Removing Magnetic Vent Covers
Magnetic vent covers are the simplest to remove. Their design relies on magnets adhering to the metal duct or a metal adapter attached to the ceiling. To remove a magnetic vent cover, simply grasp the cover firmly and gently pull it straight down. The magnetic force should release without much resistance.
If the cover seems stuck, try wiggling it slightly while pulling. This can help break the magnetic seal. Avoid using excessive force, as this could potentially damage the cover or the ceiling. If the cover is particularly stubborn, ensure that there is no obstruction or debris preventing it from detaching. Once removed, clean the cover and the surrounding ceiling area to remove any dust or dirt that may have accumulated.
When reinstalling a magnetic vent cover, align it with the duct opening and press it firmly against the ceiling. Ensure that the magnets make full contact with the metal surface to provide a secure hold. Periodically check the cover to ensure it remains securely attached.
Removing Spring-Loaded Vent Covers
Spring-loaded vent covers are held in place by spring clips. These clips can be compressed inwards to release the cover from the ceiling. To remove a spring-loaded vent cover, identify the location of the spring clips. They are usually located on the sides of the cover, near the corners.
Using both hands, gently push inward on the sides of the cover to compress the spring clips. While compressing the clips, simultaneously pull the cover down and away from the ceiling. The cover should release easily once the clips have been sufficiently compressed. If the cover does not release, ensure that both clips are fully compressed before continuing to pull. Avoid pulling too hard before the clips are compressed, as this can damage the ceiling or the clips themselves.
During reinstallation, align the vent cover with the duct opening and ensure the spring clips are oriented correctly. Push the cover up into the opening until the spring clips snap into place. Ensure that the cover is securely attached to the ceiling and that there is no movement or looseness. Test the cover by gently pushing and pulling on it to verify it is properly secured.
Removing Screw-Secured Vent Covers
Screw-secured vent covers are a common type, often found in older buildings. These covers are held in place by screws that are typically visible on the face of the cover. To remove a screw-secured vent cover, locate all the screws that are securing the cover to the ceiling. The number of screws can vary, but usually there are two to four screws.
Using a screwdriver that matches the screw head (usually a Phillips head), carefully unscrew each screw. Turn the screwdriver counterclockwise to loosen and remove the screws. It is advisable to use a container or magnetic tray to store the screws, preventing them from being lost or dropped. After all the screws have been removed, gently pull the vent cover down from the ceiling. It should come loose easily.
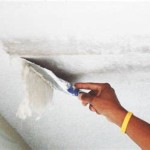
If the cover seems stuck even after removing the screws, check for any paint or debris that may be holding it in place. Gently use a putty knife or similar tool to score around the edges, breaking any paint seal. Avoid using excessive force, as this can damage the ceiling. To reinstall, align the vent cover with the duct opening and position it against the ceiling. Insert the screws back into their original holes and tighten them securely. Avoid overtightening the screws, as this can strip the holes and prevent the cover from holding properly.
Removing Tab-Secured Vent Covers
Tab-secured vent covers utilize tabs or latches that secure the cover to the ceiling. These tabs may be located on the sides, top, or bottom of the cover. To remove a tab-secured vent cover, carefully examine the cover to identify the location of the tabs and how they are engaged. The tabs often need to be pushed, pulled, or rotated to release them.
Depending on the design of the tabs, use a small flathead screwdriver or a similar tool to gently manipulate the tabs. Push the tabs inwards, outwards, or rotate them as needed to disengage them from the ceiling. While manipulating the tabs, simultaneously pull the vent cover away from the ceiling. Work slowly and carefully to avoid breaking the tabs.
If the cover does not release easily, re-examine the tabs to ensure they are fully disengaged. It may be necessary to manipulate multiple tabs simultaneously to release the cover. Once the cover is removed, inspect the tabs for any damage or wear. During reinstallation, align the vent cover with the duct opening and ensure the tabs are oriented correctly. Push the cover into place until the tabs snap or lock into position. Verify that the cover is securely attached to the ceiling and that the tabs are properly engaged.
Safety Precautions During Removal
When removing ceiling vent covers, safety should always be a priority. Before starting any work, turn off the HVAC system to prevent any unexpected drafts or airflow. This will also help to minimize the amount of dust and debris that is disturbed during the removal process.
Use eye protection, such as safety glasses or goggles, to prevent dust or debris from entering the eyes. Consider wearing a dust mask or respirator to avoid inhaling any airborne particles. Use a sturdy ladder or step stool to safely reach the ceiling vent cover. Ensure the ladder is placed on a level surface and is properly secured to prevent it from slipping or tipping.
Be cautious when handling tools, especially screwdrivers and putty knives. Avoid using excessive force, as this can lead to injuries or damage to the ceiling. If you are unsure about any step of the removal process, consult a qualified professional.
Cleaning and Maintaining Vent Covers
After removing a ceiling vent cover, take the opportunity to clean it thoroughly. Dust and debris can accumulate on the cover over time, reducing airflow and potentially affecting air quality. Use a vacuum cleaner with a brush attachment to remove loose dust and dirt. For more stubborn dirt, wash the cover with warm soapy water and a soft cloth. Rinse thoroughly and allow the cover to dry completely before reinstalling.
Inspect the vent cover for any signs of damage or wear, such as cracks, rust, or broken parts. If the cover is damaged beyond repair, consider replacing it with a new one. Regularly cleaning and maintaining vent covers can help to improve airflow, reduce dust buildup, and extend the life of the ventilation system.
While the vent cover is removed, it is also advisable to inspect the duct opening. Use a vacuum cleaner to remove any dust or debris that may have accumulated inside the duct. This can help to improve air quality and efficiency. If there are any signs of mold or mildew, take appropriate steps to clean and disinfect the duct.

How To Replace Your Ac Vent Covers Clf Services

How To Remove Ducted Air Conditioning Vents Quickair

Replacing A Heat Vent Register

Do I Have To Remove Vents When Painting The Ceiling Rite

Ac Vent Cover Removal Keystone Rv Forums

How To Remove Clean Bathroom Ceiling Fan Nutone

Marc Poulos Painting Before A Room Remove Ceiling Vents

How To Clean A Bathroom Fan Diy Family Handyman

Easy To Install Modern Vent Cover For Ceilings Walls And Floors Angela Marie Made

Grill Installation Air Registers How To Install In Your Home
Related Posts

