How To Remove Air Conditioner Ceiling Vents
Air conditioner ceiling vents, ubiquitous components of residential and commercial HVAC systems, facilitate the distribution of conditioned air throughout a space. These vents, typically made of metal or plastic, are designed to be removable for cleaning, maintenance, and replacement. Understanding the process of removing these vents is crucial for homeowners and maintenance personnel alike, enabling tasks such as duct cleaning, painting, and accessing concealed spaces above the ceiling. This article provides a comprehensive guide on how to safely and effectively remove air conditioner ceiling vents, focusing on different types of vents and the tools and techniques required.
Before commencing any work on HVAC systems, safety precautions are paramount. Disconnecting power to the air conditioning unit is essential to prevent electrical hazards. This can usually be accomplished by turning off the corresponding circuit breaker in the electrical panel. Additionally, wearing safety glasses and gloves is advisable to protect against dust, debris, and sharp edges. A stepladder or sturdy platform may be necessary to safely reach the ceiling vents, particularly in rooms with high ceilings. Ensure the ladder is placed on a stable, level surface before climbing.
It's also beneficial to prepare the surrounding area. Covering the floor or furniture directly below the vent with a drop cloth or plastic sheeting can protect against falling dust and debris. Having a container or bag nearby to collect screws and small parts will prevent them from getting lost. A vacuum cleaner can be used to immediately clean up any dust or debris that falls during the removal process, minimizing mess and improving air quality.
Identifying the Type of Ceiling Vent
Air conditioner ceiling vents come in various designs, each with a slightly different method for removal. The most common types include: louvered vents, diffuser vents, and register vents. Louvered vents often feature adjustable slats that direct airflow. Diffuser vents typically have a series of concentric rings or square patterns designed to spread air evenly across a wider area. Register vents combine the function of a vent and a damper, allowing for airflow regulation. Identifying the specific type of vent present is the first step toward determining the appropriate removal technique.
Louvered vents are frequently held in place by friction clips or spring-loaded mechanisms. These clips engage with the ceiling drywall or framing, providing a secure fit. To remove a louvered vent, one may need to gently pry it away from the ceiling, disengaging the clips. Diffuser vents are often secured with screws or twist-lock fasteners. Locating and removing these fasteners is necessary before the vent can be detached. Register vents, similar to diffuser vents, can be held in place by screws or clips. In some cases, the register may have a lever or knob that needs to be manipulated to release the damper mechanism before removal.
Careful visual inspection of the vent will often reveal the type of fastener used. Look for screw heads along the perimeter of the vent or small tabs or clips that protrude from the sides. Gently pressing and prodding the vent can also help identify the location and type of retention mechanism. Avoid applying excessive force, as this can damage the vent or the surrounding ceiling.
Tools Required for Vent Removal
Having the right tools on hand will significantly simplify the vent removal process and minimize the risk of damage. A basic toolkit should include: a screwdriver set (both Phillips head and flathead), a putty knife or thin pry bar, a stepladder, safety glasses, gloves, and a container for storing screws and small parts. A vacuum cleaner and drop cloth are also recommended for cleanup and protection.
The screwdriver set should include a variety of sizes to accommodate different screw heads. A putty knife or thin pry bar can be used to gently pry vents away from the ceiling, particularly those held in place by friction clips. Exercise caution when using these tools to avoid damaging the surrounding drywall. The stepladder should be sturdy and of appropriate height to allow comfortable access to the ceiling vents. Safety glasses and gloves are essential for protecting the eyes and hands from dust, debris, and sharp edges.
For more stubborn vents, a specialized tool such as a vent removal tool may be helpful. These tools are designed to grip the vent securely and provide leverage for easy removal. They are particularly useful for removing vents that are painted over or have become stuck due to dust and grime. A flashlight may also be necessary to illuminate the area behind the vent and identify the location of fasteners or clips.
Step-by-Step Removal Instructions
Once the type of vent has been identified and the necessary tools have been gathered, the removal process can begin. The following steps provide a general guideline for removing most types of air conditioner ceiling vents. Always proceed with caution and adapt the instructions based on the specific type of vent being removed.
Step 1: Preparation. Begin by turning off the power to the air conditioning unit and preparing the work area. Cover the floor or furniture below the vent with a drop cloth or plastic sheeting. Gather the necessary tools and place them within easy reach. Don safety glasses and gloves.
Step 2: Locate Fasteners. Carefully inspect the vent to identify the type and location of fasteners. Look for screws, clips, or twist-lock mechanisms. If screws are present, use the appropriate screwdriver to remove them. Place the screws in a container to prevent them from getting lost.
Step 3: Release Clips or Friction Fit. If the vent is held in place by clips or friction fit, gently pry it away from the ceiling using a putty knife or thin pry bar. Insert the putty knife between the vent and the ceiling and apply gentle pressure. Work around the perimeter of the vent, gradually loosening it from the ceiling. Avoid applying excessive force, as this can damage the drywall.
Step 4: Detach the Vent. Once the fasteners have been removed or the clips have been released, carefully detach the vent from the ceiling. Support the vent with one hand while detaching it to prevent it from falling. If the vent is connected to ductwork, be careful not to damage the connection.
Step 5: Clean the Area. After removing the vent, use a vacuum cleaner to clean up any dust or debris that may have fallen. Inspect the vent opening for any signs of damage or obstruction. If necessary, clean the ductwork using a vacuum cleaner with a hose attachment.
Step 6: Vent Cleaning (Optional). This is a good opportunity to clean the removed vent. Wash it with soap and water, removing accumulated dust and grime. Dry it thoroughly before reinstalling. This will improve airflow and air quality.
For louvered vents secured by spring clips, gently push the vent upwards towards the ceiling. This can often disengage the clips, allowing the vent to be pulled down. For diffuser vents with twist-lock fasteners, rotate the fasteners a quarter turn to unlock them. The vent can then be pulled straight down. If the vent is painted over, use a utility knife to score the paint along the edges before attempting to remove it. This will prevent the paint from peeling and damaging the ceiling.
When reinstalling the vent, reverse the removal steps. Ensure that all fasteners are securely tightened and that the vent is properly seated against the ceiling. If the vent is loose or wobbly, adjust the clips or fasteners as necessary. Regularly cleaning and maintaining air conditioner ceiling vents will help to ensure optimal performance and prolong the lifespan of the HVAC system.
Some vents may feature a central screw covered by a decorative cap. In such cases, carefully pry off the cap to reveal the screw. Remove the screw and then gently pull down on the vent. For vents with a grille that is separate from the mounting frame, first remove the grille by unclipping or unscrewing it. Then, address the mounting frame, which is typically secured with screws or clips.
If a vent is particularly difficult to remove, avoid using excessive force. Instead, try applying a lubricant such as WD-40 or a similar product to the edges of the vent. This can help to loosen any rust or grime that may be causing the vent to stick. Allow the lubricant to sit for a few minutes before attempting to remove the vent again.
In some instances, the vent may be attached to the ductwork with flexible duct connectors. These connectors can be fragile and should be handled with care. When removing the vent, gently detach the connector from the ductwork, being careful not to tear or damage it. When reinstalling the vent, ensure that the connector is properly sealed to prevent air leaks.
For vents located in high or difficult-to-reach areas, it may be necessary to use a specialized extension tool. These tools allow you to reach the vent without having to climb on a ladder. They typically feature a gripping mechanism that can be used to loosen and remove the vent. When using an extension tool, be sure to follow the manufacturer's instructions carefully.

How To Remove Ducted Air Conditioning Vents Quickair

How To Replace Your Ac Vent Covers Clf Services

Replacing A Heat Vent Register

How To Open Air Con Vents The Easy Way

Ceiling Vent Replacement For Air Conditioning Hq Joondalup Perth Wa

Ac Vent Cover Removal Keystone Rv Forums

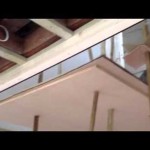
Quick Ceiling Vent Fix

How To Open And Close Ceiling Air Vents

Ceiling Vent Replacement For Air Conditioning Hq Joondalup Perth Wa

Replacing A Central Air Conditioner Return Vent Cover All About The House
Related Posts