How to Remove an AC Ceiling Vent in an RV
Maintaining a comfortable temperature inside your RV is crucial for a pleasant camping experience. One essential component of your RV's cooling system is the air conditioning (AC) ceiling vent. If you need to replace or repair the vent, it's necessary to know how to remove it properly. This guide will provide you with step-by-step instructions on how to remove an AC ceiling vent in an RV.
Safety Precautions:
Before starting any work, make sure to follow these safety precautions:
- Turn off the power to the AC unit from the RV's electrical panel.
- Wear safety gloves and eye protection.
- Use a ladder or step stool to safely reach the ceiling vent.
Materials You'll Need:
- Phillips head screwdriver
- Flathead screwdriver or putty knife (optional)
- Flashlight (optional)
Step-by-Step Instructions:
1. Locate the Vent Cover:
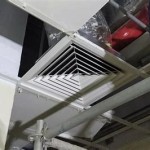
The AC ceiling vent is typically located in the center of the RV's ceiling. It is usually a square or rectangular panel with a grille or diffuser.
2. Remove the Vent Cover:
Most vent covers are held in place by a few screws. Use a Phillips head screwdriver to remove the screws and carefully lift off the vent cover.
3. Disconnect the Electrical Wires:
Once the vent cover is removed, you will see the AC unit's electrical wires connected to the vent motor. Disconnect the wires by gently pulling them apart. If they are tightly connected, you can use a flathead screwdriver or putty knife to help release them.
4. Locate the Mounting Screws:
The vent is usually mounted to the ceiling with four screws. Locate these screws and use a Phillips head screwdriver to remove them.
5. Lower the Vent:
Once the mounting screws are removed, carefully lower the vent. Be mindful of any wires or hoses that may be connected to the vent. If there are any obstructions, gently guide them out of the way.
6. Remove the Vent:
Once the vent is lowered, you can completely remove it from the ceiling. Inspect the vent for any damage or obstructions.
Reinstallation:
To reinstall the AC ceiling vent, simply reverse the steps above:
- Lift the vent into place and secure it with the mounting screws.
- Connect the electrical wires to the vent motor.
- Install the vent cover and secure it with the screws.
- Turn on the power to the AC unit and test the vent's operation.
Conclusion:
Removing an AC ceiling vent in an RV is a relatively easy task that can be completed in a short amount of time. By following these instructions, you can safely and effectively remove the vent for replacement or repair. If you encounter any difficulties or have any concerns, do not hesitate to seek assistance from a qualified RV technician.

Ac Vent Cover Removal Keystone Rv Forums

How To Remove Air Vent Cover The Rv Forum Community

How To Easily Replace An Rv Ac With A Fan Vent Or Skylight

Open Range Rv Owners Forum View Topic Ac Ceiling Registers

Have You Checked Your Rv A C Ceiling Vents Recently They Re Dirty Specialists

Rv A C Vent Removal Grand Design Transcend

Rv Roof Repair Day 2 Removing A Coleman Air Conditioner

Open Range Rv Owners Forum View Topic Ac Ceiling Registers

How To Clean Your Rv Air Conditioner Ceiling Vents And Filters

How To Remove Ceiling Ac Vent On 2000 Ford Expedition
Related Posts


