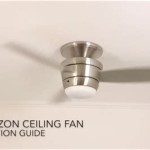
How to Remove a Ceiling Fan with Light Fixture
Removing a ceiling fan with light fixture can seem like a daunting task, but with the right tools and a little guidance, it's a manageable DIY project. By following these step-by-step instructions, you can safely and efficiently remove your ceiling fan, leaving your ceiling and electrical system in good condition.
Safety Precautions
Before you start, ensure you follow these safety precautions:
- Turn off the power to the fan at the circuit breaker or fuse box.
- Wear safety glasses and gloves.
- Use a sturdy ladder or step stool.
Step 1: Gather Your Tools and Materials
You will need the following tools and materials:
- Screwdriver
- Electrical tape
- Wire cutters
- Pliers
- Ladder or step stool
- New ceiling fan (optional)
Step 2: Remove the Fan Blades
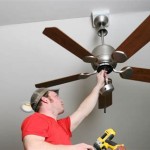
Most ceiling fans have removable blades. To remove the blades, simply unscrew the screws that hold them in place.
Step 3: Disconnect the Electrical Wires
Inside the fan housing, you will find the wires that connect the fan to the power supply. Disconnect these wires by unscrewing the wire nuts and pulling the wires apart. Be sure to wrap the ends of the wires with electrical tape to prevent accidental contact.
Step 4: Remove the Light Fixture
The light fixture is typically attached to the fan housing with screws or bolts. Remove these screws or bolts and carefully detach the light fixture.
Step 5: Remove the Fan Housing
The fan housing is attached to the ceiling by one or two mounting brackets. Remove the screws or bolts that hold the mounting brackets to the ceiling, and carefully lower the fan housing from the ceiling.
Step 6: Install the New Fan (Optional)
If you are installing a new ceiling fan, follow the instructions that came with the fan to mount it to the ceiling and connect the electrical wires.
Step 7: Reinstall the Light Fixture
Reinstall the light fixture by attaching it to the fan housing and securing it with screws or bolts.
Step 8: Reconnect the Electrical Wires
Reconnect the electrical wires by twisting the ends of the wires together and securing them with wire nuts. Wrap the ends of the wire nuts with electrical tape for added security.
Step 9: Reinstall the Fan Blades
Reinstall the fan blades by screwing them into the fan housing.
Step 10: Turn on the Power
Return to the circuit breaker or fuse box and turn the power back on to the fan. The fan should now be functional and ready to use.
Conclusion
By following these simple steps, you can successfully remove a ceiling fan with light fixture. Remember to prioritize safety throughout the process and take your time. With careful planning and execution, you can complete this task with confidence.

How To Replace A Ceiling Fan With Pendant Light
Replacing A Ceiling Fan Light With Regular Fixture Jlc

How To Remove A Ceiling Fan Krueger Electric

4 Ways To Replace A Light Bulb In Ceiling Fan Wikihow
Ceiling Fan Light Fixture Replacement Ifixit Repair Guide

How To Remove A Ceiling Fan The Home Depot

How To Remove A Ceiling Fan The Home Depot

How To Replace A Ceiling Fan Zillow

How To Remove Dome Globe Glass Light Replacement On Hampton Bay Ceiling Fan Windward Ii

How To Remove A Ceiling Fan The Home Depot
Related Posts

