How To Put Can Lights In A Drop Ceiling
Installing can lights, also known as recessed lights, in a drop ceiling can significantly enhance the aesthetics and functionality of a room. Drop ceilings, characterized by their suspended grid system and easily removable tiles, offer unique challenges and considerations compared to traditional drywall ceilings. This article provides a comprehensive guide on how to install can lights in a drop ceiling, covering essential safety precautions, necessary tools and materials, and step-by-step instructions for a successful installation.
Before commencing any electrical work, prioritize safety. Electricity can be hazardous, and improper installation can lead to shocks, fires, or equipment damage. It is strongly recommended that individuals unfamiliar with electrical work consult a qualified electrician. If proceeding independently, ensure all work adheres to local electrical codes and regulations. Neglecting these safety precautions can have serious consequences.
Proper planning is paramount to a successful installation. Carefully consider the desired lighting effect and the layout of the room. Determine the number of can lights required and their optimal placement for even illumination. Account for the existing structural elements above the drop ceiling, such as ductwork, pipes, and wiring. These obstructions may necessitate adjustments to the planned layout. A well-considered plan minimizes errors and ensures a satisfactory final result.
Key Point 1: Safety Precautions and Necessary Preparations
The cornerstone of any electrical project is prioritizing safety. Start by disconnecting the power supply to the circuit that will be used for the can lights. Locate the appropriate circuit breaker in the electrical panel and switch it to the "off" position. To verify that the power is indeed off, use a non-contact voltage tester to check the wires at the intended installation location. This simple step significantly reduces the risk of electric shock. Ensure the tester is functioning correctly before use.
In addition to power disconnection, personal protective equipment (PPE) is crucial. Wear safety glasses to protect eyes from debris during cutting and drilling. Use work gloves to provide a better grip and protect hands from sharp edges. A dust mask is also recommended to prevent inhalation of dust particles, especially if working in older buildings. These precautions contribute to a safer and more comfortable working environment.
Before beginning the physical installation, gather all necessary tools and materials. This includes:
*Can lights (rated for insulated ceilings if applicable – IC-rated)
*Wire connectors (e.g., wire nuts)
*Electrical wire (appropriate gauge for the circuit – typically 14/2 or 12/2 NM-B)
*Wire stripper/cutter
*Pencil or marker
*Measuring tape
*Level
*Hole saw (matching the diameter of the can light)
*Drill
*Screwdriver (Phillips and flathead)
*Wire staples
*Non-contact voltage tester
*Step ladder
*Drop ceiling support wire or clips (for added support)
Having all the necessary tools and materials readily available streamlines the installation process and minimizes interruptions. Double-check the compatibility of the can lights with the existing electrical system before starting the installation.
Examine the area above the drop ceiling. Look for any obstructions such as HVAC ducts, plumbing, or existing electrical wiring. If obstructions are present, adjust the placement of the can lights accordingly, or devise a strategy to work around them. Adequate space is crucial for the can lights to fit properly and for proper heat dissipation. Non-IC-rated fixtures require three inches of insulation clearance on all sides of the fixture.
Key Point 2: Cutting Holes and Wiring the Can Lights
Once the safety precautions are completed and the tools and materials are gathered, the next step is to prepare the drop ceiling tiles. Accurately measure and mark the center point for each can light on the ceiling tiles. Use a pencil or marker to clearly indicate the cut locations. Precision in marking ensures that the can lights are evenly spaced and aesthetically pleasing.
Utilize a hole saw that matches the diameter of the can lights to cut the holes in the ceiling tiles. Attach the hole saw to a drill and carefully cut through the tiles at the marked locations. Apply steady pressure and maintain a consistent speed to create clean, circular cuts. Avoid excessive force, which can damage the tiles. Take precautions to prevent the tiles from cracking or splintering during the cutting process.
After cutting the holes, carefully remove the ceiling tiles and set them aside. Inspect the area above the drop ceiling for any additional obstructions or potential hazards. Ensure that the space is clear and accessible for wiring the can lights. If necessary, use a vacuum cleaner to remove any dust or debris that may have accumulated above the ceiling. This helps maintain a clean and safe working environment.
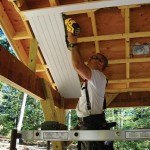
Now, bring the electrical wiring to each can light location. Run the appropriate gauge electrical wire (typically 14/2 or 12/2 NM-B) from the power source to the first can light location. Secure the wire along the joists or framing using wire staples, ensuring that the wire is not sagging or creating a hazard. Leave enough slack in the wire to allow for easy connection to the can light fixture. It is important to maintain a safe distance from any potential sources of heat or moisture.
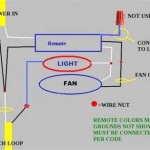
Connect the electrical wires to the can light fixture according to the manufacturer's instructions. Typically, this involves connecting the black (hot) wire to the black wire on the fixture, the white (neutral) wire to the white wire on the fixture, and the green (ground) wire to the green or bare copper wire on the fixture. Use wire connectors (e.g., wire nuts) to create secure and insulated connections. Ensure that the connections are tight and that no bare wire is exposed. Incorrect wiring can lead to electrical shorts or other hazards.
If installing multiple can lights on the same circuit, use the "daisy chain" method to wire them together. Run the electrical wire from the first fixture to the next, and so on, connecting the wires in parallel. Be sure to maintain consistent polarity (hot to hot, neutral to neutral, ground to ground) throughout the circuit. Use wire connectors to make secure connections at each fixture. Proper wiring minimizes voltage drop and ensures consistent light output from all the fixtures.
Key Point 3: Installing the Can Lights and Ensuring Proper Support
After the wiring is complete, carefully insert the can lights into the prepared holes in the ceiling tiles. Ensure that the can lights fit snugly and securely in the holes. Some can lights may have retaining clips or springs that help hold them in place. Follow the manufacturer's instructions for proper installation and securing of the can lights. A secure fit prevents the lights from shifting or falling out of the ceiling.
Drop ceiling tiles are often lightweight and may not provide sufficient support for the can lights. To provide additional support, consider using drop ceiling support wire or clips. Attach the support wire or clips to the ceiling grid or the framing above the drop ceiling. Suspend the can lights from the support wire or clips to distribute the weight and prevent strain on the ceiling tiles. Proper support is essential for the longevity and safety of the installation.
Once the can lights are installed and properly supported, carefully replace the ceiling tiles. Align the tiles with the ceiling grid and ensure that they are securely seated in place. Double-check that the can lights are centered in the holes and that they are aligned with each other. Make any necessary adjustments to ensure a professional and aesthetically pleasing appearance. A well-aligned installation enhances the overall look of the room.
Before restoring power to the circuit, visually inspect all wiring connections, can light installations, and ceiling tile placements. Ensure that all wire connectors are securely fastened, that no bare wires are exposed, and that the can lights are properly supported. Address any issues or concerns before proceeding. A thorough inspection minimizes the risk of problems after power is restored.
Finally, restore power to the circuit by switching the circuit breaker back to the "on" position. Test the can lights to ensure that they are functioning properly. Check for any flickering, dimming, or other anomalies. If any issues are detected, immediately disconnect the power and troubleshoot the wiring or fixture. Only after verifying that all can lights are working correctly should the installation be considered complete.
Consider the type of light bulbs to be used. LEDs are generally preferred for their energy efficiency, long lifespan, and low heat output. Ensure that the light bulbs are compatible with the can light fixtures and that they provide the desired level of illumination. Experiment with different types of light bulbs to achieve the desired lighting effect.
After the installation is complete, properly dispose of all waste materials, including wire scraps, packaging, and damaged ceiling tiles. Keep the work area clean and organized. Dispose of electrical waste according to local regulations. A clean and tidy work area promotes safety and professionalism.
Regularly inspect the can lights and wiring for any signs of damage or wear. Check for loose connections, frayed wires, or cracked fixtures. Address any issues promptly to prevent electrical hazards. Periodic maintenance ensures the continued safety and performance of the lighting system.

How To Install Recessed Lights In A Drop Ceiling Temecula Handyman

Light Installation In A Ceiling Tile

Installing Lightbulb During Recessed Lighting Installation Drop Ceiling Diy

How To Install Lighting In Your Ceiling Kanopi By Armstrong

Install Lighting In A Suspended Ceiling Doityourself Com

Operation Laundry Room Lighting Reality Daydream

Recessed Lighting In Basement Drop Ceiling Made Easy Suspended Ceilings And Recesse Dropped

Diy Recessed Lighting Installation In A Drop Ceiling Tiles Part 3 Super Nova Adventures

How To Change Downlights Or Recessed Lights In False Ceiling Electrician Singapore Recommended Services

How To Put Recessed Lights In The Ceiling
Related Posts