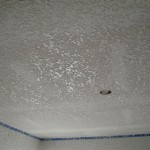
Painting high ceilings is a great way to add a touch of style and elegance to any room. However, it can be a tricky task to tackle. With a few simple steps, you can make sure your high ceilings look perfect. Here’s a step-by-step guide to painting high ceilings like a pro.
Step 1: Prepare the Room
Before you can start painting, you’ll need to make sure the room is properly prepared. Start by removing any furniture or other items from the room, and then cover the floor with a drop cloth or plastic sheeting to protect it from paint splatters. You should also make sure to open any windows to ensure proper ventilation.
Step 2: Prepare the Ceiling
Before you can start painting, you’ll need to make sure the ceiling is ready. Start by washing the ceiling with a mild detergent, and then use a putty knife to fill in any cracks or holes. Once that’s done, you can use sandpaper to smooth out any rough patches.
Step 3: Prime the Ceiling
Once the ceiling is clean and dry, it’s time to prime it. Use a primer that’s specifically designed for high ceilings, and make sure to cover the entire surface. Let the primer dry completely before you start painting.
Step 4: Paint the Ceiling
Now that the ceiling is primed, you can start painting. Use a roller for larger surfaces and a brush for smaller sections. When painting high ceilings, it’s important to use a slow, steady stroke to ensure an even finish. Start from the corners and work your way out, and make sure to use light, even strokes.
Step 5: Clean Up
Once you’re done painting, it’s time to clean up. Make sure to clean all of your brushes and rollers with soap and water, and then let them air dry. You should also vacuum up any dust and debris that may have accumulated during the painting process. Painting high ceilings can be a daunting task, but with the right steps it can be done easily. Follow these steps to ensure a perfect finish every time.


Related Posts


