How To Mount a Ceiling Fan on Angled Ceiling
Installing a ceiling fan can significantly improve air circulation and reduce energy costs. Mounting a ceiling fan on an angled ceiling, however, presents a unique challenge compared to a flat ceiling installation. This article provides a comprehensive guide on how to properly and safely mount a ceiling fan on an angled ceiling, covering necessary preparations, tools, and step-by-step instructions.
The primary difference between a flat ceiling and an angled ceiling installation stems from the need to ensure the fan hangs vertically, preventing wobble and potential damage. This requires specific mounting hardware and careful alignment. Ignoring the angle can lead to premature motor failure, blade imbalances, and even the fan detaching from the ceiling.
Before beginning any electrical work, it is crucial to prioritize safety. Turn off the circuit breaker that controls the power to the existing light fixture or electrical box in the room. Verify the power is off using a non-contact voltage tester. This simple step can prevent electrical shock and ensure a safe working environment. Wearing appropriate safety glasses is also recommended to protect eyes from debris that may fall during the installation process.
Key Point 1: Preparation and Assessing the Angle
The initial step involves preparing the workspace and assessing the angle of the ceiling. This information will determine the length of the downrod required and the type of mounting hardware needed. Accurate measurement is paramount for a successful installation.
First, clear the area directly below the installation point. Remove any furniture or cover it with drop cloths to protect it from dust and debris. Gather all necessary tools and materials, including the ceiling fan kit, angled mounting bracket, downrod (if not included), wire connectors, electrical tape, a screwdriver (Phillips and flathead), pliers, a wire stripper, a drill with appropriate drill bits, a level, a stud finder, a measuring tape, and safety glasses.
Next, determine the ceiling angle. This can be accomplished using a level and a protractor. Place the level against the ceiling and measure the angle between the level and the ceiling. Alternatively, some smartphones have built-in level and angle measurement apps that can provide accurate readings. Note this angle, as it will be crucial when selecting the correct angled mounting bracket and downrod length.
The electrical box currently installed in the ceiling must be rated for ceiling fan support. Examine the box for markings indicating its capacity to support the weight of a ceiling fan. Standard light fixture boxes are typically not strong enough and must be replaced with a fan-rated box. If the existing box is not fan-rated, a heavy-duty fan brace must be installed between the ceiling joists to provide adequate support.
The downrod length is critical for proper fan operation and aesthetics. A general rule is that the fan blades should be at least seven feet above the floor. Consider the ceiling height and the angle when determining the downrod length. An angled adapter might be necessary to compensate for extreme slopes. A longer downrod may be required on steeply angled ceilings to maintain sufficient blade clearance from the ceiling.
Key Point 2: Installing the Angled Mounting Bracket and Electrical Box
Replacing the existing electrical box and installing the angled mounting bracket are crucial steps in ensuring the ceiling fan is securely and safely mounted. This process requires careful attention to detail and adherence to electrical safety codes.
Begin by removing the existing light fixture. After confirming the power is off, carefully disconnect the wires connected to the light fixture. Use wire connectors to cap the exposed wires for safety. Remove the light fixture and the existing electrical box from the ceiling. If the existing box is nailed or screwed to a joist, it may be necessary to use a pry bar to carefully remove it. Be cautious not to damage the ceiling.
If the existing electrical box is not fan-rated, install a new, fan-rated box. This often involves installing a fan brace between the ceiling joists. The fan brace provides a secure anchor point for the electrical box and can support the weight of the ceiling fan. Follow the manufacturer's instructions for installing the fan brace and the new electrical box. Ensure the box is flush with the ceiling surface.
Next, install the angled mounting bracket. This bracket is specifically designed for angled ceilings and allows the fan to hang vertically. Attach the bracket to the electrical box following the manufacturer's instructions. Ensure the bracket is securely fastened and properly aligned. The angle of the bracket should compensate for the ceiling angle, allowing the fan to hang straight down. Use a level to verify the bracket is plumb. Tighten all screws and bolts securely.
The wiring is now prepared for the fan. Ensure proper wire connections when connecting the fan to the electrical wiring. Typically, there will be three wires: black (hot), white (neutral), and green or bare copper (ground). Connect the corresponding wires from the fan to the house wiring using wire connectors. Wrap the wire connectors with electrical tape for added security. Tuck the wires neatly into the electrical box.
Key Point 3: Assembling and Mounting the Ceiling Fan
The final stage involves assembling the ceiling fan, attaching it to the mounting bracket, and testing its operation. This requires careful attention to detail and adherence to the manufacturer's instructions.
Assemble the ceiling fan motor housing and blades according to the manufacturer's instructions. This typically involves attaching the blades to the blade holders and then securing the blade holders to the motor housing. Ensure all screws are tightened securely. Attach the downrod to the motor housing. The downrod should thread securely into the motor housing and be locked in place with a set screw. Ensure the set screw is tightened firmly.
Carefully lift the assembled fan motor housing and downrod and attach it to the angled mounting bracket. Most ceiling fans have a ball-and-socket joint at the top of the downrod that fits into a receiver on the mounting bracket. Ensure the ball is properly seated in the receiver and that the safety pin is engaged to prevent the fan from falling. Connect the wiring from the fan to the wiring in the electrical box, following the color-coded connections (black to black, white to white, and green to green). Use wire connectors to secure the connections and wrap them with electrical tape.
Carefully tuck the wires into the electrical box and attach the fan's canopy to the mounting bracket. The canopy covers the wiring and provides a finished look. Secure the canopy with the provided screws. Ensure the canopy is flush with the ceiling.
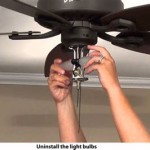
Finally, install the light kit, if included, according to the manufacturer's instructions. This typically involves connecting the light kit wiring to the fan wiring and attaching the light fixture to the fan motor housing. Install the light bulbs and test the fan's operation. Turn on the circuit breaker and test the fan's speed settings and the light kit. Listen for any unusual noises or vibrations. If the fan wobbles, adjust the blade weights or tighten the blade screws.
Inspect the installation for any loose connections or potential hazards. Ensure all screws are tightened and that the wiring is properly secured. Clean up the workspace and remove any debris. The ceiling fan is now safely and securely mounted on the angled ceiling and ready for use.
Properly mounting a ceiling fan on an angled ceiling requires careful planning, accurate measurements, and attention to detail. By following these instructions and prioritizing safety, individuals can successfully install a ceiling fan and enjoy its benefits for years to come.

How To Install A Ceiling Fan On Sloped Lemon Thistle

How To Install A Ceiling Fan On Sloped Lemon Thistle

Install Ceiling Fan On Sloped Simple Modern Handmade Home

Electrical Mount Ceiling Fan At The Peak Of A Sloped Home Improvement Stack Exchange
How To Install A Ceiling Fan On Vaulted Quora

Ensuring Proper Ceiling Fan Installation With Vaulted Ceilings

Mounting Ceiling Fan On Sloped Home Improvement Stack Exchange

How To Choose A Ceiling Fan For Vaulted Ceilings Lightology

Cathedral Ceiling Fan Installation Instructions

Fans On An Angle Installing Ceiling Angled Or Raked
Related Posts


