How to Make a False Ceiling at Home Depot Mexico
A false ceiling, also known as a drop ceiling, is a secondary ceiling suspended below the main ceiling. False ceilings offer numerous benefits, including improved aesthetics, better insulation, and easier access to wiring and plumbing. While installing a false ceiling might seem daunting, it can be done effectively with proper planning and materials. This guide will assist you with the process of building a false ceiling at Home Depot Mexico.
Step 1: Planning and Material Selection
Before embarking on the installation process, careful planning is crucial. This includes determining the desired height of the false ceiling, the area to be covered, and the type of materials needed. Home Depot Mexico offers a wide range of materials for false ceilings, including: *
Gypsum boards:
These are versatile and commonly used for false ceilings due to their lightweight nature, fire resistance, and sound insulation properties. *Metal grid system:
Metal grids are used to support the gypsum boards and come in various sizes and configurations. *Ceiling tiles:
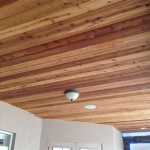
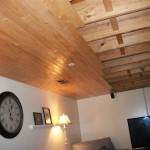
Ceiling tiles are available in a range of materials, colors, and designs, allowing for aesthetic customization. *Lighting fixtures:
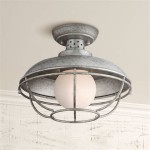
Choose lighting fixtures that complement the overall design and meet your lighting requirements. *Insulation material:
Installing insulation between the main ceiling and the false ceiling enhances energy efficiency and reduces noise levels.Once you have determined the desired materials, visit Home Depot Mexico to purchase them. Their helpful staff can assist you in choosing the right materials and provide guidance on quantities and installation.
Step 2: Preparing the Existing Ceiling
Adequately preparing the existing ceiling is crucial for a successful installation. This involves: *
Cleaning the existing ceiling:
Remove any dust, dirt, or debris from the main ceiling surface. *Inspecting for structural defects:
Check for any cracks, leaks, or other structural issues that may need to be addressed before installing the false ceiling. *Marking the ceiling for grid installation:
Use a level and pencil to mark the perimeter of the area to be covered by the false ceiling. *Installing electrical wiring and plumbing:
If you need to install electrical wiring or plumbing within the false ceiling, ensure it is done before installing the grid system.By thoroughly preparing the existing ceiling, you create a smooth and stable surface for the false ceiling installation.
Step 3: Installing the Grid System
The metal grid system provides structural support for the false ceiling and makes it easier to install gypsum boards or ceiling tiles. Follow these steps: *
Attaching runners to the walls:
Using screws and anchors, attach the runners to the walls along the marked perimeter. *Connecting cross tees:
Install cross tees perpendicular to the runners, creating a grid pattern. Ensure the cross tees are level and securely attached to the runners. *Adjusting grid height:
Before securing the grid system, ensure the desired height is achieved. Use spacers or adjust the runner positions as needed. *Securing the grid system:
Once the grid is properly configured, secure the cross tees and runners to the walls and ceiling using appropriate fasteners.A properly installed grid system provides a robust framework for supporting the false ceiling and allows for easy adjustments later on.
Step 4: Installing Gypsum Boards or Ceiling Tiles
After the grid system is in place, you can begin installing the gypsum boards or ceiling tiles. *
Installing gypsum boards:
Align the gypsum boards with the grid system and secure them using screws. Ensure the boards are flush with the grid and create a seamless surface. *Installing ceiling tiles:
Ceiling tiles are typically secured into the grid system by snapping into place. Refer to the manufacturer's instructions for specific tile installation methods. *Applying joint compound:
After installing the gypsum boards, use joint compound to fill any gaps between the boards. This creates a smooth and even surface. *Sanding and painting:
Once the joint compound has dried, sand the surface to remove any unevenness. Apply a primer and then paint the false ceiling to match the desired color and style.By installing the chosen materials carefully and paying attention to detail, you can achieve a professional-looking false ceiling.
Step 5: Finishing Touches
Once the false ceiling is installed, you can add finishing touches to complete the project. This may include: *
Installing lighting fixtures:
Install the lighting fixtures you have chosen, ensuring proper wiring and installation. *Adding trim:
Install molding or trim around the perimeter of the false ceiling to create a clean and finished look. *Adding additional insulation:
Install acoustic insulation panels or other sound-absorbing materials to enhance noise reduction.These finishing touches will enhance the aesthetics and functionality of the false ceiling.
Installing a false ceiling at Home Depot Mexico is a rewarding project that can significantly improve the appearance and functionality of your home. By following these steps and selecting the right materials, you can achieve a professional-looking and functional false ceiling that adds value to your property.

Hg Grid 100 Sq Ft Suspended Ceiling Kit White

Hg Grid 100 Sq Ft Suspended Ceiling Kit White

12pcs White Pvc Ceiling Tiles 24 X24 Decorative Plastic Panels 48 Sq Ft Coverage Paintable Rustless Durable Paneling For Home Ren

Hg Grid 100 Sq Ft Suspended Ceiling Kit White

Easy Installation Of Er Friendly Ceiling Tiles With Double Sided Mounting Tape Tiktok

Hg Grid 100 Sq Ft Suspended Ceiling Kit White

Hg Grid 100 Sq Ft White Suspended Ceiling Kit 39900 The Home Depot

Hg Grid 100 Sq Ft Suspended Ceiling Kit White

Sample Of Styrofoam Ceiling Tile Cover Popcorn Easy Diy Installation Glue Up Over Or Any Flat Surface 1

Ceiling Tiles The Home Depot
Related Posts