How to Make Ceiling Design Step by Step
Ceiling design is a crucial aspect of interior aesthetics, significantly impacting the overall ambiance and perceived value of a space. Moving beyond the standard flat, white surface, thoughtful ceiling design can introduce texture, depth, and visual interest, transforming a room from mundane to magnificent. This guide provides a comprehensive, step-by-step approach to creating compelling and functional ceiling designs, encompassing planning, material selection, and practical installation techniques.
1. Planning and Conceptualization
The initial stage of any successful ceiling design project revolves around meticulous planning and conceptualization. This phase involves a thorough assessment of the existing architectural context, desired aesthetic outcome, and budgetary constraints. A well-defined plan minimizes errors, reduces material waste, and ensures a cohesive final product.
Firstly, it is essential to consider the existing architectural style of the space. A modern minimalist interior, for example, would necessitate a significantly different ceiling design than a traditional Victorian-style room. Elements such as ceiling height, room size, and existing architectural details (e.g., crown molding, window placement) will influence the choice of materials and design approach. Low ceiling heights may benefit from designs that visually elongate the space, such as recessed lighting or strategically placed vertical lines. Conversely, high ceilings can accommodate more elaborate designs, including coffered ceilings or intricate moldings.
Next, define the desired aesthetic outcome. This involves determining the overall mood and style the ceiling design should evoke. Consider the influence of color, texture, and lighting on the perceived atmosphere. A warm, inviting space might incorporate natural wood finishes and soft, ambient lighting, while a modern, sophisticated space may benefit from sleek, geometric designs and integrated LED lighting. Gather inspiration from various sources, such as interior design magazines, online platforms, and architectural publications. Creating a mood board can be helpful in visually representing the desired aesthetic and ensuring a consistent design direction.
Furthermore, establish a realistic budget for the project. This should encompass the cost of materials, labor (if professional installation is required), and any necessary tools or equipment. Obtain quotes from multiple suppliers and contractors to ensure competitive pricing. Prioritize spending on high-quality materials and experienced labor, as these factors will significantly impact the longevity and visual appeal of the finished product. It is also prudent to allocate a contingency fund to account for unforeseen expenses or design modifications.
Finally, create detailed drawings or sketches of the proposed ceiling design. These visual representations will serve as a guide during the installation process and facilitate communication with contractors or suppliers. Include precise measurements, material specifications, and lighting layouts. Consider using computer-aided design (CAD) software to create more accurate and professional-looking drawings, especially for complex designs.
2. Material Selection and Preparation
The choice of materials is paramount in achieving the desired aesthetic and functional properties of the ceiling design. A wide array of materials is available, each possessing unique characteristics in terms of appearance, durability, cost, and ease of installation. Careful consideration should be given to these factors when selecting the appropriate materials for the project.
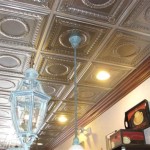
Popular ceiling materials include drywall, plaster, wood, metal, and suspended ceiling tiles. Drywall is a versatile and cost-effective option, suitable for creating smooth, seamless surfaces. It can be easily painted or textured to achieve various aesthetic effects. Plaster offers a more traditional and durable alternative to drywall, providing a smooth, high-quality finish. Wood adds warmth and natural texture to a space, and can be used in various forms, such as planks, beams, or panels. Metal, such as aluminum or steel, offers a sleek and modern aesthetic, and is often used in commercial or industrial settings. Suspended ceiling tiles are a practical option for concealing utilities and improving acoustic performance, particularly in office spaces.
Consider the environmental impact of the chosen materials. Opt for sustainable and eco-friendly options whenever possible, such as reclaimed wood, recycled metal, or low-VOC paints. These materials not only reduce the environmental footprint of the project but also contribute to a healthier indoor environment.
Before commencing the installation, thoroughly prepare the selected materials. This may involve cutting drywall to size, sanding wood surfaces, or priming metal panels. Ensure that all materials are clean, dry, and free from defects. Proper preparation will significantly improve the quality and longevity of the finished ceiling design.
Gather all necessary tools and equipment before starting the installation process. This may include a measuring tape, level, saw, drill, screwdriver, hammer, and safety glasses. Ensure that all tools are in good working order and that you are familiar with their proper use. Investing in high-quality tools will facilitate the installation process and improve the overall quality of the finished product.
3. Installation Techniques and Best Practices
The installation process requires careful attention to detail and adherence to best practices to ensure a structurally sound and aesthetically pleasing result. The specific installation techniques will vary depending on the chosen materials and design, but certain fundamental principles apply to all ceiling design projects.
Firstly, prioritize safety. Wear appropriate safety gear, such as safety glasses, gloves, and a dust mask, to protect yourself from potential hazards. Work in a well-ventilated area to minimize exposure to dust and fumes. If working at heights, use a sturdy ladder or scaffolding and ensure that it is properly secured. Turn off the power supply to any electrical fixtures in the ceiling before commencing work to prevent electrical shock.
Begin by establishing a level reference line around the perimeter of the room. This line will serve as a guide for aligning the ceiling panels or framing. Use a laser level or a spirit level to ensure accuracy. Any deviations from level will be magnified as the installation progresses, resulting in an uneven and unprofessional-looking finish.
For drywall or plaster ceilings, install furring strips or metal channels to provide a secure surface for attaching the panels. Space the furring strips or channels according to the manufacturer's recommendations. Ensure that they are securely fastened to the existing ceiling joists or framing. Use appropriate fasteners, such as screws or nails, depending on the type of framing material.
When installing wood planks or panels, use a nail gun or screws to secure them to the furring strips or framing. Stagger the joints between the planks or panels to create a more visually appealing and structurally sound surface. Leave a small gap between the planks or panels to allow for expansion and contraction due to changes in temperature and humidity.
For suspended ceiling tiles, install the grid system according to the manufacturer's instructions. Ensure that the grid is level and properly aligned before installing the tiles. Use appropriate hangers to suspend the grid from the existing ceiling joists or framing. Carefully cut the tiles to fit around light fixtures, pipes, and other obstructions.
Pay close attention to detail during the finishing process. Fill any gaps or cracks with joint compound or caulk. Sand the surfaces smooth and remove any dust or debris. Apply a primer and paint to achieve the desired color and finish. Consider adding decorative moldings or trim to enhance the aesthetic appeal of the ceiling design.
4. Lighting Integration and Considerations
Effective lighting integration is crucial for enhancing the visual impact and functionality of a ceiling design. The type, placement, and intensity of lighting fixtures can significantly influence the ambiance and perceived size of a room. Thoughtful lighting design should complement the overall aesthetic and address the specific needs of the space.
Recessed lighting is a popular choice for modern ceiling designs, providing a clean and minimalist look. Recessed fixtures can be strategically placed to highlight specific areas of the room or to provide general ambient lighting. Select fixtures with adjustable beam angles and dimming capabilities to customize the lighting to suit different needs.
Pendant lights are ideal for adding decorative flair and providing focused illumination over specific areas, such as dining tables or kitchen islands. Choose pendant lights that complement the overall style of the room and provide adequate light for the intended purpose. Consider the size and scale of the pendant lights in relation to the size of the room.
Track lighting offers flexibility and versatility, allowing you to easily adjust the direction and focus of the light. Track lighting is particularly well-suited for highlighting artwork or architectural features. Choose track lighting fixtures that complement the overall style of the room and provide adequate light for the intended purpose.
Consider the color temperature of the lighting fixtures. Warm white light (2700-3000K) creates a cozy and inviting atmosphere, while cool white light (4000-5000K) provides a brighter and more energizing feel. Choose lighting fixtures with a color temperature that complements the overall aesthetic of the room.
Incorporate natural light whenever possible. Maximize the use of windows and skylights to bring natural light into the space. Natural light can significantly enhance the ambiance and reduce the need for artificial lighting. Consider using light-reflecting materials on the ceiling to bounce natural light around the room.
Consult with a qualified electrician to ensure that the lighting installation complies with all applicable electrical codes and safety regulations. Proper wiring and grounding are essential for preventing electrical hazards. Obtain all necessary permits before commencing the lighting installation.

How To Make A False Ceiling Design With Lighting Houzz

Latest False Ceiling Designs For Drawing Room Beautiful Homes

34 Trending False Ceiling Designs For Your Beautiful Bedroom 2024

40 Pop Ceiling Design Ideas For Hall 2024

20 Stunning False Ceiling Design Ideas Designs Types Amp Materials

False Ceiling Design Singapore Stylish Designs

11 False Ceiling Design Ideas Can Reform Your Living Space

10 Stunning False Ceiling Room Designs To Elevate Your Home Nerolac

10 Latest False Ceiling Design Ideas For Your Stunning Home By Livspace

False Ceiling Designs You Can Actually Use 72 Rates
Related Posts