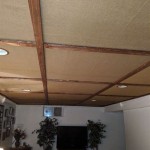
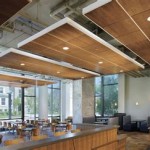
How To Make a Faux Tray Ceiling in Revit
Creating a faux tray ceiling in Revit is a versatile technique that can add visual interest and a touch of sophistication to a space. This design element, often used in residential and commercial projects, can be achieved through various methods within the software, depending on the desired effect. This article outlines a step-by-step guide to creating a faux tray ceiling in Revit, focusing on common approaches and key considerations.
1. Define the Ceiling Geometry
The first step is to establish the basic geometry of the ceiling. This involves defining the overall ceiling area, including any variations in height or shape.
1.1 Creating the Main Ceiling
Begin by drawing a rectangle or other shape representing the main ceiling plane. This is typically done using the "Line" or "Rectangle" tools in Revit's "Draw" tab. Ensure that the ceiling is accurately positioned and aligned to the walls of the room.
1.2 Defining the Tray Shape
Next, define the tray shape itself. This can be a simple rectangle, a more complex curved design, or even an irregular shape. Create this shape using the same drawing tools, making sure it's entirely within the main ceiling area.
1.3 Extrude the Shapes
After creating both the main ceiling and the tray shape, extrude them to create solid volumes. This step gives the ceiling its depth and structure. Use the “Extrude” tool, specifying the appropriate height for both the main ceiling and the tray. The tray should be extruded to a lower height than the main ceiling, creating the recessed effect.
2. Creating the Visual Effect
Once the geometry is established, focus on creating the visual effect of the faux tray ceiling. This involves adjusting materials, adding details, and exploring different lighting strategies to enhance the design.
2.1 Applying Materials
Apply materials to both the main ceiling and the tray area. For the main ceiling, one can opt for a standard ceiling material or experiment with different finishes like wood, plaster, or metal. The tray ceiling can be given a contrasting material to emphasize its recessed nature. This might involve using a darker shade, a textured surface, or a different material altogether.
2.2 Adding Trim and Molding
To further enhance the appearance, add trim and molding around the perimeter of the tray ceiling. This adds a visual emphasis to the recessed area and can complement the overall design aesthetics. Create trim using Revit's "Wall" tool, adjusting its width and profile to match the desired design.
2.3 Lighting Considerations
Lighting plays a crucial role in accentuating the faux tray ceiling. Consider incorporating recessed lighting within the tray itself to highlight the recessed area and create a focal point. Alternatively, use pendant lights or track lighting to cast shadows that further enhance the visual impact.
3. Additional Details and Refinement
Finally, consider adding additional details to the faux tray ceiling for a more refined and realistic look.
3.1 Adding Cornices
Consider adding cornices to the perimeter of the tray ceiling to visually enhance the transition between the tray and the main ceiling. Use Revit's "Wall" tool to create the cornice, adjusting its height and profile to fit the design.
3.2 Creating Custom Shapes
For more elaborate designs, explore the option of creating custom shapes for the tray ceiling. This can involve utilizing Revit's "Form" tool to construct complex geometries or importing 3D models from external software.
3.3 Using Materials for Texture and Depth
Experiment with different materials and their properties to add texture and depth to the faux tray ceiling. For instance, using a material with a wood grain or a textured plaster can create a more realistic and visually appealing effect.
By following these steps, users can effectively create a faux tray ceiling in Revit, adding depth, visual interest, and sophistication to their project designs.

6 Types Of Ceilings Modeled In Revit Tutorial Ceiling

6 Types Of Ceilings Modeled In Revit Tutorial Ceiling

How To Create Classic False Ceiling In Revit Architecture

6 Types Of Ceilings Modeled In Revit Tutorial Ceiling

How To Create Classic False Ceiling In Revit Architecture

Ceiling In Revit Tutorial Smart Suspended

Revit Tutorial Coffered Ceiling Model In Place

Classical Coffered Ceiling In Revit Tutorial

How To Create Mesh Ceiling In Revit

How To Create Mesh Ceiling In Revit
Related Posts

