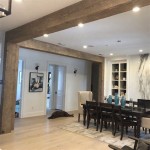
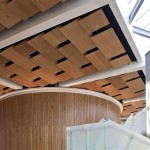
Crafting a Coffered Ceiling in Revit Family: A Comprehensive Guide
Coffered ceilings, with their intricate recessed panels and moldings, exude a sense of grandeur and architectural prowess. Creating such ceilings in Revit Family requires a comprehensive understanding of the design principles and technical execution involved. Here's a step-by-step guide to help you navigate this process effectively.
1. Establish a Grid for Panel Layout
Define the dimensions and spacing of the panels based on aesthetic preferences and room proportions. Create a rectangular grid using the "Extrude" tool to establish the basic frame of the coffered ceiling.
2. Model the Recessed Panels
Select one of the panels on the grid and use the "Void" tool to create a rectangular opening. Adjust the depth of the void to match the desired recess height. Use the "Sweep" tool to create moldings around the perimeter of the panel opening, adding depth and definition.
3. Create the Coffered Beams
Draw the cross-sectional profile of the beam using the "Sketch" tool. Extrude the sketch to form the beam, then align it with the grid lines between the panels. The beam width should correspond to the panel spacing to create a seamless transition.
4. Design the Molding Profiles
Moldings add intricate details and elegance to the ceiling. Use the "Sweep" tool to create custom molding profiles based on architectural references or preferences. Align the profiles with the beams and panels to enhance the visual appeal.
5. Add Lighting Elements
Coffered ceilings often incorporate lighting elements to illuminate the recesses and highlight the intricate detailing. Use the "Ceiling Light" or "Recessed Light" families in Revit to add lighting fixtures to the ceiling.
6. Add Materials and Textures
Assign appropriate materials and textures to the ceiling elements to create realistic finishes. Select materials for the panels, beams, moldings, and lighting fixtures to complement the overall design scheme.
7. Create a Revit Family
Once the coffered ceiling elements are complete, group them together to create a Revit Family. This allows for easy insertion and repetition in other Revit projects, saving time and ensuring design consistency.
Tips for Realistic Coffered Ceilings:
- Use accurate dimensions and proportions to maintain scale and realism.
- Pay attention to the depth and shape of the recesses and moldings for visual impact.
- Experiment with different lighting options to create ambiance and highlight architectural features.
- Refer to architectural drawings and examples for inspiration and design guidance.
Creating coffered ceilings in Revit Family requires patience, precision, and an understanding of the design principles involved. By following these steps and incorporating the tips provided, you can create stunning and realistic coffered ceilings that enhance the architectural impact of your Revit projects.

Classical Coffered Ceiling In Revit Tutorial

Revit Tutorial Coffered Ceiling Model In Place

Classical Coffered Ceiling In Revit Tutorial

Revit Tutorial Coffered Ceiling Model In Place

Rd052 How To Make A Coffered Ceiling Waffle In Revit

Revit Rocks Cadclip Waffled Or Coffered Ceiling Tutorial

Ceilings In Revit Tutorial Sloped Ceiling Arc Floor Integrated

Creating A Coffered Ceiling With Curtian Wall In Architectural Desktop

Creating A Coffered Ceiling With Curtian Wall In Architectural Desktop

5 Things You Need To Know About Coffered Ceilings Intrim Mouldings
Related Posts