How to Make a Ceiling Fan Remote Control
Creating a custom remote control for a ceiling fan offers a unique way to integrate the appliance into a smart home system or simply replace a lost or broken remote. This process involves understanding the signals used by ceiling fans and utilizing appropriate electronic components. This article provides a guide for creating a basic remote using a microcontroller, a radio frequency (RF) transmitter, and a receiver.
1. Gather the Necessary Components
The project requires specific electronic parts including an Arduino Uno (or similar microcontroller), an RF transmitter and receiver pair (e.g., 433MHz), a breadboard, jumper wires, a suitable enclosure for the remote, buttons for the controls, and a power source (batteries or a DC adapter). Selecting components with compatible voltage and current ratings is crucial for proper functionality and safety. Datasheets for each component should be consulted for detailed specifications.
2. Understanding Ceiling Fan Signals
Most ceiling fans operate using RF signals to control functions like fan speed and light activation. These signals are usually pulse-width modulated (PWM) signals or specific coded transmissions. Analyzing the signals from the original remote using an oscilloscope or a logic analyzer is essential. This allows for replicating the signals with the custom remote. Understanding the frequency, pulse width, and data encoding scheme is critical for successful communication between the remote and the fan.
3. Programming the Microcontroller
The microcontroller, in this case, an Arduino Uno, acts as the brain of the remote. It needs to be programmed to send the correct signals to the RF transmitter. The Arduino IDE (Integrated Development Environment) software is utilized to write and upload the code. The code should include instructions for reading the button presses, generating corresponding signals mimicking the original remote, and transmitting these via the RF transmitter. Libraries for RF communication and button handling will likely be required and can be readily downloaded within the Arduino IDE.
Sample code demonstrating basic RF transmission might look like this (simplified example and will require modification based on the specific RF module used):
#include
RCSwitch mySwitch = RCSwitch();
const int buttonPin = 2;
void setup() {
  Serial.begin(9600);
  mySwitch.enableTransmit(10); // Specify transmitter pin
  pinMode(buttonPin, INPUT_PULLUP);
}
void loop() {
  if (digitalRead(buttonPin) == LOW) {
    mySwitch.send(1234, 24); // Example data and bit length
    Serial.println("Signal sent");
    delay(500); // Debouncing
  }
}
This code example utilizes the RCSwitch library to send a simple signal. It needs to be adapted to send the correct signals for your specific ceiling fan model. This involves identifying the appropriate values to send using `mySwitch.send()`.
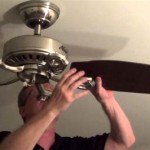
4. Connecting the Hardware
Once the code is written and tested, the hardware components need to be connected according to a circuit diagram. The RF transmitter connects to a digital pin on the Arduino, while the buttons connect to other digital pins, ideally using pull-up or pull-down resistors. A well-organized breadboard facilitates prototyping and testing before moving to a more permanent setup. Ensure all connections are secure and correct to prevent malfunctions or damage.
5. Testing the Remote
After assembling the circuit, test the remote's functionality. Upload the code to the Arduino and power the circuit. Pressing the buttons should transmit the corresponding signals. Observe the ceiling fan's response. If the fan reacts as expected, the remote is working correctly. If not, re-check the signal analysis, code, and wiring for errors. Debug by using the serial monitor in the Arduino IDE to print values and check for inconsistencies.
6. Enclosing the Remote
Finally, house the components within a suitable enclosure. This protects the electronics and provides a user-friendly interface. The enclosure should accommodate the buttons, power source, and the circuit board. Labeling the buttons clearly improves usability. Choose an enclosure size and material appropriate for the project, considering aesthetics and practicality.
7. Advanced Features (Optional)
Expanding the project to include features like dimming, multiple fan control, or integration with home automation systems is possible. This requires more complex programming and potentially additional hardware. Utilizing libraries and online resources can assist in implementing these advanced functionalities.

क ई भ फ न चल ओ र म ट स How To Make Remote Control Fan Normal Into

How To Make Remote Control Fan At Easy

न र मल स ल ग फ क म ट चल ओ How To Make Remote Control For Fan Ceiling

How To Make A Digital Fan Regulator Diy Smart Humming Free

How To Make A Ceiling Fan With Light And Remote Smart Complete Step By Guide

How To Make Your Fan Smart Any A Control With Smartphone And Ir Remote

Diy Smart Home Project Arduino Based Ceiling Fan Control With Ir Sensor And Remote Arduinoprojects

How To Make Remote Control Fan Sd Circuit Using Cd4017

How To Install A Ceiling Fan Remote Diy Family Handyman

How To Make Remote Control Fan Ii Use Any Change Sd And On Off Smart Ceiling
Related Posts