How to Install Recessed Lighting in a Suspended Ceiling
Installing recessed lighting in a suspended, or drop, ceiling can significantly enhance the aesthetic appeal and functionality of a space. This type of lighting provides a clean, modern look while offering focused or ambient illumination. The process, while manageable for a reasonably skilled DIY enthusiast, requires careful planning, adherence to safety protocols, and a thorough understanding of electrical wiring and ceiling structure. This article provides a comprehensive guide on installing recessed lighting in a suspended ceiling.
First and foremost, safety is paramount. Before initiating any electrical work, it is crucial to disconnect the power supply to the circuit you will be working on. Locate the appropriate circuit breaker in your electrical panel and switch it to the "off" position. Verify that the power is indeed off by using a non-contact voltage tester on the wires you intend to manipulate. This step is non-negotiable and should be meticulously followed to prevent electrical shock. Also, ensure that the work area is well-ventilated, and wear appropriate safety gear, including safety glasses.
Next, careful planning is essential for a successful installation. This involves determining the optimal placement of the recessed lights, considering factors such as room size, existing light sources, and desired lighting effect. A well-thought-out lighting plan will ensure even illumination and prevent hotspots or areas of inadequate lighting. It is advisable to sketch a diagram of the ceiling grid, marking the intended locations of the recessed lights. This will serve as a visual guide during the installation process.
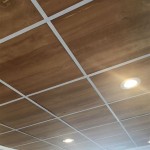
Understanding the structure of a suspended ceiling is also crucial. Suspended ceilings consist of a grid of metal runners (the framework) and tiles or panels that sit within the grid. The grid is typically suspended from the structural ceiling above using wires. These wires must be avoided during the installation process. Furthermore, it’s important to ensure that the weight of the recessed lights, including the housing, is adequately supported. The existing grid may require reinforcement depending on the weight and number of lights being installed.
Key Point 1: Preparation and Planning
Effective preparation and planning are the cornerstones of a successful recessed lighting installation. This phase involves several critical steps, each contributing to a safe and aesthetically pleasing outcome.
1.1. Lighting Layout and Design: The initial step is to create a detailed lighting layout. Consider the room's purpose, size, and existing light sources. For instance, a kitchen might require brighter, more focused lighting over countertops and islands, while a living room might benefit from softer, more ambient light. Determine the number of recessed lights needed based on the room's dimensions and desired light levels. A common rule of thumb is to space recessed lights approximately two feet away from walls and four to six feet apart from each other. Also, consider the beam angle of the lights you are installing. A narrow beam angle will create spotlights, while a wider beam angle will provide more diffused light.
1.2. Product Selection: Choose recessed lighting fixtures that are specifically designed for suspended ceilings. These fixtures typically have integrated junction boxes and mounting hardware that are compatible with the grid system. Consider the type of bulb you want to use (LED, incandescent, halogen). LED bulbs are generally preferred for their energy efficiency and long lifespan. Ensure that the chosen fixtures are UL-listed or ETL-listed, indicating that they have been tested and certified for safety. Select the appropriate trim style to match the room's décor. Trims are available in various finishes and designs, including baffle, reflector, and eyeball trims.
1.3. Material Acquisition: Gather all necessary materials and tools before commencing the installation. This includes the recessed lighting fixtures, electrical wiring (typically 12/2 or 14/2 NM cable, depending on local electrical codes and the circuit breaker rating), wire connectors (wire nuts), a wire stripper, a voltage tester, a drill with appropriate drill bits, a hole saw (matching the diameter of the recessed light housing), a measuring tape, a pencil, safety glasses, and work gloves. Additionally, gather any required support brackets or reinforcement materials for the ceiling grid. A stud finder might also be useful if you're unsure where the ceiling joists are located above the suspended ceiling.
1.4. Understanding Local Codes: Familiarize yourself with local electrical codes and building regulations regarding recessed lighting installations. These codes are in place to ensure safety and prevent electrical hazards. Local codes may specify the type of wiring required, the spacing between fixtures, and the need for permits. Contact your local building department to obtain the necessary information and permits before starting the project. Failure to comply with local codes can result in fines or the need to redo the installation.
By meticulously planning the layout, selecting appropriate materials, and understanding local codes, you lay a solid foundation for a safe and successful recessed lighting installation.
Key Point 2: Installation Procedure
Once the planning and preparation phase is complete, the next step is to execute the installation. This requires careful attention to detail and adherence to safety guidelines.
2.1. Marking and Cutting the Ceiling Tiles: Using the lighting layout as a guide, precisely mark the locations for the recessed lights on the suspended ceiling tiles. Use a measuring tape and pencil to ensure accurate placement. Employ a hole saw of the appropriate diameter to cut the holes in the ceiling tiles. Start by drilling a pilot hole in the center of the marked circle. Then, carefully guide the hole saw along the marked line, applying even pressure to create a clean, circular cut. Take precautions to prevent the ceiling tile from cracking or splintering during the cutting process. Support the tile from underneath while cutting to provide stability. Consider using a shop vacuum to collect dust and debris generated during the cutting process.
2.2. Wiring the Fixtures: With the power supply disconnected, run the electrical wiring from the existing circuit to the location of the first recessed light fixture. Ensure that the wiring is appropriately sized according to local electrical codes and the circuit breaker rating. Use wire strippers to carefully strip the insulation from the ends of the wires, exposing the copper conductors. Connect the wires to the recessed light fixture's junction box using wire connectors (wire nuts). Connect the black wire (hot) to the black wire, the white wire (neutral) to the white wire, and the green or bare copper wire (ground) to the grounding terminal in the junction box. Ensure that all connections are secure and properly insulated to prevent shorts or electrical hazards. Secure the wiring to the ceiling grid using cable staples or zip ties to prevent it from sagging or interfering with the tiles.
2.3. Installing the Fixtures: Carefully insert the recessed light fixture into the pre-cut hole in the ceiling tile. Most recessed light fixtures designed for suspended ceilings have spring clips or other mounting hardware that secure them to the grid. Ensure that the fixture is properly seated and flush with the ceiling tile. If necessary, use support brackets or reinforcement materials to provide additional support to the ceiling grid, especially if the fixtures are heavy. Connect the wiring from the first fixture to the next, repeating the wiring process described above. Continue this process until all fixtures are wired and installed. Ensure that the wiring is neatly organized and securely fastened to the ceiling grid.
2.4. Testing and Troubleshooting: Once all fixtures are installed, double-check all wiring connections to ensure that they are secure and properly insulated. Restore power to the circuit by switching the circuit breaker back to the "on" position. Test each recessed light fixture to ensure that it is functioning correctly. If a fixture does not light up, turn off the power and check the wiring connections. Look for loose wires, incorrect connections, or damaged components. Use a voltage tester to verify that power is reaching the fixture. If the problem persists, consult a qualified electrician to diagnose and repair the issue.
By carefully following these installation steps and adhering to safety guidelines, you can successfully install recessed lighting in a suspended ceiling.
Key Point 3: Addressing Specific Challenges
While the general installation process is relatively straightforward, certain challenges may arise when installing recessed lighting in a suspended ceiling. Addressing these challenges effectively is crucial for ensuring a safe and professional outcome.
3.1. Working Around Obstructions: Suspended ceilings often contain various obstructions, such as ductwork, plumbing pipes, and electrical conduits. These obstructions can interfere with the placement of recessed lights and require adjustments to the lighting layout. If an obstruction is encountered, carefully assess the situation and determine if it is possible to relocate the fixture slightly to avoid the obstruction. If relocation is not feasible, consider using a smaller recessed light fixture or a different type of lighting altogether, such as track lighting or surface-mounted lighting. Avoid cutting into or damaging any existing infrastructure, such as ductwork or plumbing pipes.
3.2. Supporting Heavy Fixtures: Some recessed light fixtures, especially those with larger housings or integrated transformers, can be quite heavy. The existing suspended ceiling grid may not be able to adequately support the weight of these fixtures, leading to sagging or instability. To address this issue, reinforce the ceiling grid by adding additional support wires or brackets. These supports can be attached to the structural ceiling above the suspended ceiling, providing a more robust foundation for the fixtures. Ensure that the supports are properly installed and securely fastened to both the ceiling grid and the structural ceiling. Distribute the weight of the fixtures evenly across the grid to minimize stress on any one point.
3.3. Dealing with Asbestos: In older buildings, suspended ceiling tiles may contain asbestos. Asbestos is a hazardous material that can cause serious health problems if inhaled. If you suspect that the ceiling tiles may contain asbestos, do not attempt to disturb or remove them yourself. Contact a qualified asbestos abatement professional to inspect the tiles and determine the appropriate course of action. Asbestos abatement should only be performed by licensed and trained professionals using specialized equipment and procedures to minimize the risk of exposure.
3.4. Ensuring Proper Ventilation: Recessed light fixtures can generate heat, which can build up in the ceiling cavity. This heat buildup can reduce the lifespan of the fixtures and pose a fire hazard. To ensure proper ventilation, select recessed light fixtures that are IC-rated, meaning that they are approved for direct contact with insulation. If using non-IC-rated fixtures, maintain a minimum clearance of 3 inches between the fixture and any insulation or other combustible materials. Consider installing ventilation holes or vents in the ceiling tiles to allow for airflow. Monitor the temperature of the ceiling cavity periodically to ensure that it is not overheating.
By proactively addressing these challenges, installers can achieve a safe and professional recessed lighting installation in a suspended ceiling, enhancing both the functionality and aesthetics of the space.

How To Install Recessed Lights In A Drop Ceiling Temecula Handyman

Light Installation In A Ceiling Tile

How To Put Recessed Lights In The Ceiling

How To Install Recessed Lighting With Ceilume Ceiling Tiles

How To Install Recessed Lights In A Drop Ceiling Temecula Handyman

Drop Ceiling Installation How To Install A Homeserve Usa

How To Install Recessed Lights In A Drop Ceiling The Home Depot

Drop Ceiling Tiles Installation Tips Diy Family Handyman

How To Install Recessed Lighting Fixthisbuildthat

Diy Recessed Lighting Installation In A Drop Ceiling Tiles Prep Work Super Nova Adventures Dropped Finishing Basement
Related Posts

