How to Install PVC Beadboard Ceiling: A Comprehensive Guide
PVC beadboard ceilings offer a visually appealing, water-resistant, and durable alternative to traditional ceiling materials. Ideal for bathrooms, kitchens, laundry rooms, or any area prone to moisture, PVC beadboard is relatively lightweight and easy to install, making it a popular choice for both DIY enthusiasts and professional contractors. This article provides a detailed, step-by-step guide on how to install a PVC beadboard ceiling, covering essential tools, materials, preparation, and installation techniques.
Key Point 1: Preparation and Planning
Proper preparation is paramount for a successful PVC beadboard ceiling installation. This involves accurate measurements, careful material selection, and thorough surface preparation. A rushed or incomplete preparation phase can lead to installation errors, resulting in an uneven or unstable ceiling.
Measuring the Ceiling Area: The first step is to accurately measure the length and width of the ceiling. This provides the necessary information to calculate the total square footage and determine the quantity of beadboard panels required. It is advisable to add an extra 10% to the total square footage to account for cuts, waste, and potential errors during installation. Accurately measuring the ceiling prevents the need for additional trips to the store and ensures sufficient material for the entire project.
Selecting the Right Materials: Choose high-quality PVC beadboard panels designed for ceiling applications. These panels are typically tongue-and-groove, allowing for a seamless and secure connection. Consider the panel thickness, color, and finish to match the aesthetic of the room. In addition to the panels, gather the following materials: furring strips (typically 1x3 or 1x4 lumber), construction adhesive, appropriate fasteners (nails or screws), trim pieces (crown molding, baseboard, or cove molding), paint (optional, for trim), caulk, and shims.
Preparing the Ceiling Surface: Before installing the furring strips, inspect the existing ceiling for any damage, such as water stains, cracks, or loose plaster. Repair any damage to create a stable and level surface. Existing popcorn ceilings should be scraped off or covered with a smooth layer of drywall compound to provide a clean, flat surface for the furring strips. Clean the ceiling thoroughly to remove any dust, dirt, or debris. This ensures proper adhesion of the furring strips and prevents contaminants from interfering with the installation.
Installing Furring Strips: Furring strips provide a secure framework for attaching the PVC beadboard panels. Space the furring strips perpendicular to the direction of the beadboard panels, typically 12 to 16 inches apart. Use a stud finder to locate the ceiling joists and attach the furring strips to the joists using screws or nails. Ensure the furring strips are level using a level and shims as necessary. If the existing ceiling is uneven, shimming the furring strips is crucial to creating a level surface for the finished beadboard ceiling. Proper spacing and leveling of the furring strips are essential for a professional-looking and structurally sound installation.
Key Point 2: Installing the PVC Beadboard Panels
The installation of the PVC beadboard panels requires careful alignment, precise cutting, and secure fastening. Following a systematic approach and paying attention to detail will ensure a smooth and professional finish.
Cutting the Panels: Use a circular saw or a miter saw with a fine-tooth blade to cut the PVC beadboard panels to the required lengths. Measure carefully and make precise cuts to ensure a tight fit. When cutting, always wear safety glasses and use appropriate dust collection measures, as PVC can produce fine particles. It is advisable to make slightly longer cuts initially and then trim the panels down to the exact size for a perfect fit. This allows for adjustments and minimizes the risk of cutting the panels too short.
Installing the First Row: Start the installation along one wall of the room. Apply a bead of construction adhesive to the back of the first panel and position it against the furring strips. Align the panel carefully to ensure it is straight and level. Fasten the panel to the furring strips using nails or screws, driving the fasteners through the tongue of the panel. The tongue of the panel should face outwards, ready to receive the groove of the next panel. Using a level during this stage is crucial to ensure the first row is perfectly aligned, as any misalignment will be amplified in subsequent rows.
Continuing the Installation: Slide the groove of the next panel into the tongue of the first panel. Ensure the panels are tightly joined together, creating a seamless connection. Apply adhesive to the back of the panel and fasten it to the furring strips. Continue this process, row by row, until the entire ceiling is covered. Periodically check the alignment of the panels to ensure the installation remains straight and even. Adjustments can be made by gently tapping the panels into place with a rubber mallet.
Dealing with Obstacles: When encountering obstacles such as light fixtures, ceiling fans, or pipes, carefully measure and cut the panels to fit around them. Use a jigsaw or a hole saw for precise cuts. It is advisable to create templates for complex shapes to ensure accurate cuts. Proper planning and precise cutting around obstacles contribute to a clean and professional finished appearance.
Key Point 3: Finishing and Trim Work
The final stage involves adding trim pieces and finishing touches to conceal the edges of the beadboard panels and create a polished, professional look. Proper trim work enhances the aesthetic appeal of the ceiling and provides a clean transition between the ceiling and the walls.
Installing Trim Pieces: Install trim pieces such as crown molding, baseboard, or cove molding around the perimeter of the ceiling. These trim pieces conceal the edges of the beadboard panels and provide a decorative finish. Cut the trim pieces to the appropriate lengths using a miter saw, ensuring accurate angles for tight-fitting corners. Apply construction adhesive to the back of the trim pieces and fasten them to the furring strips or the walls using nails or screws.
Caulking and Sealing: Apply caulk to any gaps or seams between the beadboard panels and the trim pieces. This creates a watertight seal and prevents moisture from penetrating behind the ceiling. Use a paintable caulk that matches the color of the trim or beadboard panels. Smooth the caulk with a wet finger or a caulking tool for a clean, professional finish.
Painting (Optional): If desired, paint the trim pieces to match the color of the walls or to create a contrasting accent. Use a high-quality paint that is suitable for PVC and apply it in thin, even coats. Allow the paint to dry completely before handling the trim pieces. Painting the trim adds a personal touch and enhances the overall aesthetic appeal of the ceiling.
Final Inspection: Once the installation is complete, inspect the ceiling for any imperfections or areas that require attention. Check the alignment of the panels, the tightness of the seams, and the security of the trim pieces. Make any necessary adjustments or repairs to ensure a flawless finished product. Clean the ceiling with a damp cloth to remove any dust or debris. Thoroughly inspecting the finished ceiling ensures long-lasting performance and a visually appealing result.
By following these steps carefully, one can successfully install a PVC beadboard ceiling that enhances the beauty and functionality of any room. Remember that safety precautions, accurate measurements, and attention to detail are key to achieving a professional and long-lasting installation.

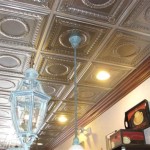
Awesome Diy Vinyl Bead Board Ceiling The Perfect For A Farmhouse Bathroom Lehman Lane

Awesome Diy Vinyl Bead Board Ceiling The Perfect For A Farmhouse Bathroom Lehman Lane

Awesome Diy Vinyl Bead Board Ceiling The Perfect For A Farmhouse Bathroom Lehman Lane

Diy Beadboard Ceiling Tutorial Easy And Inexpensive Custom Treatment

Awesome Diy Vinyl Bead Board Ceiling The Perfect For A Farmhouse Bathroom Lehman Lane

How To Install A Beadboard Paneled Ceiling The Kim Six Fix

How To Install Beadboard Panels On A Ceiling And Why We Ll Never Do It Again The Lake Land

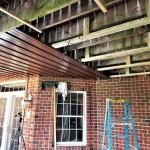
Installing A Pvc Porch Ceiling Fine Homebuilding

How To Install A Beadboard Paneled Ceiling The Kim Six Fix

Vinyl Beadboard Ceiling Common Problems And A Better Alternative Allura Usa
Related Posts