How to Install Honeywell Universal Remote Ceiling Fan and Light Control
A Honeywell universal remote ceiling fan and light control offers a convenient way to manage your ceiling fan and light fixture from anywhere in the room. These remotes are designed to be compatible with a wide range of ceiling fans and light fixtures, providing a seamless integration into your existing setup. Installing a Honeywell universal remote is a straightforward process that can be accomplished with basic tools and a few simple steps.
Step 1: Gather Your Supplies
Before you begin, ensure you have all the necessary materials. These typically include:
- Honeywell universal remote ceiling fan and light control
- Screwdriver
- Wire strippers
- Electrical tape
- Wire nuts
- Optional: Wall plate (if desired)
Step 2: Locate the Receiver
The Honeywell remote control system usually includes a receiver that needs to be wired to your ceiling fan and light fixture. Determine the best location for the receiver. Ideally, the receiver should be hidden from view and easily accessible for any future adjustments.
The receiver may be included with the remote kit or you may need to purchase it separately. The receiver is typically a small, rectangular device with wires extending from it. It's important to note that some Honeywell remote systems may not need a receiver, and the remote control directly pairs with the ceiling fan. Refer to your specific remote control instructions for details.
Step 3: Connect the Receiver
Follow these steps to connect the receiver:
- Turn off the power to the ceiling fan and light fixture at the breaker box. This is crucial for safety and to avoid electrical shock.
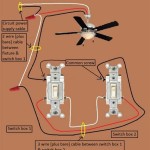
- Identify the wires connected to the ceiling fan and light fixture. Typically, you will find three wires: black (hot), white (neutral), and ground (green or bare copper). Some older wiring may have a blue instead of a black wire.
- Connect the receiver wires to the corresponding wires on the ceiling fan and light fixture. Use wire nuts to securely connect the wires. Make sure the wire connections are tight and well-insulated.
- Secure the receiver to the ceiling or fan housing using screws provided. Ensure that the receiver is mounted in a stable location.
Step 4: Program the Remote
With the receiver connected, it's time to program the remote. Each remote has a different programming method. Most remotes have a "learn" button that allows the remote to recognize the receiver.
Refer to the instruction manual that came with your Honeywell remote to learn the specific programming steps. The programming process may vary slightly depending on the specific model of the remote.
Step 5: Test the Remote
Once the remote is programmed, test its functionality. Verify that it can control your ceiling fan and light fixture. Turn the fan on and off, adjust the speed, and switch the light on and off. If the remote operates as expected, you have successfully installed it.
Step 6: Mount the Receiver
If the receiver is not already mounted, secure it to the ceiling or fan housing using the provided screws. Ensure that the receiver is mounted in a stable location, out of the way of any obstructions, and easily accessible if you need to make adjustments in the future.
Step 7: Turn the Power Back On
After you have completed the installation and testing, turn the power back on at the breaker box. Make sure the fan and light operate as expected. Check for any loose connections or wires that may need adjusting.
Congratulations! You have successfully installed your Honeywell universal remote ceiling fan and light control. Enjoy the convenience of controlling your ceiling fan and light fixture with a simple press of a button.

Universal Ceiling Fan Remote Control Kit With Light Dimmer Replacement For Harbor Breeze Hampton Bay Hunter Litex Westinghouse Honeywell 28r Kujce9103 2aazpfan 53t 11t Uc7030t Com

Honeywell 3 5 In Sd Black Plastic Indoor Universal Ceiling Fan Remote The Accessories Department At Com

Honeywell 3 5 In Sd Black Plastic Indoor Universal Ceiling Fan Remote The Accessories Department At Com

Honeywell Eamon 52 Modern Espresso Broe Remote Control Ceiling Fan With Integrated Led Light 3 Blade Com

Honeywell 3 5 In Sd Black Plastic Indoor Universal Ceiling Fan Remote The Accessories Department At Com

Universal Ceiling Fan Remote Control Kit 3 In 1 Light Timing Sd For Hunter Harbor Breeze Westinghouse Honeywell Other Lamp Com

Ceiling Fan Remote Control Kit Light On Off 3 Sd Replacement For Hampton Bay Hunter Westinghouse Honeywell Kichler Litex Replace Kujce9103 Uc7030t 53t 2aazpfan 11t 35t Yahoo Ping

New Smaller Size Universal Ceiling Fans Light Remote Control Kit 3 In 1 Fan Timing Sd For Hunter Harbor Breeze Westinghouse Honeywell Other Lamp Com

Fnado F2 U Learning Code 3 In 1 Universal Ceiling Fan Lamp Remote Controller Kit Timing Wireless Control For Hunter Harbor Breeze Westinghouse Honeyw Live Wire

Universal Remote Control Kit Easily Timer Adjust Sd Of Ceiling Fan Lights For Hunter Harbor Breeze Westinghouse Honeywell More Temu
Related Posts

