How to Install a Heat Vent in a Drop Ceiling Box
Installing a heat vent into a drop ceiling box involves careful planning and execution to ensure proper functionality and aesthetic integration. Drop ceilings, also known as suspended ceilings, offer a convenient way to conceal wiring, plumbing, and ductwork, but require specific techniques when adding or modifying fixtures like heat vents. Ensuring a secure and airtight connection between the vent and the ductwork above the ceiling is crucial for efficient heating and energy conservation.
This article outlines the necessary steps to install a heat vent in a drop ceiling box, covering preparation, installation, and finishing touches. Before commencing the installation, it is imperative to understand the existing infrastructure and local building codes related to HVAC systems and drop ceilings. Adhering to these regulations guarantees a safe and compliant installation.
Planning and Preparation
Proper planning is vital to a successful heat vent installation. This phase involves assessing the existing drop ceiling structure, selecting the appropriate vent, and gathering the necessary tools and materials. A thorough evaluation will prevent potential issues and ensure the project proceeds smoothly.
First, the location for the new heat vent must be determined. Consider the room's heating needs and airflow patterns. Ideally, the vent should be positioned to provide optimal heat distribution, avoiding obstructions that could impede airflow. Inspect the drop ceiling grid in the chosen location. Note the spacing of the grid and the size of the ceiling tiles. This information is important for selecting a vent that fits correctly within the existing framework.
Next, the existing ductwork above the drop ceiling needs to be examined. Determine the size and type of duct leading to the desired location. This will influence the selection of the transition piece connecting the ductwork to the vent. Accessing the area above the drop ceiling might involve removing adjacent ceiling tiles. Exercise caution to avoid damaging the tiles or disturbing any existing wiring or plumbing.
Once the ductwork has been assessed, select a heat vent that is compatible with both the ductwork and the drop ceiling grid. Heat vents designed specifically for drop ceilings are readily available at most home improvement stores. These vents typically feature a frame that fits securely within the grid and a diffuser that directs the airflow. Ensure the vent's size matches the opening in the ceiling tile that will house it. It’s advisable to choose a vent made of durable materials like steel or aluminum, as these will resist rust and corrosion over time.
Gather the necessary tools and materials before starting the installation. This includes a utility knife, measuring tape, drill with appropriate drill bits, screwdriver, duct tape, safety glasses, gloves, and a ladder or step stool. Having all the tools readily available will streamline the installation process and minimize interruptions.
Finally, turn off the HVAC system before starting any work on the ductwork. This will prevent dust and debris from entering the system and potentially causing damage. It is also advisable to wear a dust mask to protect against airborne particles.
Installation Process
The installation process involves carefully cutting the ceiling tile, connecting the vent to the ductwork, and securing the vent within the drop ceiling grid. Each step requires precision and attention to detail to ensure a secure and functional installation.
Begin by preparing the ceiling tile to accommodate the new heat vent. Using a measuring tape, mark the desired size and shape of the opening on the tile. It is recommended to trace the outline of the vent frame onto the tile to ensure an accurate fit. Use a sharp utility knife to carefully cut along the marked lines. Score the tile several times before cutting all the way through. This will help prevent tearing or splintering.
Once the opening is cut, carefully remove the cutout section of the tile. Ensure the edges of the opening are clean and smooth. If necessary, use sandpaper to smooth any rough edges. Place the prepared ceiling tile back into the drop ceiling grid.
Next, connect the heat vent to the existing ductwork. This often involves using a transition piece that adapts the ductwork's shape and size to the vent's connection point. Securely attach the transition piece to the ductwork using duct tape. Ensure the connection is airtight to prevent air leakage. Inspect the connection for any gaps or tears in the duct tape. Apply additional layers of duct tape as needed to create a secure seal.
With the transition piece in place, connect the heat vent to the transition piece. Most vents have a collar or flange that fits over the transition piece. Secure the vent to the transition piece using screws or clamps, depending on the design of the vent. Ensure the vent is level and properly aligned with the drop ceiling grid.
Finally, secure the heat vent frame to the drop ceiling grid. Some vents feature clips or tabs that attach directly to the grid. Others may require screws or fasteners to hold the vent in place. Securely attach the vent to the grid to prevent it from sagging or falling. Double-check that the vent is level and flush with the surrounding ceiling tiles.
Finishing Touches and Testing
After the installation is complete, conducting a thorough inspection and testing the vent's functionality are essential to ensure everything is working correctly. This final phase ensures the installation is both aesthetically pleasing and performs as intended. Proper sealing and airflow verification are key components of this process.
Inspect the installation for any gaps or leaks around the vent frame and the ductwork connection. Use duct tape or caulk to seal any gaps to prevent air leakage. Air leakage can significantly reduce the efficiency of the heating system and increase energy costs. Pay close attention to the connection between the vent frame and the ceiling tile. If there are any noticeable gaps, use caulk to fill them in.
Turn on the HVAC system and test the heat vent. Check for proper airflow from the vent. If the airflow is weak or inconsistent, there may be a blockage in the ductwork or a leak in the connection. Inspect the ductwork for any obstructions or damage. Ensure the vent's diffuser is properly adjusted to direct the airflow in the desired direction.
Clean up any debris or materials left over from the installation. This includes removing any scraps of ceiling tile, duct tape, or packaging materials. Dispose of the waste properly. Leave the work area clean and tidy.
Consider painting the vent frame to match the color of the drop ceiling tiles. This will help the vent blend in with the surrounding ceiling and create a more aesthetically pleasing look. Use a paint that is suitable for metal or plastic, depending on the material of the vent frame. Apply the paint in thin, even coats to avoid drips or runs.
Finally, document the installation for future reference. This includes taking photographs of the installed vent and noting the location of the vent in relation to other fixtures and utilities in the room. Keeping a record of the installation can be helpful for future maintenance or repairs.
By following these steps diligently, a heat vent can be installed seamlessly into a drop ceiling box, providing efficient heating distribution while maintaining the integrity of the ceiling system. Remember to prioritize safety, accuracy, and compliance with building codes throughout the entire process.

How Do I Extend A Register From Overhead Duct To Drop Ceiling Doityourself Com Community Forums

How Do I Extend A Register From Overhead Duct To Drop Ceiling Doityourself Com Community Forums

How Do I Extend A Register From Overhead Duct To Drop Ceiling Doityourself Com Community Forums

Installing Ceiling Drops For A Dropped Or Suspended

Hvac Best Vent Size For Replacing Drop Ceiling Register With Boot Drywall Using 8 Duct Home Improvement Stack Exchange

Boxing Ductwork For A Dropped Ceiling Fine Homebuilding

Hvac Diffuser Installation Fine Homebuilding

How To Install A Suspended Ceiling Building Advanced Drops

Hvac Diffuser Installation Fine Homebuilding
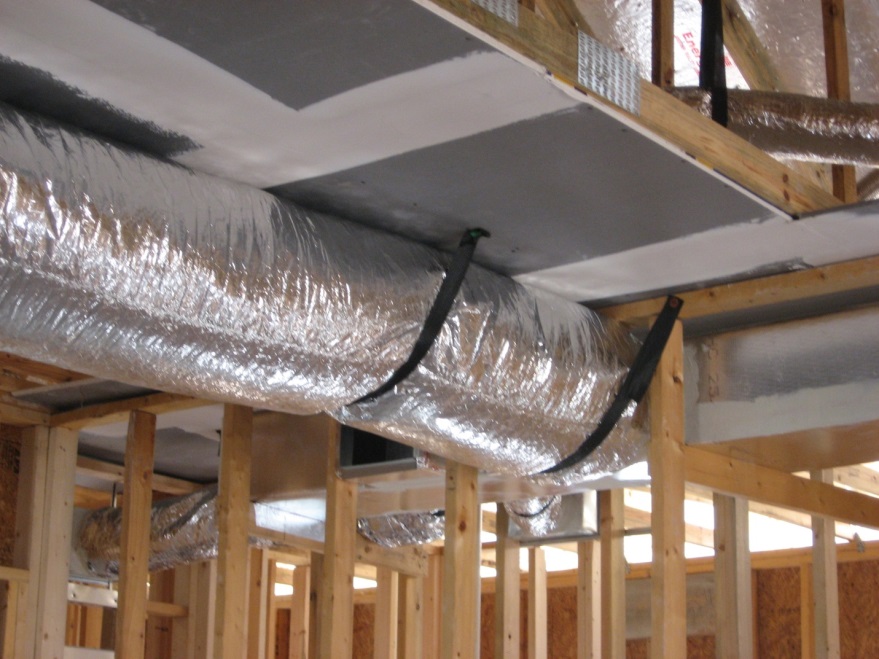
Ducts In Dropped Ceilings Building America Solution Center
Related Posts


