Crowning Your Popcorn Ceiling: A Step-by-Step Guide to Installing Crown Molding
Popcorn ceilings may have had their heyday in the past, but adding crown molding can give them a timeless elegance that complements any décor. Here's a comprehensive guide to help you achieve a flawless crown molding installation on your popcorn ceiling:
1. Gather Your Tools and Materials
Before embarking on this project, ensure you have the necessary tools and materials:
- Crown molding (amount determined by room perimeter)
- Miter saw or miter box
- Caulk gun and caulk
- Nail gun or hammer and nails
- Measuring tape
- Pencil
- Chalk line or laser level
- Sandpaper or sanding sponge
2. Prepare the Popcorn Ceiling
Popcorn ceilings require special attention before installing crown molding. Use a vacuum cleaner with a soft brush attachment to remove any loose popcorn particles. If necessary, gently scrape away any stubborn popcorn using a putty knife, being careful not to damage the ceiling.
3. Measure and Mark the Ceiling
Using a measuring tape, determine the lengths of crown molding needed for each wall. Mark these measurements on the ceiling using a pencil. Next, use a chalk line or laser level to draw a straight line along the marked points to indicate where the bottom of the crown molding will be installed.
4. Cut the Crown Molding
Use a miter saw or miter box to cut 45-degree angles on the ends of the crown molding. Practice cutting a few scrap pieces to ensure accurate angles. Measure and cut the appropriate lengths based on your room measurements.
5. Install the First Piece
Apply a thin bead of caulk along the top edge of the popcorn ceiling where the crown molding will be installed. Place the first piece of crown molding in place, ensuring it aligns with the chalk line and the angle is flush against the ceiling and wall. Use a nail gun or hammer and nails to secure the molding into place.
6. Continue Installing the Crown Molding
Continue installing the remaining pieces of crown molding, using the same process. Carefully fit the angled ends together to form seamless corners. Use caulk to fill any gaps and secure the molding in place.
7. Secure the Molding
Once all the crown molding is installed, use a nail gun or hammer and nails to secure it further. Space the nails about 12-18 inches apart for optimal support.
8. Caulk and Finish
Apply a generous bead of caulk along the seam where the crown molding meets the ceiling and wall. Use a damp sponge or caulk tool to smooth out the caulk. Once the caulk has dried, sand any excess with a fine-grit sandpaper or sanding sponge.
Tips for Success:
- Use a sharp blade on your miter saw for clean cuts.
- Test-fit the crown molding before nailing it in place.
- Don't over-caulk the joints, as this can create a messy appearance.
- Allow the caulk to dry completely before sanding.
- Consider painting the crown molding to match your walls or ceiling for a cohesive look.

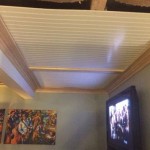
Crown Moulding With Popcorn Ceiling

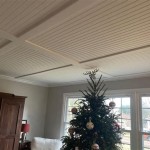
Crown Moulding With Popcorn Ceiling

Crown Moulding With Popcorn Ceiling

Crown Moulding With Popcorn Ceiling
Removing Popcorn Ceiling With Crown Molding Diy Home Improvement Forum

Remove Popcorn Ceiling Part 5 Final

Crown Moulding With Popcorn Ceiling

Crown Molding On Popcorn Ceiling Diy Home Improvement Forum

Updating The Look Of Your Home With Crown Moulding Acoustic Removal Experts

Crown Moulding With Popcorn Ceiling
Related Posts


