How To Install a Ceiling Mount Light Fixture
Installing a ceiling mount light fixture can significantly enhance the ambiance and functionality of a room. While it may seem daunting, the process is manageable for most homeowners with basic electrical knowledge and the right tools. This article provides a comprehensive guide to safely and effectively install a ceiling mount light fixture, ensuring a secure and aesthetically pleasing result.
Before commencing the installation, it is paramount to prioritize safety. Electricity can be dangerous, and improper handling can lead to serious injury or even death. Therefore, adhering to all safety precautions outlined within this guide is crucial. Furthermore, consulting local electrical codes and regulations is essential to ensure compliance and avoid potential hazards.
This guide will cover the necessary tools and materials, a step-by-step installation process, and troubleshooting tips to help navigate common issues encountered during the setup. Understanding these aspects will empower individuals to confidently tackle this project, transforming their living spaces with improved lighting.
Key Point 1: Pre-Installation Preparation and Safety Measures
Prior to beginning the installation, gather all the necessary tools and materials. This proactive step minimizes interruptions and ensures a smooth workflow. The required tools generally include: a voltage tester (non-contact), a screwdriver set (including Phillips and flathead), wire strippers, wire connectors (wire nuts), electrical tape, a ladder, safety glasses, and work gloves. The necessary materials consist of the new ceiling light fixture, mounting hardware appropriate for the ceiling type (e.g., drywall anchors, screws), and possibly additional wire if the existing wiring is insufficient.
The most crucial safety step is to disconnect the power supply to the circuit at the breaker box. Locate the circuit breaker that controls the existing light fixture and switch it to the "OFF" position. To confirm that the power is indeed off, use a non-contact voltage tester to check the wires at the existing fixture. If the tester indicates the presence of voltage, double-check that the correct breaker has been turned off. If the problem persists, consult a qualified electrician.
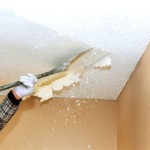
Inspect the existing wiring to assess its condition. Look for any signs of damage, such as frayed insulation or corroded wires. If any damage is detected, it is crucial to replace the affected wiring segments before proceeding. Using damaged or deteriorated wiring poses a significant fire hazard. Additionally, ensure that the junction box is properly secured to the ceiling structure. A loose junction box can cause the fixture to detach and create a safety risk.
Before removing the old fixture, carefully observe how it is wired. Take a picture or draw a diagram of the wiring connections to serve as a reference during the installation of the new fixture. This will help ensure that the new fixture is wired correctly. Pay close attention to the colors of the wires and their corresponding connections: black (hot), white (neutral), and green or bare copper (ground).
Key Point 2: Step-by-Step Installation Process
After completing the pre-installation preparation and ensuring the power is off, the next step is to remove the existing light fixture. Carefully unscrew or detach the fixture from the junction box. Lower the fixture while supporting its weight to avoid it falling and potentially causing damage or injury. Disconnect the wires one at a time, using wire strippers to expose fresh wire if necessary. Cap the ends of the existing wires with wire connectors to prevent accidental contact.
Install the mounting bracket that comes with the new light fixture. The mounting bracket provides a secure base for the fixture and ensures it is properly aligned. Attach the bracket to the junction box using the screws provided. Ensure that the bracket is firmly attached and can support the weight of the new fixture. If the provided screws are not suitable for the ceiling type, use appropriate anchors.
Connect the wires of the new fixture to the corresponding wires in the junction box. Typically, the black wire from the fixture connects to the black wire in the junction box, the white wire connects to the white wire, and the green or bare copper wire connects to the green or bare copper wire (or to the junction box if it is metal). Use wire connectors (wire nuts) to securely join the wires. Twist the wires together tightly and then screw on the wire connector. Ensure that no bare wire is exposed outside of the wire connector. Wrap electrical tape around the wire connectors for added insulation and security.
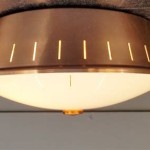
Carefully tuck the wires into the junction box, making sure they are not pinched or strained. Position the new fixture over the mounting bracket and secure it with the screws or fasteners provided. Ensure that the fixture is flush with the ceiling and that there are no gaps or loose connections. Tighten the screws securely, but avoid over-tightening, which could damage the fixture or the ceiling.
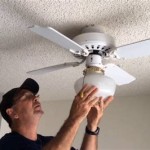
After the fixture is securely mounted, install the light bulb according to the manufacturer's instructions. Ensure that the bulb is the correct wattage and type for the fixture. Once the bulb is installed, restore power to the circuit by switching the breaker back to the "ON" position. Test the fixture by turning on the light switch. If the fixture does not turn on, re-check the wiring connections and ensure that the bulb is properly installed. If the problem persists, consult a qualified electrician.
Key Point 3: Troubleshooting Common Issues and Considerations
One common issue encountered during installation is incorrect wiring. If the light fixture does not turn on, double-check the wiring connections to ensure that the black, white, and ground wires are connected correctly. A reversed wiring configuration can cause the fixture to malfunction or even create a short circuit. If the light fixture flickers, the wiring may be loose or the bulb may be faulty. Tighten the wiring connections and try a new bulb.
Another potential issue is an overloaded circuit. If the breaker trips frequently after installing the new fixture, the circuit may be overloaded. This means that the circuit is drawing more power than it is designed to handle. In this case, it may be necessary to move the fixture to a different circuit or to reduce the number of appliances or fixtures connected to the same circuit. Consult a qualified electrician to determine the best solution.
When selecting a new light fixture, consider the size and style of the room. A large fixture may be overwhelming in a small room, while a small fixture may not provide enough light in a large room. Choose a fixture that complements the décor of the room and provides adequate illumination. Consider the light output of the fixture, measured in lumens, and select a fixture with the appropriate lumen output for the intended use.
Before starting the installation, review the manufacturer's instructions for the new light fixture. The instructions will provide specific details about the installation process and any special considerations. Following the manufacturer's instructions will help ensure a successful and safe installation. If you are unsure about any aspect of the installation process, consult a qualified electrician. It is always better to be safe than sorry when working with electricity.
It's also wise to consider the weight of the new fixture. If the new fixture is significantly heavier than the old one, ensuring the junction box can support the added weight is crucial. Reinforcing the junction box, or replacing it with a sturdier one, may be necessary to prevent the fixture from detaching from the ceiling. Using appropriate mounting hardware for heavy fixtures is also paramount.

Mounting Light Fixtures Fine Homebuilding

How To Install Flush Mount Fixture Junction Box

Mounting Light Fixtures Fine Homebuilding

How To Replace Install A Light Fixture The Art Of Manliness

How To Replace A Ceiling Light Fixture Lights Installing Modern

Mounting Light Fixtures Fine Homebuilding

Light Fixture Flush Mount Installation Wattco Electric

How To Change A Light Fixture

How To Install A Flush Mount Light Canarm

How To Replace Install A Light Fixture The Art Of Manliness
Related Posts