How to Install AC Duct in the Ceiling of a House
Installing AC ductwork in the ceiling of a house is a complex task that requires careful planning, proper tools, and a good understanding of HVAC principles. It involves navigating tight spaces, handling heavy materials, and ensuring a secure, airtight system. This article provides a comprehensive guide to installing AC ductwork in the ceiling, outlining key steps and considerations, while emphasizing safety precautions and professional standards.
Planning and Preparation
Before embarking on the installation process, proper planning and preparation are crucial. This involves determining the optimal duct layout, selecting the right materials, and gathering necessary tools.
1. Ductwork Design and Layout: The first step is to design the ductwork layout. This involves determining the optimal route for the ducts, considering factors such as room layouts, existing obstacles, and the desired airflow patterns. A professional HVAC contractor can provide valuable assistance in designing the ductwork, ensuring efficient airflow distribution and optimal performance.
2. Material Selection: Choose the appropriate duct material based on the specific application and environmental conditions. Common duct materials include galvanized steel, aluminum, and fiberglass. Consider factors such as durability, corrosion resistance, and ease of installation when making a material choice.
3. Tool Gathering: Ensure you have the necessary tools for the job. These may include a tape measure, level, saw, drill, metal shears, duct sealant, and a variety of fasteners. Specialized tools like duct cutters and crimpers can also be helpful.
Installation Process
Once the planning and preparation are complete, you can begin the installation process, following these steps:
1. Accessing the Ceiling: Create access points in the ceiling for installing the ductwork. This typically involves cutting holes in the ceiling drywall or removing sections of existing ceiling panels. Ensure ample access for maneuverability and installation.
2. Installing the Main Trunk Line: The main trunk line is the primary duct that distributes air from the AC unit throughout the house. Install the main trunk line in the ceiling, running it along the joists for support and stability. Secure the duct securely using appropriate fasteners and ensure proper insulation to prevent heat loss or gain.
3. Branching to Individual Rooms: Branch runs are connected to the main trunk line and lead to individual rooms. Use appropriate fittings and transition pieces to connect the branch runs to the main trunk line, ensuring a tight seal. Ensure the branch runs are properly sized for each room's requirements.
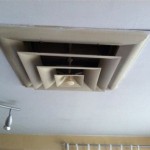
4. Installing Registers and Vents: Registers or vents are installed at the end of each branch run to deliver conditioned air into the rooms. These are typically mounted into the ceiling, providing a convenient and aesthetically-pleasing airflow solution. Ensure that the registers are properly sealed to prevent leaks and ensure optimal airflow.
5. Sealing and Testing: Once the installation is complete, thoroughly seal all joints and connections with mastic sealant. Ensure that the system is properly sealed to prevent air leaks and maintain optimal system efficiency. After sealing, test the system for leaks using a smoke pencil or a pressure gauge.
Safety Precautions and Considerations
Safety is paramount during the installation process. Follow these precautions to ensure security and prevent potential risks:
1. Use Appropriate Safety Gear: Wear appropriate safety gear, including gloves, goggles, and a dust mask, to protect yourself from potential hazards during the installation process. Safety glasses should be worn to protect against flying debris, while gloves will protect your hands from sharp edges and materials.
2. Securely Support Ductwork: Ensure that the ductwork is securely supported and fastened to the ceiling structure, especially at junction points and transition areas. Use appropriate hangers and fasteners to prevent the ductwork from sagging or collapsing.
3. Minimize Air Leaks: Ensure a tight seal at all connections and joints by using appropriate sealant and fasteners. Air leaks can significantly reduce system efficiency and increase energy consumption.
4. Consider Professional Assistance: If you are unsure about any aspect of the installation process, consult with a professional HVAC contractor. They can provide expert advice and assistance, ensuring a safe and effective installation.
Installing AC ductwork in the ceiling is a complex and demanding task. Proper planning, preparation, and adherence to safety guidelines will ensure an efficient and safe installation process.

How To Install Ductwork In A Basement Diy Finished Renovation

Incredible Exposed Duct Work Installation Finishing

Ducts In Dropped Ceilings Building America Solution Center

How To Frame Around Hvac Ducts Or Pipes In A Basement Easiest Method

Hvac Ductwork Air Duct Types Working Problems Installation Austin Area Conditioning And Heating G S Mechanical

6 Tips For Installing Ductwork In The Attic

Seven Tips For Good Ductwork Installation

Install An Air Duct To A Room

Case Closed Get Those Air Conditioning Ducts Out Of The Attic Energy Vanguard

Ducts In Dropped Ceilings Building America Solution Center
Related Posts


