Essential Aspects of Installing a Harbor Breeze Centerville Ceiling Fan with Light
Transforming your living space with a stylish and functional ceiling fan like the Harbor Breeze Centerville model is an exciting project. To ensure a successful installation, it's crucial to follow specific guidelines. Here's a comprehensive guide to help you navigate the process seamlessly:
1. Safety First
Before embarking on the installation, prioritize safety measures. Turn off the power supply at the circuit breaker or fuse box. Verify that there is no electricity flowing through the wires by using a non-contact voltage tester. Prepare a sturdy ladder or scaffolding to reach the ceiling safely.
2. Gather Materials and Tools
Ensure you have all the necessary materials and tools before starting. The Harbor Breeze Centerville Ceiling Fan with Light typically includes a fan blade set, light kit, hanger bracket, mounting screws, wire nuts, and a remote control. Additionally, you'll need a screwdriver, electrical tape, wire strippers, and a drill if mounting into a wood ceiling.
3. Assemble the Fan Components
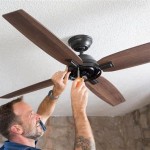
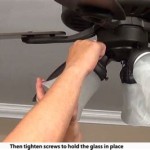
Start by assembling the fan components. Attach the fan blades to the motor. Install the light kit and bulbs according to the provided instructions. Securely fasten all the connections using the provided screws or bolts.
4. Mount the Hanger Bracket
Identify the location for the fan and mark the mounting position on the ceiling. Position the hanger bracket and secure it with the appropriate screws. Ensure the bracket is level and firmly attached to the ceiling joists or electrical box.
5. Connect the Electrical Wires
Locate the electrical wires in the ceiling and connect them to the corresponding wires on the fan. Typically, black wires are for power, white wires are for neutral, and green or bare wires are for grounding. Use wire nuts to secure all connections and wrap them with electrical tape for insulation.
6. Mount the Fan Assembly
Carefully lift the fan assembly and align it with the hanger bracket. Slide the fan onto the bracket and secure it with the provided screws. Ensure the fan is stable and balanced.
7. Install the Light Fixture
If installing the light kit, connect the wires and secure the fixture to the fan body. Insert the bulbs and tighten them securely.
8. Install the Remote Control
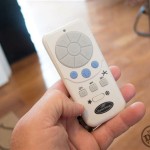
The Harbor Breeze Centerville Ceiling Fan with Light often comes with a remote control. Install the remote control holder according to the instructions and pair the remote with the fan.
9. Test and Adjust
Once everything is installed, turn on the power and test the fan. Check that the fan rotates smoothly and the light turns on and off correctly. Adjust the fan speed and light brightness using the remote control.
10. Enjoy Your New Fan
Congratulations! You have successfully installed your Harbor Breeze Centerville Ceiling Fan with Light. Now, you can enjoy the enhanced comfort and illumination it brings to your living space.

Install Of A Harbor Breeze Centreville Ceiling Fan

Harbor Breeze Centreville Ceiling Fan

Installation Review Of Harbor Breeze Centreville White Led Indoor Flush Mount Ceiling Fan With Light

Harbor Breeze 52 Centreville Ceiling Fan 1 2

Harbor Breeze Ceiling Fan From Installation Steps Diy How To Replace Old

Discover The Stylish Harbor Breeze Centreville 42 In Ceiling Fan

52 Harbor Breeze Centerville Ceiling Fans 1 2 Of 5

Harbor Breeze Centreville 52 Ceiling Fan

52 Harbor Breeze Centreville Brushed Nickel Ceiling Fan

Harbor Breeze Centreville 42 In Oil Rubbed Broe With Auburn Mink Blades Led Indoor Flush Mount Ceiling Fan Light 5 Blade 41239 At Com
Related Posts

