How to Install a Harbor Breeze Ceiling Fan Remote Control
Upgrading your ceiling fan with a remote control is a convenient and straightforward project that can significantly enhance the comfort and functionality of your space. Harbor Breeze ceiling fans are known for their reliability and ease of installation, making them a popular choice for homeowners. Here's a comprehensive guide to help you successfully install a Harbor Breeze ceiling fan remote control:
Step 1: Gather Materials and Tools
Before you begin, ensure you have all the necessary materials and tools: - Harbor Breeze ceiling fan remote control kit - Screwdriver - Wire strippers - Electrical tape - Ladder
Step 2: Power Off the Ceiling Fan
Safety first! Turn off the power to your ceiling fan at the circuit breaker panel. This step is crucial to prevent electrical shocks during installation.
Step 3: Remove the Existing Control Box
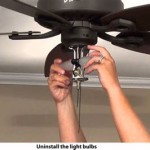
Locate the control box on the ceiling fan housing. Use a screwdriver to remove the screws holding it in place and carefully disconnect the wires inside the box.
Step 4: Install the Receiver Module
The receiver module included in the remote control kit will receive signals from the remote and relay them to the fan. Mount the receiver module inside the fan housing using the provided screws.
Step 5: Connect the Wires
Connect the wires from the ceiling fan to the corresponding terminals on the receiver module. Follow the color-coding and match the black wire to black, white to white, and green or bare copper to green. Strip the wire ends about 1/2 inch and twist them together before inserting them into the terminals.
Step 6: Secure the Connections
Tighten the screws on the terminals to secure the wire connections. Use electrical tape to insulate each connection, ensuring no exposed wires are visible.
Step 7: Reinstall the Control Box
Place the control box back onto the ceiling fan housing and secure it with the screws. Double-check that the wires are properly connected and not pinched or damaged.
Step 8: Install the Remote Control Batteries
Open the remote control and insert new batteries according to the specified polarity (+ and -). Ensure the batteries are securely installed.
Step 9: Test the Remote Control
Turn on the power to the ceiling fan at the circuit breaker panel. Use the remote control to operate the fan, including functions like speed, light control, and timer settings. If everything works correctly, your Harbor Breeze ceiling fan remote control is successfully installed.
Tips:
- If you encounter any difficulties during installation, refer to the instruction manual provided with the remote control kit.
- If you are not confident in your electrical abilities, it is recommended to consult a qualified electrician for professional installation.
- Regularly replace the batteries in your remote control to ensure optimal performance.

Harbor Breeze Ceiling Fan Remote Program Dimmer And Conflict Fix

Harbor Breeze Ceiling Fan Remote Not Working Definitive Troubleshooting Guide Replacements Hampton Bay Fans Lighting

Harbor Breeze Ceiling Fan With Remote

How To Install A Ceiling Fan Remote Extreme Diy

Harbor Breeze Remote Fan Lowe S How To Install

Universal Ceiling Fan Remote Control Kit With Light Dimmer Replacement For Harbor Breeze Hampton Bay Hunter Litex Westinghouse Honeywell 28r Kujce9103 2aazpfan 53t 11t Uc7030t Com

Harbor Breeze Ceiling Fan Remote Not Working Definitive Troubleshooting Guide Replacements Hampton Bay Fans Lighting

Harbor Breeze Ceiling Fan Re Wiring New Transmitter Remote Help Doityourself Com Community Forums

Universal Uc9050t Ceiling Fan Wall Remote Control Dip Switch With Adjustable 3 Sd Light Dimmer Requires Receiver No Included Compatible Hampton Bay Harbor Breeze Hunter Com
.jpg?strip=all)
Universal Ceiling Fan Remote Control Kit 3 In 1 Light Timing Sd For Hunter Harbor Breeze Westinghouse Honeywell Other Lamp
Related Posts

