How To Install a Ceiling Fan on Vaulted Ceilings
Installing a ceiling fan on a vaulted ceiling presents unique challenges compared to a standard, flat ceiling installation. The angled surface necessitates specialized hardware and techniques to ensure the fan hangs securely and operates safely. This article provides a comprehensive guide for installing a ceiling fan on a vaulted ceiling, covering essential considerations, necessary tools, and step-by-step instructions.
Before commencing the installation, a thorough assessment of the existing electrical wiring and ceiling structure is critical. Improper installation can lead to electrical hazards, structural damage, or fan malfunction. It is also crucial to understand local building codes and regulations pertaining to electrical work and ceiling fan installations, which may require a permit or inspection.
Key Point 1: Assessing the Ceiling and Electrical System
The initial step in installing a ceiling fan on a vaulted ceiling involves determining the structural integrity of the mounting location. This includes identifying the ceiling joist or support beam that will bear the weight of the fan. Vaulted ceilings often have hidden joists or irregular spacing, making it essential to use a stud finder to accurately locate a suitable support.
Once a joist is located, its strength must be evaluated. Older homes may have joists that are not designed to support the weight of a ceiling fan, particularly larger models. Reinforcement may be required in such cases. This might involve adding additional bracing between joists or installing a support beam that runs perpendicular to the existing joists. Consult a qualified structural engineer if there are concerns about the ceiling's load-bearing capacity.
Equally important is assessing the existing electrical wiring. The wiring must be suitable for ceiling fan installations and comply with local electrical codes. Typically, a 14/3 or 12/3 wire (with ground) is required, providing separate wires for the fan motor and light kit. Verify that the circuit breaker controlling the wiring is adequately sized for the fan's power consumption. If the existing wiring is inadequate or outdated, it must be replaced by a qualified electrician before proceeding with the installation.
Furthermore, ensure the electrical box currently installed at the mounting location is rated for supporting a ceiling fan. Standard light fixture boxes are generally not designed to handle the dynamic forces exerted by a rotating fan. A fan-rated electrical box, often called a "pancake box" or a "heavy-duty box," is specifically designed to withstand these forces and must be used. It is usually attached directly to the ceiling joist for maximum support.
Safety is paramount when working with electrical systems. Always disconnect the power to the circuit at the breaker box before commencing any electrical work. Use a non-contact voltage tester to verify that the power is indeed off before touching any wires. Wearing appropriate safety equipment, such as insulated gloves and safety glasses, is also recommended.
Key Point 2: Selecting the Correct Mounting Hardware and Downrod
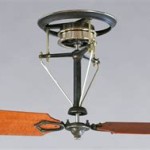
Vaulted ceilings require specialized mounting hardware to ensure the ceiling fan hangs properly. The key component is a sloped ceiling adapter, also referred to as a vaulted ceiling adapter or angled mounting bracket. This adapter provides a level surface for the fan's canopy, regardless of the ceiling's angle. These adapters come in various designs, and the appropriate model depends on the angle of the ceiling and the specific ceiling fan being installed.
Measure the ceiling angle using an angle finder or protractor. Many manufacturers specify the maximum ceiling angle that their sloped ceiling adapters can accommodate. It is crucial to select an adapter that is compatible with the measured angle. Some adapters are adjustable, allowing them to be used on a wider range of ceiling slopes.
The downrod is another critical component that must be chosen correctly. A standard downrod is a metal pipe connecting the fan motor to the ceiling mounting bracket. On vaulted ceilings, a longer downrod is usually required to ensure the fan blades are at a sufficient distance from the ceiling. This is important for optimal airflow and to prevent the blades from hitting the ceiling. The ideal downrod length depends on the ceiling height and the fan blade diameter.
Generally, a minimum clearance of 7 feet from the floor to the fan blades is recommended for safety and airflow. To determine the appropriate downrod length, measure the distance from the ceiling to the desired blade height and subtract the height of the fan motor housing. Consider the esthetics of the installation when selecting the downrod length. A downrod that is too short can make the fan appear disproportionate, while a downrod that is too long can make the fan appear too low.
Furthermore, ensure the downrod is compatible with the specific ceiling fan model being installed. Different fans may have different downrod attachment mechanisms. Some downrods are threaded, while others use a pin or clip system. Refer to the fan's instruction manual for compatibility information.
When purchasing the ceiling fan, sloped ceiling adapter, and downrod, carefully review the weight ratings of each component. The combined weight rating of the adapter and downrod must exceed the weight of the ceiling fan. This ensures the installation is safe and reliable.
Key Point 3: Installing the Mounting Bracket, Wiring, and Fan
After selecting the appropriate hardware, the installation process can begin. The first step is to securely attach the sloped ceiling adapter to the fan-rated electrical box in the ceiling. Follow the manufacturer's instructions for attaching the adapter. Typically, this involves using screws to fasten the adapter to the electrical box and ensuring it is level and aligned correctly. Proper alignment is essential for the fan to hang straight and operate smoothly.
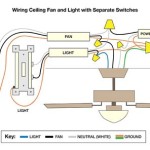
Next, prepare the electrical wiring for connection. Identify the hot (black), neutral (white), ground (green or bare copper), and light kit (usually blue) wires. Carefully strip the ends of the wires to expose about ½ inch of bare wire. Using wire connectors (wire nuts), connect the corresponding wires from the fan to the wires in the electrical box. Ensure the connections are secure and that no bare wire is exposed. Follow the manufacturer's instructions for the specific wiring configuration of the fan.
After the wiring is complete, carefully tuck the wires into the electrical box, ensuring they are not pinched or damaged. Attach the fan's canopy to the sloped ceiling adapter. The canopy covers the wiring and provides a finished look to the installation. Some canopies have a locking mechanism to secure them to the adapter. Follow the manufacturer's instructions for attaching the canopy.
Next, attach the fan motor housing to the downrod. Most fans have a threaded opening for the downrod to screw into. Tighten the downrod securely, ensuring it is properly seated. Some fans also have a safety pin or screw that must be inserted to prevent the downrod from loosening over time. Refer to the fan's instruction manual for details.
Carefully lift the fan motor housing and downrod assembly into position and insert the downrod into the mounting bracket on the sloped ceiling adapter. Most brackets have a ball-and-socket joint that allows the fan to swivel and hang level. Once the downrod is in place, secure it with the provided pins or screws. Ensure the fan is hanging securely and that the downrod is properly seated in the mounting bracket.
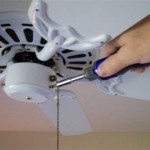
Finally, install the fan blades and light kit, if applicable. The fan blades typically attach to the motor housing using screws. Tighten the screws securely, but avoid over-tightening, which can damage the blades or motor housing. Follow the manufacturer's instructions for installing the light kit, connecting the wires to the appropriate terminals.
After completing the installation, turn on the power at the breaker box and test the fan. Verify that the fan operates smoothly at all speeds and that the light kit is functioning correctly. If there are any issues, such as wobbling or noise, troubleshoot the installation by checking the blade balance, screw tightness, and downrod alignment.
Installing a ceiling fan on a vaulted ceiling requires careful planning, the correct hardware, and precise execution. Following these steps and adhering to safety precautions will ensure a successful and safe installation. If any doubts arise during the process, consulting a qualified electrician or handyman is always recommended.

How To Choose A Ceiling Fan For Vaulted Ceilings Lightology

How To Install A Ceiling Fan On Sloped Lemon Thistle

Ensuring Proper Ceiling Fan Installation With Vaulted Ceilings

How To Choose A Ceiling Fan For Vaulted Ceilings Lightology

How To Install A Ceiling Fan On Sloped Lemon Thistle

Vaulted Sloped Ceiling Adapter For Modern Fan Company Fans Stardust

How To Find Ceiling Fans Slope Adapters And Downrods For Angled Ceilings Delmarfans Com

How To Choose A Ceiling Fan For Vaulted Ceilings Lightology

Fans On An Angle Installing Ceiling Angled Or Raked

Ceiling Fans For Angled Ceilings
Related Posts

