How to Install a Ceiling Fan on Slanted Walls
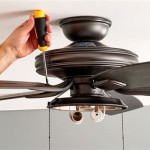
Installing a ceiling fan on a slanted wall presents unique challenges, but it is a manageable task with the right tools, knowledge, and approach. The primary obstacle is finding a mounting solution that accommodates the angled surface while ensuring the fan's stability and safety. This article will guide you step-by-step through the installation process, equipping you with the necessary information to tackle this project successfully.
Selecting the Right Fan and Mounting System
Before embarking on the installation, it's essential to choose a ceiling fan designed for angled surfaces. Conventional ceiling fans might not work effectively on a slanted ceiling due to the uneven mounting position. Look for fans specifically labeled as "slanted ceiling fans" or "sloped ceiling fans." These models often come with specialized mounting brackets and instructions designed for angled installations.
The most common mounting system for slanted ceilings is the "sloped ceiling bracket." This bracket is typically made of metal and has a sliding mechanism that allows it to adjust to the angle of the ceiling. It securely holds the fan's motor housing while ensuring proper alignment. When selecting a bracket, consider the angle of the ceiling slant and ensure it provides the necessary adjustment range.
In addition to the fan and mounting system, you will need to purchase the appropriate electrical wiring and junction box to connect to your home's existing electrical system. Make sure to choose a junction box that is compatible with the ceiling angle and designed for the fan's electrical requirements.
Preparing for Installation
Before you begin installation, it's crucial to prepare your workspace and gather all necessary tools and materials. Turn off the power to the circuit supplying the area where you'll be installing the fan. Use a voltage tester to confirm that the power is off.
You will need the following tools and materials:
- Level
- Stud finder
- Tape measure
- Pencil
- Drill with appropriate drill bits
- Screwdrivers (Phillips and flathead)
- Wire cutters
- Wire strippers
- Electrical tape
- Safety glasses
- Ladder
- Ceiling fan mounting bracket
- Junction box (if required)
- Electrical wiring (if required)
- Ceiling fan
Step-by-Step Installation
Once your workspace is prepared, you can follow these steps to install your ceiling fan on a slanted ceiling:
-
Locate the joist:
Use a stud finder to locate a ceiling joist where you plan to mount the fan. The joist will provide structural support for the fan. -
Mount the mounting bracket:
Align the mounting bracket with the joist and mark the screw holes with a pencil. Using the appropriate drill bit, drill pilot holes in the marked locations. Secure the bracket to the ceiling joist using screws. -
Connect the electrical wiring:
Carefully connect the electrical wiring from the fan to the existing wiring in the junction box. Be sure to match the wires correctly and use wire nuts to secure the connections. Use electrical tape to cover any exposed wires. -
Install the fan motor:
Position the fan motor onto the mounting bracket and tighten the mounting screws. Ensure the motor is securely fastened and aligned correctly. -
Adjust the fan blade angles:
Once the motor is mounted, adjust the fan blade angles using the provided screws or knobs. This step helps to ensure that the blades are positioned correctly for optimal air circulation, even on a slanted ceiling. -
Install the fan blades:
Attach the fan blades to the motor using the provided fasteners. Ensure that the blades are securely fastened and aligned with the motor. -
Turn on the power:
Carefully turn on the power to the circuit supplying the fan and test the fan.
Additional Considerations
When installing a ceiling fan on a slanted wall, consider the fan's overall weight and the ceiling's structural integrity. Ensure that the joist you choose to mount the fan on can support the fan's weight. If you have any concerns about the structural adequacy of the ceiling, consult with a professional contractor.
Before installing the fan, review the manufacturer's instructions carefully. These instructions often provide specific details and guidance relevant to your particular model.
Always prioritize safety during the installation process. Wear safety glasses to protect your eyes from debris and use a ladder that is sturdy and provides a stable platform. If you are not comfortable with electrical work, it's best to consult with a qualified electrician for assistance.

How To Install A Ceiling Fan On Sloped Lemon Thistle

Ensuring Proper Ceiling Fan Installation With Vaulted Ceilings

How To Install A Ceiling Fan On Sloped Lemon Thistle

How To Choose A Ceiling Fan For Vaulted Ceilings Lightology

Electrical Mount Ceiling Fan At The Peak Of A Sloped Home Improvement Stack Exchange

How To Install A Ceiling Fan On Sloped Lemon Thistle

How To Choose A Ceiling Fan For Vaulted Ceilings Lightology

How To Choose A Ceiling Fan For Vaulted Ceilings Lightology

How To Install A Ceiling Fan On Sloped Lemon Thistle

Install Ceiling Fan On Sloped Simple Modern Handmade Home
Related Posts


