How to Install a Ceiling Fan on a 45-Degree Angle: A Comprehensive Guide
Installing a ceiling fan on a 45-degree angle can elevate the aesthetics and functionality of your space. Whether you seek better airflow, improved lighting, or a touch of sophistication, this guide will equip you with the necessary knowledge and steps to execute the task flawlessly.
Step 1: Gather Materials and Tools
To begin, gather the essential materials and tools required for the installation:
- Ceiling fan kit
- 45-degree angled ceiling adapter (if not included in the kit)
- Phillips-head screwdriver
- Electrical tape
- Wire strippers
- Safety glasses
- Ladder
Step 2: Prepare the Electrical Junction Box
Before mounting the fan, ensure the electrical junction box is adequately secured. Check that the box is firmly attached to the ceiling joist and can support the weight of the fan. If the box is loose or damaged, consult a qualified electrician for assistance.
Step 3: Mount the Angled Ceiling Adapter
Slip the 45-degree angled ceiling adapter over the junction box and secure it using the provided screws. Ensure the adapter is flush against the ceiling and properly aligned with the desired angle.
Step 4: Connect the Wiring
Identify the wires from the ceiling and the fan kit. Strip the ends of the wires to expose approximately 1/2 inch of bare wire. Using electrical tape, connect the black wires together, the white wires together, and the ground wires together. Ensure the connections are secure and covered with electrical tape.
Step 5: Hang the Fan
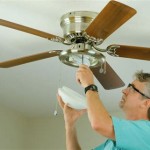
Carefully lift the fan assembly and align the mounting bracket with the angled adapter. Thread the mounting screws through the bracket and tighten them securely. Ensure the fan is level and hangs at the desired height.
Step 6: Install the Fan Blades
Locate the slots on the fan motor and insert the fan blades. Secure the blades firmly using the provided screws or bolts. Ensure the blades are balanced and aligned correctly.
Step 7: Complete the Installation
Slide the canopy over the mounting bracket and secure it using the provided screws. Install the light fixture if included in the fan kit, following the manufacturer's instructions. Turn on the fan and light to confirm proper functionality.
Additional Tips and Considerations
Safety Precautions: Always wear safety glasses and turn off the electricity at the circuit breaker before starting any electrical work.
Ceiling Height: Ensure there is sufficient clearance between the fan blades and the ceiling. The minimum height for most ceiling fans is 8 feet.
Angle Adjustment: Most angled ceiling adapters offer adjustable angles. Choose the desired angle and secure the adapter accordingly.
Balance the Fan: If the fan wobbles or shakes, it may be unbalanced. Add balancing weights to the lighter blades to eliminate vibrations.
Professional Assistance: If you encounter any difficulties or uncertainties during the installation process, do not hesitate to consult a professional electrician for assistance.

Fans On An Angle Installing Ceiling Angled Or Raked

How To Choose A Ceiling Fan For Vaulted Ceilings Lightology

How To Find Ceiling Fans Slope Adapters And Downrods For Angled Ceilings Delmarfans Com

How To Choose A Ceiling Fan For Vaulted Ceilings Lightology

How To Choose A Ceiling Fan For Vaulted Ceilings Lightology

How To Choose A Ceiling Fan For Vaulted Ceilings Lightology

Ceiling Fans For Angled Ceilings

How To Find Ceiling Fans Slope Adapters And Downrods For Angled Ceilings Delmarfans Com

How To Find Ceiling Fans Slope Adapters And Downrods For Angled Ceilings Delmarfans Com

Sloped Ceiling Fan Adapter By Minka Aire A245 Bs Mka350548
Related Posts

