How To Hang Decorations From the Ceiling Without Nails
Decorating a space often involves utilizing the ceiling to add visual interest and create a festive atmosphere. However, using nails or screws for hanging decorations can damage the ceiling surface, leaving unsightly holes and requiring repairs. Fortunately, several alternative methods exist that allow for secure and damage-free decoration hanging. This article outlines various techniques and materials for hanging decorations from the ceiling without nails, focusing on their application, advantages, and limitations.
Using Adhesive Hooks and Strips
Adhesive hooks and strips represent a popular and readily available option for hanging decorations without nails. These products typically consist of a plastic or metal hook attached to an adhesive backing. The adhesive is designed to bond strongly to the ceiling surface while being removable without causing damage. The effectiveness of adhesive hooks and strips depends on several factors, including the weight of the decoration, the texture and cleanliness of the ceiling surface, and the quality of the adhesive itself.
Before applying an adhesive hook or strip, it is crucial to prepare the ceiling surface properly. This involves cleaning the area with a damp cloth and allowing it to dry completely. Removing any dust, dirt, or grease will ensure a stronger bond between the adhesive and the ceiling. Certain surfaces, such as textured ceilings or those coated with loose paint, may not be suitable for adhesive hooks and strips. In such cases, the adhesive may not adhere properly, or it may pull off paint or texture when removed.
When selecting adhesive hooks or strips, it is essential to consider the weight capacity of the product. This information is typically indicated on the packaging. Choosing a hook or strip with a weight capacity that exceeds the weight of the decoration is highly recommended to ensure a secure hold and prevent the decoration from falling. It is also advisable to distribute the weight of heavier decorations across multiple hooks or strips.
To apply an adhesive hook or strip, carefully peel off the backing paper and press the adhesive side firmly against the prepared ceiling surface. Hold the hook or strip in place for the recommended time, as specified by the manufacturer. This allows the adhesive to bond properly to the ceiling. Avoid hanging decorations immediately after applying the hooks or strips. Allow the adhesive to cure for the recommended time (usually several hours or overnight) to achieve maximum bonding strength.
When removing adhesive hooks or strips, follow the manufacturer's instructions carefully. Typically, this involves gently pulling down on the hook or strip while supporting the surrounding ceiling surface. Avoid pulling the hook or strip directly outwards, as this can damage the ceiling. Some adhesive products have a release mechanism that involves pulling a tab to stretch the adhesive, allowing for clean removal.
One of the main advantages of using adhesive hooks and strips is their ease of use and availability. They are relatively inexpensive and can be found in most hardware stores and supermarkets. Furthermore, they are generally damage-free when applied and removed correctly. However, their weight capacity is limited, and they may not be suitable for hanging heavy or bulky decorations. They also may not work on all ceiling surfaces.
Utilizing Suspended Ceiling Grids
Suspended or drop ceilings, characterized by a grid of metal rails supporting lightweight ceiling tiles, offer an alternative method for hanging decorations without nails. This method is particularly suitable for office spaces, classrooms, and other buildings with suspended ceilings. Special clips and hooks designed specifically for suspended ceiling grids allow decorations to be hung securely without damaging the ceiling tiles or grid system.
Suspended ceiling grid clips are typically made of metal or plastic and are designed to attach to the T-shaped rails of the ceiling grid. These clips feature a hook or loop that allows decorations to be hung from them. The clips are designed to distribute the weight of the decoration across the grid system, preventing damage to individual ceiling tiles. The selection of the appropriate clip depends on the size and weight of the decorations to be hung. There are clips designed for lighter decorations like streamers and paper lanterns, and more robust clips for heavier items.
To install a suspended ceiling grid clip, simply slide it onto the T-shaped rail of the ceiling grid. Ensure that the clip is securely attached and that it is positioned where the decoration will be hung. The weight capacity of each clip must be respected to avoid overloading the grid system. Heavier decorations should be hung from multiple clips to distribute the weight evenly. One should be mindful of the overall weight capacity of the suspended celling grid as well. Consult the manufacturer's specifications for maximum load.
The advantage of using suspended ceiling grid clips is that they provide a secure and stable hanging point without damaging the ceiling tiles. They are relatively easy to install and remove, making them a convenient option for temporary decorations. Furthermore, they can support a wider range of decoration weights compared to adhesive hooks. However, this method is only applicable to spaces with suspended ceilings. The aesthetic appeal of suspended ceiling grid clips may also be a consideration, as they are visible and may not blend seamlessly with all decoration styles.
When removing suspended ceiling grid clips, care should be taken not to damage the ceiling tiles or grid system. Gently slide the clip off the rail, avoiding excessive force. Inspect the ceiling tiles and grid for any signs of damage. If any damage is found, it should be addressed promptly to prevent further deterioration.
Employing Tension Rods
Tension rods, commonly used for hanging curtains or creating temporary partitions, can also be adapted for hanging decorations from the ceiling without nails. This method involves placing a tension rod horizontally between two walls or within a recessed area of the ceiling. Decorations can then be hung from the rod using hooks, clips, or strings.
Selecting the appropriate tension rod is crucial for a successful installation. The rod should be long enough to span the distance between the two walls or recessed areas securely, but not so long that it cannot be tightened properly. The weight capacity of the tension rod should also be considered, especially when hanging heavier decorations. Choosing a sturdy tension rod made of durable materials is essential to prevent it from bending or collapsing under the weight of the decorations.
To install a tension rod, extend it slightly beyond the desired length and then compress it until it fits snugly between the two walls or recessed areas. Ensure that the rod is level and that it is securely in place. Test the stability of the rod by applying gentle pressure to it. If the rod slips or moves, readjust it until it is securely anchored.
Decorations can be hung from the tension rod using various methods. S-hooks are a versatile option that allows for easy attachment and removal of decorations. String or wire can also be used to suspend decorations from the rod. The weight of the decorations should be distributed evenly along the rod to prevent it from becoming unbalanced. Consider using a non-slip material or coating on the ends of the tension rod to prevent slippage and protect the walls from scratches.
The advantage of using tension rods is that they provide a strong and stable hanging point without requiring any drilling or nailing. They are relatively easy to install and remove, making them a good option for temporary decorations. Furthermore, they can support a wider range of decoration weights compared to adhesive hooks. However, this method is only applicable to spaces with suitable walls or recessed areas. The aesthetic appeal of tension rods may also be a consideration, as they are visible and may not blend seamlessly with all decoration styles.
When removing a tension rod, simply compress it until it is loose and then remove it from its position. Inspect the walls for any signs of damage. If any damage is found, it should be addressed promptly. Store the tension rod in a safe place for future use.
Ultimately, selecting the best method for hanging decorations from the ceiling without nails depends on various factors, including the weight and type of decoration, the ceiling surface, and personal preferences. Evaluating these factors and carefully following the instructions for each method will ensure a successful and damage-free decorating experience.

How To Hang Decorations From A Ceiling 7 Steps With Pictures

How To Hang Decorations From A Ceiling 7 Steps With Pictures

How To Hang Decorations From A Ceiling 7 Steps With Pictures

Diy Ers Friendly Origami Ceiling Decoration

How To Hang Decorations From A Ceiling 7 Steps With Pictures

Tips For How To Hang Garland Wreaths And Stockings Without Nails The Inspired Room

How To Hang Decorations From A Ceiling 7 Steps With Pictures

Diy Ers Friendly Origami Ceiling Decoration

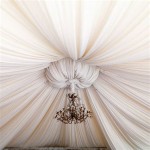
How To Hang A Canopy From The Ceiling Without Drilling Holes

Diy Ers Friendly Origami Ceiling Decoration
Related Posts