Hanging ceiling lights can be tricky, but it doesn’t have to be. With the right tools and a few simple steps, you can easily hang ceiling lights in your home. This guide will walk you through the process, including the safety precautions you should take, the tools you will need, and the best techniques for hanging your ceiling lights.
Safety First
Before you begin, you must ensure that you’re safe. Make sure you follow all safety precautions specific to the type of light you’re installing. Turn off the circuit breaker that supplies power to the area where you’ll be working. Wear protective eyewear and gloves when handling wiring. Also, make sure you have a ladder that is stable and tall enough to reach the ceiling.
Tools Needed
You’ll need a few tools to hang your ceiling lights. You’ll need a drill and a drill bit that is the same size as the screws that come with the light. You’ll also need a Phillips-head screwdriver, a wire stripper, and a wire cutter. You may also need a voltage tester and an extension cord.
Installing the Light
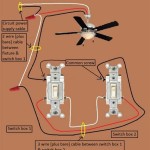
Once you’ve gathered all the necessary tools, it’s time to install the light. Start by mounting the mounting bracket onto the ceiling. Make sure it is level and secure. Then, connect the wiring according to the instructions that came with the light. Test the wiring with a voltage tester to make sure it’s properly connected. Once you’ve connected the wiring, attach the light to the mounting bracket and turn it on to make sure it works.
Conclusion
Hanging ceiling lights doesn’t have to be a daunting task. With the right tools and a few simple steps, you can have your light installed in no time. Just remember to take safety precautions and follow the instructions that come with the light. With a few simple steps, you’ll be able to enjoy your new ceiling light in no time!


/RecessedLighting-5c60f471c9e77c00010a4a3e.jpg)
Related Posts


