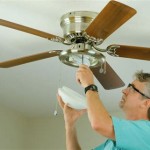
How to Troubleshoot and Repair a Hunter Ceiling Fan Light Kit
A non-functional light kit on a Hunter ceiling fan can be a frustrating issue. This guide provides a step-by-step approach to diagnosing and resolving common problems, restoring illumination and full functionality to the ceiling fan.
Safety First
Before beginning any electrical work, ensure safety by turning off the power to the ceiling fan at the circuit breaker. This crucial step prevents electrical shock and ensures a safe working environment. Verify the power is off by using a non-contact voltage tester on the fan's wiring.
1. Check the Light Bulbs
Often, the simplest solution is the correct one. Begin by checking the light bulbs for any signs of burning or damage. Try replacing the bulbs with new ones of the correct wattage and type specified by the Hunter fan's instructions. This seemingly obvious step can often resolve the issue quickly.
2. Inspect the Pull Chain
If the light kit is controlled by a pull chain, examine it for damage or disconnection. Ensure the chain is properly connected and functioning correctly. Sometimes, a stuck or broken pull chain can interrupt the circuit to the light kit. Replacing a faulty pull chain is a relatively simple fix.
3. Examine the Light Socket
Carefully inspect the light sockets for any signs of damage, debris, or corrosion. Loose wiring within the socket can also prevent the light kit from working. If necessary, tighten the wiring connections, ensuring they are secure. A damaged socket may need replacement.
4. Test the Wall Switch
If the light kit is controlled by a wall switch, verify the switch's functionality. A faulty wall switch can prevent power from reaching the fan's light kit. Test the switch with a multimeter or replace it with a known working switch to eliminate this possibility.
5. Check the Wiring Connections Within the Fan
With the power off, open the fan's motor housing to access the internal wiring. Inspect the wiring connections for looseness, corrosion, or damage. Ensure all wires are securely connected to the appropriate terminals and that no wires are frayed or broken. Secure any loose connections and repair or replace any damaged wiring as needed.
6. Inspect the Hunter Fan's Remote Control (If Applicable)
If the fan is operated by a remote control, check the remote's batteries and ensure they are functioning correctly. Test the remote's functionality by trying to operate the fan's other functions. A malfunctioning remote can sometimes interfere with the light kit's operation. Consider replacing the remote if necessary.
7. Check the Hunter Fan's Receiver Unit (If Applicable)
If the fan uses a remote control, the receiver unit inside the fan's housing can sometimes malfunction. Check the receiver unit's wiring connections and look for any signs of damage. If the receiver unit appears faulty, it may need to be replaced.
8. Examine the Reverse Switch
The reverse switch, which controls the direction of the fan blades, can sometimes affect the light kit operation. Check the switch's wiring and ensure it's properly connected. A faulty reverse switch can occasionally interrupt the circuit to the light kit.
9. Consult Hunter Fan's Support Resources
If the problem persists after attempting these troubleshooting steps, consult Hunter Fan's official website for support documentation, including wiring diagrams and troubleshooting guides specific to the fan model. Contacting Hunter Fan's customer support directly can provide further assistance in resolving the issue.
Specific Issues with Hunter Pull Chain Light Kits
Hunter pull chain mechanisms can sometimes present specific challenges. If the issue is isolated to the pull chain controlling the light, focus on the following:
Pull Chain Operation
Ensure the pull chain engages the switch mechanism correctly. Sometimes the chain becomes disconnected or the mechanism itself becomes worn or broken. Replacing the pull chain assembly is often a straightforward solution.
Switch Contacts
Inside the pull chain housing are small metal contacts that make and break the electrical connection to the light kit. These contacts can become corroded or worn over time. Cleaning the contacts with electrical contact cleaner or replacing the entire switch assembly can resolve this issue.
Specific Issues with Hunter Remote Controlled Light Kits
Remote-controlled Hunter fans may experience issues specific to the remote control system. If the fan itself operates but the light does not respond to the remote, consider these steps:
Remote Synchronization
Sometimes, the remote loses synchronization with the receiver unit in the fan. Consult the Hunter fan's instructions for the proper procedure to resynchronize the remote. This often involves a specific sequence of button presses on the remote and/or the fan itself.
Dip Switch Settings
Inside the fan's housing and the remote control battery compartment are small dip switches. These switches control the frequency at which the remote and receiver communicate. Ensure the dip switch settings on both the remote and the receiver match exactly. Mismatched dip switch settings can prevent the remote from controlling the light kit.

How To Replace A Ceiling Fan Light Kit Smafan Com

Ceiling Fan Light Repair Home Tutor

Hunter Ceiling Fan Replacement Parts Fans Lighting Patio Furniture Light Kit Diy Network Kits

Changing Ceiling Fan Light Kit Doityourself Com Community Forums

Light Kit Assembly K053208299 Oem Hunter Ereplacementparts Com

Oem Hunter K053208214 Light Kit Assembly Fix Com

Hunter Ceiling Fan Replacement Parts Hampton Bay Fans Lighting

Hunter Avia Ii Led 52 Ceiling Fan Costco

Oem Hunter K053208299 Light Kit Assembly Fix Com

Hunter Newsome 52 In Indoor Brushed Nickel Bowl Light Kit Ceiling Fan 53312 The Home Depot
Related Posts