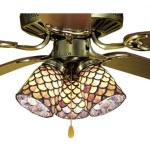
How To Fix a Ceiling Fan Pull Switch
A malfunctioning pull chain switch in a ceiling fan is a common household nuisance. These switches, responsible for controlling the fan's speed and sometimes the light fixture, are subject to wear and tear due to frequent use. When a pull chain switch fails, the fan might not turn on, might get stuck on a single speed, or the light may stop working entirely. Fortunately, replacing a pull chain switch is typically a straightforward task that most homeowners can accomplish with basic tools and a bit of patience. This article will provide detailed instructions on diagnosing the problem, safely disconnecting the power, and replacing the faulty switch.
Before beginning any electrical work, safety is paramount. Always ensure the power to the ceiling fan is completely disconnected. This is typically achieved by turning off the corresponding circuit breaker in the electrical panel. It’s also prudent to double-check with a non-contact voltage tester to confirm no electricity is flowing to the fan. Neglecting to disconnect the power can result in serious injury or even death.
Once the power is safely disconnected, the next step is to gain access to the fan's wiring compartment. This typically involves removing the light fixture and the switch housing, often held in place by screws. Carefully set aside all removed components, noting their order and orientation for easy reassembly. Once inside the wiring compartment, the pull chain switch will be visible, along with its connected wires.
Documenting the existing wiring configuration is crucial before disconnecting any wires. Take clear photographs or draw a detailed wiring diagram to ensure accurate reconnection of the new switch. Improper wiring can damage the fan motor or light fixture. Pay close attention to the color of the wires and their corresponding terminals on the switch.
Identifying the Malfunctioning Switch
The primary symptom of a faulty pull chain switch is the inability to control the fan speed or light fixture. The fan might be stuck on one speed, or the light might not turn on at all. The pull chain itself might also feel loose or unresponsive. However, it's important to rule out other potential causes before assuming the switch is the problem. A loose wire connection within the fan's wiring compartment can sometimes mimic the symptoms of a bad switch.
To diagnose a loose wire, visually inspect all connections in the wiring compartment. Gently tug on each wire to ensure it is securely fastened to its terminal. If any loose connections are found, tighten them using a screwdriver. After securing the connections, restore power to the fan and test its functionality. If the problem persists, the pull chain switch is likely the culprit.
Another possible, though less common, cause of fan malfunction can be a faulty capacitor. Capacitors are responsible for storing and releasing electrical energy to help start and maintain the fan motor's rotation. A failing capacitor can cause the fan to run slowly, hum loudly, or not start at all. While less frequently mistaken for a switch issue, it is important to be aware of this potential issue. Replacing a capacitor requires more specialized knowledge of electrical components.
Occasionally the chain itself may be the failing part. If the internal mechanisms are worn, the chain may not engage the switch correctly. In this case, replacing the chain may be an option before replacing the entire switch. Typically, a new chain can be attached using pliers to open and close the chain link.
Replacing the Pull Chain Switch
Once the power is disconnected and the wiring configuration is documented, the old pull chain switch can be removed. The switch is typically held in place by a small nut on the switch housing or by pressure fittings. Loosen the nut or disengage the pressure fittings to release the switch from the housing. Next, disconnect the wires connected to the switch. These wires are usually connected via screw terminals or push-in connectors. If screw terminals are used, loosen the screws and remove the wires. For push-in connectors, a small screwdriver or specialized release tool may be required to disengage the wires.
With the old switch removed, install the new pull chain switch. Thread the wires through the switch housing and connect them to the corresponding terminals on the new switch, referring to the previously created wiring diagram or photographs. Ensure each wire is securely fastened to its terminal. Tighten the screws on screw terminals firmly, but avoid over-tightening, which can damage the terminals. For push-in connectors, ensure the wires are fully inserted and locked in place.
After connecting the wires, carefully position the new switch in the switch housing and secure it with the nut or pressure fittings. Ensure the switch is properly seated and the pull chain moves freely. Double-check all wire connections to ensure they are secure and no bare wires are exposed. If there are any remaining wires, then they should be tucked back into the wiring compartment neatly.
Once the new switch is installed and all connections are verified, carefully reassemble the switch housing and light fixture, ensuring all screws are tightened securely. Restore power to the ceiling fan by turning on the circuit breaker in the electrical panel. Test the functionality of the fan and light fixture by using the pull chain. If the fan and light operate as expected, the pull chain switch replacement was successful. If problems persist, re-examine the wiring diagram and connections, or consult a qualified electrician.
Preventative Measures and Considerations
To extend the lifespan of pull chain switches and minimize the need for frequent replacements, consider several preventative measures. Avoid pulling the chain forcefully or rapidly, as this can damage the internal mechanisms of the switch. Gentle and deliberate pulls are less likely to cause wear and tear. Consider lubricating the pull chain mechanism with a small amount of silicone lubricant to reduce friction and prevent corrosion. Regular lubrication can help the chain move smoothly and extend the switch's lifespan.
Consider the quality of the replacement switch. While inexpensive switches might seem appealing, they are often made with lower-quality materials and may not last as long. Investing in a higher-quality switch can provide better performance and durability. Look for switches with robust construction and reliable mechanisms.
When selecting a replacement switch, ensure it is compatible with the ceiling fan's wiring and electrical specifications. Using an incompatible switch can damage the fan or create a fire hazard. Check the fan's manual or consult a qualified electrician to determine the appropriate type of switch. Switches are sold with different speed and light options, so ensure the desired settings are selected.
For ceiling fans with multiple features, such as remote control functionality or dimmable lights, consider upgrading to a more advanced switch. These switches often offer greater control and convenience. Also consider replacing the ceiling fan altogether, especially if the fan is several decades old. New fans are more energy efficient, are quieter, and have improved features.
If this repair seems daunting, or if any uncertainty arises during the process, it is always best to consult a qualified electrician. Electrical work can be dangerous, and improper repairs can lead to serious consequences. A qualified electrician has the knowledge and experience to safely and effectively diagnose and repair electrical problems. Do not hesitate to seek professional assistance when needed.

Ceiling Fan Pull Switch Broken Chain Replace Fix Hampton Bay

4 Ways To Replace A Ceiling Fan Pull Chain Switch Wikihow

Fix A Snapped Fan Pull Chain At No Cost How To

Ceiling Fan Pull Chain Switch Replacement How To Replace A On Easy
Ceiling Fan Pull Chain Switch Replacement Ifixit Repair Guide

4 Ways To Replace A Ceiling Fan Pull Chain Switch Wikihow

Diy Pull Chain Fix Ceiling Fan

How To Change A Ceiling Fan Pull Chain Switch

4 Ways To Replace A Ceiling Fan Pull Chain Switch Wikihow

4 Ways To Replace A Ceiling Fan Pull Chain Switch Wikihow
Related Posts

