How to Cut Crown Molding on a Vaulted Ceiling Wall
Installing crown molding elevates the aesthetic appeal of any room, adding a touch of elegance and sophistication. However, when dealing with vaulted ceilings, the process becomes significantly more complex than installing molding on a standard 90-degree wall. The angles involved are rarely straightforward, requiring precise measurements, accurate cuts, and a thorough understanding of geometric principles. This article provides a comprehensive guide to cutting and installing crown molding on a vaulted ceiling wall, ensuring a professional and visually appealing result.
Before embarking on this project, it’s crucial to understand the challenges involved. Unlike standard installations where pre-calculated miter and bevel angles can be readily applied, vaulted ceilings demand custom calculations based on the specific angles of the ceiling and wall intersection. Furthermore, the coping technique, often used for inside corners, becomes more intricate due to the non-standard angles. Finally, dealing with long runs of molding on a vaulted ceiling may necessitate joining pieces together seamlessly, requiring advanced techniques for a flawless finish.
Accurately Measuring Vaulted Ceiling Angles
The first and arguably most critical step in installing crown molding on a vaulted ceiling is accurately measuring the angles. Without precise measurements, any subsequent cuts will be inaccurate, leading to gaps, misalignments, and a compromised final product. Several methods can be employed to achieve accurate measurements, each with its own advantages and disadvantages.
One of the most common methods involves using a protractor or angle finder. These tools allow you to directly measure the angle between the two surfaces – the wall and the ceiling. Digital angle finders offer increased precision compared to traditional protractors, displaying the angle reading in degrees. To use this method effectively, position the protractor or angle finder at the intersection of the wall and ceiling, ensuring it is flush against both surfaces. Take multiple readings along the length of the vaulted ceiling to account for any variations or inconsistencies in the ceiling angle.
Another method involves using a bevel gauge in conjunction with a T-bevel. The bevel gauge is adjusted to match the angle between the wall and the ceiling. The T-bevel is then used to transfer this angle to a piece of scrap wood. From the scrap wood, the angle can be bisected to determine the appropriate miter saw settings. This method requires careful attention to detail and precise adjustments to ensure accuracy.
A more advanced method utilizes a combination square and a level. This technique is particularly useful for vaulted ceilings with complex angles. First, use the level to establish a plumb line on the wall. Then, use the combination square to measure the distance from the plumb line to the ceiling at various points along the wall. These measurements can then be used to calculate the angle of the ceiling using trigonometric functions. While this method requires a basic understanding of trigonometry, it can provide highly accurate results.
Regardless of the method chosen, it is essential to double-check all measurements to minimize the risk of errors. Remember that even a small error in measurement can result in significant gaps or misalignments when the crown molding is installed.
Calculating Miter and Bevel Angles
Once the ceiling angle is accurately measured, the next step is to calculate the miter and bevel angles required for cutting the crown molding. This calculation involves bisecting the angle between the wall and the ceiling and then applying specific formulas to determine the appropriate settings for the miter saw.
The fundamental principle is that the miter angle is half the angle between the two walls meeting at the corner. For a standard 90-degree corner, the miter angle is 45 degrees. However, with vaulted ceilings, the angle is rarely 90 degrees, and the miter angle must be calculated accordingly. To calculate the miter angle, simply divide the measured angle between the wall and the ceiling by two.
The bevel angle is the angle at which the blade of the miter saw is tilted relative to the base. The calculation of the bevel angle is more complex and depends on the spring angle of the crown molding. The spring angle is the angle at which the molding sits against the wall and ceiling. Most crown molding has a spring angle of either 38 degrees or 45 degrees. The formula for calculating the bevel angle is as follows: arcsin(cos(spring angle) / cos(miter angle)).
For example, if the measured angle between the wall and the ceiling is 120 degrees, the miter angle would be 60 degrees. If the crown molding has a spring angle of 45 degrees, the bevel angle would be arcsin(cos(45) / cos(60)), which is approximately 54.7 degrees.
Online calculators and angle converters are readily available to simplify these calculations. These tools allow you to input the measured angle and the spring angle of the crown molding, and they will automatically calculate the miter and bevel angles. While these calculators can be helpful, it is essential to understand the underlying principles and double-check the results to ensure accuracy.
It is also important to note that the calculated angles are theoretical values and may need to be adjusted slightly based on the specific characteristics of the crown molding and the wall and ceiling surfaces. It is always recommended to perform test cuts on scrap pieces of molding to fine-tune the angles before cutting the actual molding.
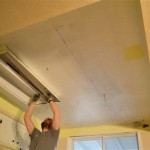
Cutting and Installing Crown Molding
With the miter and bevel angles calculated, the next step is to cut and install the crown molding. This process requires precision, patience, and a systematic approach to ensure a professional and visually appealing result.
Before cutting the molding, it is essential to set up the miter saw accurately. Ensure that the blade is sharp and properly aligned. Adjust the miter and bevel angles according to the calculated values. Double-check the settings to minimize the risk of errors. Secure the molding to the miter saw fence, ensuring it is properly supported and aligned. Make the cut slowly and smoothly, allowing the blade to do the work. Avoid forcing the blade or applying excessive pressure, as this can result in splintering or inaccurate cuts.
For outside corners, the crown molding should be cut with the back of the molding facing up in the miter saw. The molding should be positioned so that the right side is cut for the right corner and the left side is cut for the left corner. For inside corners, the crown molding should be cut with the front of the molding facing up in the miter saw. The molding should be positioned so that the right side is cut for the right corner and the left side is cut for the left corner.
After cutting the molding, dry-fit the pieces to ensure a proper fit. Check for any gaps or misalignments. If necessary, make small adjustments to the angles to achieve a seamless fit. Once the fit is satisfactory, apply construction adhesive to the back of the molding. Position the molding against the wall and ceiling, ensuring it is properly aligned. Use a nail gun to secure the molding in place. Drive nails into the studs or ceiling joists to provide a secure hold. Fill any nail holes with wood filler and sand smooth. Caulk the seams between the molding and the wall and ceiling to create a smooth, seamless finish.
When dealing with long runs of molding on a vaulted ceiling, it may be necessary to join pieces together. This can be accomplished by creating a scarf joint, which is a angled joint that allows the two pieces of molding to overlap slightly. The angle of the scarf joint should be approximately 45 degrees. Apply construction adhesive to the joint and clamp the pieces together until the adhesive is dry. Sand the joint smooth and fill any gaps with wood filler. Caulk the seam to create a seamless finish.
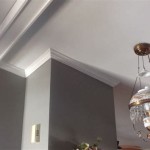
Installing crown molding on a vaulted ceiling requires careful attention to detail and precise execution. By following these guidelines and taking the time to measure, calculate, and cut accurately, you can achieve a professional and visually appealing result that will enhance the beauty of your home.

Install Crown Molding Cathedral Vaulted Ceiling

How To Cut A Vaulted Sloped Cathedral Up Crown Molding Corner The Easy Way With Creative

Installing Crown Molding Around A Cathedral Ceiling Fine Homebuilding

Running Crown On Cathedral Ceilings Jlc

How To Install Crown Molding On Vaulted Or Cathedral Ceilings The Joy Of Moldings

Nightmare Job Vaulted Ceiling Crown Molding Mobile Home Bedroom Renovation

Crown Molding On Angled Ceilings Makely

Crown Molded On Sloped Ceiling

Crown Molding On Angled Ceiling Sawdust Girl

Diy Crown Molding For Vaulted Ceilings Easy Cut Install Paul Ricalde
Related Posts