How to Cut Crown Molding for a Cathedral Sloped Ceiling
Cutting crown molding for a cathedral sloped ceiling can be a daunting task, but with the right tools and techniques, it can be done with precision and accuracy. Here's a step-by-step guide to help you achieve a professional-looking finish:
1. Measure and Mark the Ceiling
Measure the length of the ceiling where you want to install the crown molding and mark the starting and ending points. Use a level to ensure that the marks are straight and parallel to the floor.
2. Determine the Ceiling Angle
To determine the angle of the ceiling slope, use a bevel square or an angle finder. Place the square on the ceiling and adjust it until the blade is parallel to the slope. Mark the angle on a scrap piece of molding.
3. Cut the Inner and Outer Miter Angles
For the inner miter cut, place the molding on a miter saw and adjust the blade to the angle measured on the scrap piece. Cut the molding at a 45-degree angle. For the outer miter cut, adjust the saw to the ceiling angle and cut the molding at a 45-degree angle opposite to the inner miter angle.
4. Cut the Coped Joints
To create a smooth transition between the crown molding and the ceiling, you need to make copped joints. Mark the length of the molding between the inner and outer miter cuts on the ceiling. Transfer the measurement to the molding and make a vertical cut at the mark. Then, cut the molding at a 45-degree angle along the edge of the vertical cut.
5. Dry Fit the Crown Molding
Before installing the crown molding, dry fit the pieces together on the floor to ensure they fit properly. Make any necessary adjustments to the cuts.
6. Install the Crown Molding
Apply adhesive or use nails to secure the crown molding to the ceiling. Start by installing the inner miter cut piece and work your way towards the outer miter cut piece. Use a nail gun or a hammer and nails to secure the molding.
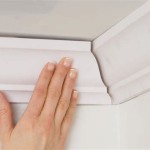
7. Fill and Finish
Once the crown molding is installed, fill any nail holes or gaps with caulk or wood filler. Sand the filled areas smooth and paint or stain the molding to match the rest of the ceiling.
Tips for Cutting Crown Molding for a Cathedral Sloped Ceiling
- Use a sharp blade on your miter saw to ensure clean cuts.
- Test your cuts on scrap pieces of molding before making the actual cuts.
- Practice makes perfect. If you're not confident in your skills, consider seeking professional help.

Install Crown Molding Cathedral Vaulted Ceiling

How To Cut A Vaulted Sloped Cathedral Up Crown Molding Corner The Easy Way With Creative

How To Install Crown Molding On A Vaulted Cathedral Ceiling Without Transition Piece

Running Crown On Cathedral Ceilings Jlc

Installing Crown Moulding Part Two Canadian Woodworking

Install Crown Molding Cathedral Vaulted Ceiling

Crown Moulding On Angled Ceiling Sawdust Girl

How To Install Crown Molding On Vaulted Or Cathedral Ceilings The Joy Of Moldings

Diy Crown Molding For Vaulted Ceilings Easy Cut Install Paul Ricalde

Installing Crown Moulding Part Two Canadian Woodworking
Related Posts