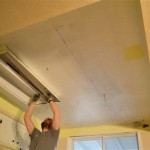
How to Cut Ceiling for Recessed Lighting
Installing recessed lighting can dramatically enhance a room's ambiance and functionality. However, before enjoying the benefits of these fixtures, you must carefully cut the ceiling to accommodate them. This task requires precision, safety precautions, and the right tools. This article outlines the essential steps involved in cutting your ceiling for recessed lighting, ensuring a seamless and aesthetically pleasing installation.
1. Planning and Preparation
Thorough planning is paramount for a successful ceiling cut. Begin by carefully selecting the location for your recessed lights, considering factors like furniture placement, wall switches, and overall room design. It's crucial to determine the size and type of recessed lighting fixtures you intend to install, as this will dictate the size and shape of the ceiling cut required.
Once you've finalized the placement and chosen your fixtures, gather the necessary tools and materials. These include:
- Recessed lighting fixtures
- Safety glasses
- Dust mask
- Work gloves
- Measuring tape
- Pencil
- Level
- Utility knife
- Power drill with appropriate drill bits
- Circular saw or jigsaw
- Drywall saw
- Safety ladder or scaffolding
- Drywall patching compound
- Drywall tape
- Paint to match the ceiling
Before starting any cutting, ensure you have access to the electrical wiring to connect the recessed lights. If necessary, consult an electrician for professional assistance with the wiring process.
2. Marking the Ceiling
With your tools and materials gathered, carefully mark the ceiling where you intend to cut for the recessed lighting. Begin by using a measuring tape and pencil to mark the exact location and size of each fixture. Ensure that the markings are straight and accurate, as they will serve as a guide for the cutting process.
To mark the ceiling accurately, follow these steps:
- Determine the location of the fixture's center point on the ceiling. Mark this point with a pencil.
- Measure the diameter or width of the fixture and divide it by two. This will give you the radius of the cutout.
- Using a compass or a string attached to a pencil, draw a circle around the center point with the calculated radius.
- Repeat the process for each fixture location, ensuring that the circles are spaced appropriately.
Once the circles are marked, use a level to ensure they are perfectly level and parallel. This will ensure that the recessed lights are installed at the same height and angle.
3. Cutting the Ceiling
Cutting the ceiling for recessed lighting requires precision and care. Begin by using a utility knife to score along the marked lines. This will weaken the drywall and make it easier to cut through. Then, choose a cutting tool appropriate for your ceiling material:
- For drywall ceilings, a circular saw or jigsaw is ideal. Ensure the tool is fitted with a drywall blade for clean cuts.
- If your ceiling is made of plaster, a drywall saw or a sharp utility knife might be sufficient.
When cutting with a saw, start from the outside of the circle and gradually work your way inwards, following the marked lines. Use slow, controlled movements to avoid chipping or breaking the drywall. Once the cut is complete, remove the cutout section carefully. Be cautious as the drywall may crumble or fall, so have a container to collect the debris.
4. Finishing Touches
Once the ceiling is cut, carefully remove any loose debris and prepare the area for the recessed lighting fixtures. Ensure the cut edges are smooth and free of sharp edges to prevent injury. Use a sanding block to smooth any rough edges, and vacuum away any remaining dust.
Before installing the fixtures, carefully check the wiring and electrical connections. Ensure all connections are secure and meet local electrical codes. Once the fixtures are installed, test the lights to ensure they are functioning correctly. Finally, finish the installation by patching the drywall. Use drywall patching compound to fill the gap between the ceiling and the fixture's housing, and use drywall tape to reinforce the edges. Allow the compound to fully dry before sanding and painting the area to match the surrounding ceiling.

Installing Recessed Lighting For Dramatic Effect Diy Family Handyman

How To Cut Drywall For A Recessed Light

Installing Recessed Lighting Fine Homebuilding

How To Install Recessed Lights In A Drop Ceiling The Home Depot

How To Install Recessed Lighting Fixthisbuildthat

How To Install Recessed Lighting The Home Depot

Holes When Installing Ceiling Lighting Is This Normal Doityourself Com Community Forums

Installing Recessed Lighting For Dramatic Effect Diy Family Handyman

How To Install Recessed Lighting The Home Depot

Install Recessed Lighting In Your Home Office
Related Posts

