How To Cover Popcorn Ceiling With Tiles
Popcorn ceilings, also known as acoustic ceilings, were a popular choice in residential construction for many years due to their sound-dampening and texture-hiding properties. However, their dated appearance and potential asbestos content (in homes built before the late 1970s) often lead homeowners to seek alternatives. Covering a popcorn ceiling with tiles offers a practical and aesthetically pleasing solution, avoiding the messy and potentially hazardous task of removing the existing texture. This article provides a comprehensive guide on how to successfully cover a popcorn ceiling with tiles.
I. Assessment and Preparation of the Existing Popcorn Ceiling
Before embarking on the tiling project, a thorough assessment of the existing popcorn ceiling is crucial. This step helps identify potential problems and ensures proper preparation for the successful adhesion of the tiles.
A. Asbestos Testing: The most important preliminary step is to determine whether the popcorn ceiling contains asbestos. Asbestos was a common component in building materials prior to its ban, and disturbing asbestos-containing materials can release dangerous fibers into the air. If the house was built before the late 1970s, professional asbestos testing is highly recommended. If asbestos is present, professional abatement is necessary to remove it safely. Attempting to scrape or otherwise disturb an asbestos-containing ceiling is extremely dangerous and illegal in many jurisdictions.
B. Condition Assessment: Inspect the popcorn ceiling for any signs of water damage, cracks, or loose areas. Water damage can weaken the adhesive bond of the tiles and cause them to detach over time. Cracks should be filled with joint compound and sanded smooth to provide a stable surface. Loose areas should be reattached using appropriate adhesive or fasteners.
C. Cleaning: Even if the ceiling appears clean, years of dust and grime can accumulate on the textured surface. Thoroughly clean the ceiling with a mild detergent and water solution. Use a sponge or soft cloth to avoid damaging the popcorn texture. Allow the ceiling to dry completely before proceeding.
D. Leveling (Optional but Recommended): While tiles can often adhere directly to the popcorn texture, achieving a perfectly level surface improves the final appearance and prevents potential warping or unevenness. Applying a thin coat of joint compound over the entire ceiling, then sanding it smooth after it dries, creates a more uniform surface for tile adhesion. This step is particularly important if the popcorn texture is very uneven or damaged.
E. Priming: Applying a primer to the popcorn ceiling is essential for promoting proper adhesion of the tile adhesive. Choose a primer specifically designed for porous surfaces, such as a latex-based primer. The primer seals the popcorn texture, preventing it from absorbing the moisture from the adhesive and weakening the bond. Apply the primer evenly using a roller or brush, following the manufacturer's instructions. Allow the primer to dry completely before proceeding to the next step.
II. Choosing the Right Tiles and Adhesive
Selecting the appropriate tiles and adhesive is key to a long-lasting and visually appealing result. The weight of the tiles, the specific type of material used, and the environmental conditions of the room all influence this selection.
A. Tile Selection: Several types of tiles are suitable for covering popcorn ceilings, each with its own advantages and disadvantages:
1. Acoustic Ceiling Tiles: These tiles are specifically designed for ceiling applications and are lightweight, making them easier to install and less likely to detach. They are typically made of mineral fiber or fiberglass and offer additional soundproofing benefits.
2. Faux Tin Tiles: Made from lightweight PVC or aluminum, faux tin tiles replicate the look of traditional tin ceilings without the weight and cost. They are durable, easy to clean, and available in a wide range of patterns and finishes.
3. Cork Tiles: Cork tiles offer a natural and eco-friendly option. They provide excellent insulation and sound absorption properties. However, they are generally more expensive than other types of tiles and may require more maintenance.
4. Foam Tiles: Lightweight and easy to cut, foam tiles are a cost-effective option for covering popcorn ceilings. They are available in various patterns and textures, but may not be as durable as other types of tiles.
When choosing tiles, consider the overall style of the room, the budget, and the desired level of soundproofing and insulation. Lighter tiles are generally preferred to minimize the risk of detachment.
B. Adhesive Selection: The type of adhesive used is critical for ensuring the tiles adhere securely to the popcorn ceiling. Choose an adhesive specifically designed for ceiling tile installation. Construction adhesive formulated for porous surfaces is generally a good choice. Consider the following factors when selecting an adhesive:
1. Weight Capacity: Ensure the adhesive is capable of supporting the weight of the selected tiles. The manufacturer's specifications will indicate the maximum weight capacity per square foot.
2. Open Time: The open time refers to the amount of time the adhesive remains workable after application. Choose an adhesive with an appropriate open time for the size of the tiles and the complexity of the installation.
3. Curing Time: The curing time is the amount of time it takes for the adhesive to fully dry and achieve its maximum strength. Allow sufficient curing time before exposing the tiles to humidity or other environmental factors.
4. VOC Content: Volatile Organic Compounds (VOCs) are chemicals that can be released into the air from adhesives. Choose an adhesive with low VOC content to minimize potential health risks and improve indoor air quality.
III. Installation Process and Best Practices
Proper installation techniques are essential for achieving a professional-looking and long-lasting result. Careful planning and attention to detail will ensure the tiles are securely attached and aligned correctly.
A. Planning and Layout: Before applying any adhesive, plan the layout of the tiles to ensure a balanced and aesthetically pleasing appearance. Start by finding the center point of the ceiling and marking it with a chalk line. Lay out a row of tiles along the chalk line to determine the number of tiles needed and the size of any necessary cuts. Adjust the layout as needed to minimize the number of small or awkward cuts.
B. Applying the Adhesive: Apply the adhesive to the back of each tile according to the manufacturer's instructions. Generally, a thin bead of adhesive is applied around the perimeter of the tile and a few dots in the center. Avoid applying too much adhesive, as this can cause it to squeeze out between the tiles and create a messy appearance. Too little adhesive weakens the bond.
C. Installing the Tiles: Carefully position each tile on the ceiling, aligning it with the chalk lines or other markings. Press the tile firmly against the popcorn ceiling for several seconds to ensure good contact with the adhesive. Use a level to ensure the tiles are straight and properly aligned. If necessary, use shims to support the tiles while the adhesive dries.
D. Cutting Tiles: When necessary, cut the tiles to fit around edges, corners, or obstructions. Use a utility knife, sharp scissors, or a tile cutter, depending on the type of tile. Measure carefully and make precise cuts to ensure a clean and professional finish.
E. Finishing Touches: Once all the tiles are installed, inspect the ceiling for any gaps or imperfections. Fill any gaps with caulk or sealant that matches the color of the tiles. Clean any excess adhesive from the surface of the tiles with a damp cloth. Allow the adhesive to fully cure before making any further adjustments or applying any additional coatings.
F. Ventilation: Adequate ventilation is necessary to allow proper curing of the adhesive and to minimize exposure to any fumes. Open windows and doors, and use fans to circulate the air. Follow the manufacturer's recommendations for ventilation during and after installation.
G. Safety Precautions: When working with adhesives and cutting tools, always wear appropriate safety gear, including gloves, eye protection, and a dust mask. Read and follow the manufacturer's instructions for all products used. Work in a well-lit area to avoid accidents and ensure accurate installation.
IV. Addressing Specific Challenges
Certain situations may present unique challenges when covering a popcorn ceiling with tiles. Addressing these challenges effectively will ensure a successful and long-lasting installation.
A. Uneven Ceilings: If the popcorn ceiling is significantly uneven, the tiles may not lie flat, creating an unsightly appearance. In this case, consider leveling the ceiling with joint compound before installing the tiles. Another option is to use thicker tiles that can better conceal any imperfections. Small imperfections can be accommodated by shimming the tiles during installation.
B. High Humidity Environments: In bathrooms or other areas with high humidity, choose tiles and adhesives that are specifically designed for these environments. Moisture-resistant tiles, such as PVC or fiberglass tiles, are less likely to warp or detach. Use a mildew-resistant adhesive to prevent mold and mildew growth.
C. Heavy Tiles: If using heavier tiles, such as ceramic or stone tiles, ensure the popcorn ceiling is properly prepared and that the adhesive is strong enough to support the weight. Consider using mechanical fasteners, such as screws or nails, in addition to adhesive, to provide extra support. Fasteners should be countersunk and filled with patching compound to create a seamless surface.
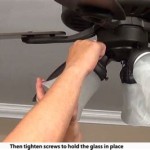
D. Lighting Fixtures and Other Obstructions: Carefully plan the layout around lighting fixtures, smoke detectors, and other obstructions. Turn off the power to any electrical fixtures before working around them. Use a hole saw or other appropriate cutting tool to create openings in the tiles for the fixtures. Ensure the tiles fit snugly around the fixtures to prevent gaps and maintain a professional appearance.
E. Existing Textured Walls: If the walls also have a textured finish, consider the overall aesthetic when choosing tiles for the ceiling. Coordinating the textures or choosing complementary colors can create a cohesive and visually appealing space. Avoid using clashing textures or colors, as this can create a jarring and unpleasant effect.
By meticulously following these steps and adapting the techniques to specific circumstances, homeowners can successfully cover a popcorn ceiling with tiles, transforming the appearance of their rooms and enhancing their property value. Remember to prioritize safety and to consult with professionals when faced with complex or hazardous situations.

Cover Popcorn Ceilings Armstrong Residential

Say Goodbye To Your Popcorn Ceiling With Glue Up Tiles Improve S Largest Home Improvement Renovation Centre

How To Cover Up Those Popcorn Ceilings 2024 11 01 Walls

Say Goodbye To Messy Popcorn Ceilings Diy Guide Covering With Glue Up Ceiling Tiles

How To Cover Popcorn Ceilings A Turtle S Life For Me

Cover Popcorn Ceiling With Stylish Tiles

Getting Rid Of A Popcorn Ceiling Decorative Tiles Inc

Cover Popcorn Ceilings Armstrong Residential

Styrofoam Ceiling Tiles Installation Covers Popcorn Ceilings Too

Popcorn Ceiling Styrofoam Tiles 5 Years Later Bella Tucker
Related Posts