Changing out a ceiling fan is not as difficult as it may seem. With the right tools and knowledge, you can easily replace an existing fan or install a brand new one. This article will provide detailed instructions on how to safely change out a ceiling fan.
Tools Needed
Before starting the project, make sure you have all of the necessary tools. You will need a screwdriver, wire stripper, electrical tape, wire connectors, and a ladder if needed. You may also need a voltage tester, depending on the model of fan you’re installing.
Removing the Existing Fan
Before you can install the new fan, you will need to remove the existing one. First, turn off the power to the fan at the circuit breaker. Next, remove the globe or light fixture from the fan. Then, remove the screws that secure the fan to the ceiling. Carefully remove the fan and set it aside.
Installing the New Fan
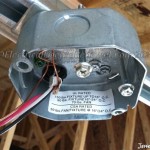
Now that the old fan is removed, it’s time to install the new one. First, make sure the power is still off. Next, mount the new fan to the ceiling using the provided screws. Connect the wires from the fan to the wires in the ceiling. If the wires are different colors, consult the manual for the fan’s wiring diagram. Secure all connections with electrical tape. Finally, attach the globe or light fixture to the fan.
Testing the Fan
Before turning on the power, make sure all connections are secure. Then, turn on the power to the fan and use a voltage tester to check all connections. If everything is working correctly, the fan should start up without any problems. If the fan does not start up, double check all connections.
Conclusion
Changing out a ceiling fan is not a difficult task. With the right tools and knowledge, you can easily install a new fan. Just make sure to turn off the power, carefully remove the existing fan, and securely attach the new fan. After all connections have been tested, you can turn the power back on and enjoy your new fan!


Related Posts


