How to Effortlessly Change a Lightbulb in a Hunter Ceiling Fan
When the illumination from your Hunter ceiling fan starts to dim, it's time to replace the lightbulb. While it may seem like a daunting task, it's actually quite simple and can be done in a matter of minutes. Here's a comprehensive guide to help you through the process effortlessly:
Gather Your Tools
Before you begin, gather the following tools:
- New candelabra or A19 lightbulb (check the fan's manual for the recommended wattage)
- Step ladder or stool
- Screwdriver (if needed)
Safety First
To ensure your safety, always turn off the power to the ceiling fan at the circuit breaker or fuse box before starting any work.
Access the Lightbulb
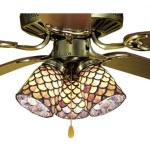
Using a step ladder or stool, carefully climb up to reach the ceiling fan. Determine the type of light fixture you have. Some models have a globe-shaped light fixture that twists off, while others have a light kit that needs to be removed.
- Globe-shaped light fixture: Simply grasp the globe and turn it counterclockwise to unscrew it.
- Light kit: Locate the screws holding the light kit in place and remove them with a screwdriver. Carefully lift the light kit down, exposing the lightbulb.
Remove the Old Lightbulb
Once you have access to the lightbulb, gently grasp it and pull it straight down to disconnect it from the socket. Do not twist or turn the bulb.
Insert the New Lightbulb
Align the new lightbulb with the socket and carefully push it straight up until it clicks into place. Make sure the bulb is securely seated but do not overtighten it.
Reassemble the Light Fixture
Depending on the type of light fixture you have, either screw the globe back on or carefully lift the light kit back into place and secure it with the screws.
Turn the Power Back On
Once everything is reassembled, climb back down and turn the power back on at the circuit breaker or fuse box. Check if the new lightbulb is working properly.
Tips
- Use the recommended wattage lightbulb for your ceiling fan to avoid overheating or safety hazards.
- If you have multiple lightbulbs in your ceiling fan, replace all of them at the same time to ensure even illumination.
- If you have any concerns about changing the lightbulb yourself, do not hesitate to contact a qualified electrician.
Conclusion
Changing a lightbulb in a Hunter ceiling fan is a simple and straightforward task that can be completed in just a few minutes. By following these steps and taking the necessary safety precautions, you can keep your ceiling fan illuminating your room for years to come.

How To Remove A Light Kit From Your Hunter Ceiling Fan 5x Series Model Fans

How To Replace A Light Fixture With Ceiling Fan Projects By Peter

How To Replace A Ceiling Fan Lighting Circuit Power Limiting Device Ifixit Repair Guide

How To Replace A Light Fixture With Ceiling Fan Projects By Peter

How To Change A Bulb In Hunter Ceiling Fan Hunker

Replace Light Bulb In Ceiling Fan Tiktok Search

Hunter Fan Announces Hunterexpress Technology

Simpleconnect Hunter Fan

Hunter Valda 36 In Led Indoor Dove Grey Ceiling Fan With Light Kit And Remote 51328 The Home Depot

Hunter Apex Led 52 Reversible Blade Ceiling Fan Costco
Related Posts