How to Change a Light Bulb in a Hunter Douglas Ceiling Fan
Changing a light bulb in a Hunter Douglas ceiling fan is a simple task that can be completed in a few minutes. Here are the step-by-step instructions on how to do it:
Materials you will need:
- Replacement light bulb (type and wattage specified in the fan's user manual)
- Ladder or step stool
Step-by-step instructions:
1. Safety first!
Before you start, make sure the ceiling fan is turned off and the power is turned off at the circuit breaker or fuse box.
2. Access the light fixture
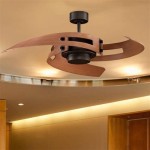
Use a ladder or step stool to reach the light fixture on the ceiling fan. Most Hunter Douglas ceiling fans have a glass or plastic globe that covers the light bulbs. Gently twist the globe counterclockwise to remove it.
3. Remove the old light bulb
Once the globe is removed, you will see the light bulbs. Gently grasp the old light bulb and pull it straight down to remove it from the socket.
4. Install the new light bulb
Take the new light bulb and carefully screw it into the socket. Do not overtighten the bulb, as this can damage the socket.
5. Reattach the globe
Once the new light bulb is installed, carefully put the globe back on the light fixture. Twist the globe clockwise to secure it in place.
6. Turn on the power and test the light
Go back to the circuit breaker or fuse box and turn the power back on. Turn on the ceiling fan and check if the new light bulb is working properly.
Tips:
- If you have multiple light bulbs in your ceiling fan, it is a good idea to replace them all at the same time. This will ensure that they have the same lifespan and brightness.
- If you have a hard time removing the globe, you can try using a pair of pliers or a rubber grip to get a better grip.
- Be careful not to touch the glass of the new light bulb with your bare hands, as this can shorten its lifespan.
Changing a light bulb in a Hunter Douglas ceiling fan is a simple task that can be completed in a few minutes. By following these step-by-step instructions, you can easily keep your ceiling fan running smoothly and looking its best.

Ceiling Fan Glass Cover Removal Light Bulb Dome

How To Remove Dome Globe Glass Light Replacement On Hampton Bay Ceiling Fan Windward Ii

4 Ways To Replace A Light Bulb In Ceiling Fan Wikihow

Ceiling Fan Light Repair Home Tutor

4 Ways To Replace A Light Bulb In Ceiling Fan Wikihow

4 Ways To Replace A Light Bulb In Ceiling Fan Wikihow

For Removing Stubborn Glass Domes From Overhead Lights Ceiling Fans

Ceiling Fan Light Repair Home Tutor

4 Ways To Replace A Light Bulb In Ceiling Fan Wikihow

4 Ways To Replace A Light Bulb In Ceiling Fan Wikihow
Related Posts