How to Change a LED Ceiling Fan Light Cover
Ceiling fans with integrated LED lights are a popular choice for modern homes, offering both cooling and illumination in one convenient unit. However, the LED light cover may eventually need replacement due to damage, wear, or simply a desire for a different aesthetic. Fortunately, changing a LED ceiling fan light cover is a relatively straightforward process that can be done with minimal tools and effort. This guide will walk you through the steps involved in replacing the light cover safely and efficiently.
1. Gather the Necessary Tools and Materials
Before starting the process, ensure that you have the following tools and materials ready:
- A Phillips-head screwdriver
- A ladder (if necessary to reach the fan)
- A new LED ceiling fan light cover (compatible with your fan model)
- Gloves (optional, for protection)
- A flashlight (optional, for better visibility)
It's important to select a new light cover that is specifically designed for your ceiling fan model. Improperly sized or incompatible covers can cause damage to the fan or result in improper lighting.
2. Disconnect the Power Supply
Safety is paramount when working with electricity. Always disconnect the power supply to the ceiling fan before attempting any repairs or replacements. This step is crucial to prevent electric shock and ensure your safety.
Locate the circuit breaker controlling the ceiling fan's power. It is usually found in the electrical panel or breaker box within your home. Turn off the breaker to completely cut off the power supply to the fan.
Once the power is disconnected, double-check that the light switch is in the "off" position. You can also test the power by turning on the light switch and observing if the light is still on. If it is, the power has not been fully disconnected, and you need to investigate further.
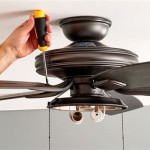
3. Remove the Old Light Cover
Once the power is disconnected, you can safely remove the old light cover. Depending on the design of your ceiling fan, the process for removing the cover may vary. Refer to the manufacturer's instructions or the model's user manual for specific steps. However, the general procedure usually involves the following:
- Locate the cover screws: The old light cover is usually secured by screws located on the underside or edges of the cover. Carefully locate the screws, which may be hidden beneath a decorative trim or shroud. Take note of the screw size and shape, as you will need to use compatible screws for the new cover.
- Unscrew the cover: Using your Phillips-head screwdriver, carefully unscrew the screws holding the light cover in place. Avoid applying excessive force, as this could damage the cover or the fan assembly. If the cover is stuck, use a gentle prying motion with a thin tool like a putty knife to release it, but exercise caution to prevent scratching the fan finish.
- Remove the old cover: Once the screws are removed, carefully lift the old light cover off the fan housing. Be mindful of any wires or connections that may be attached to the cover.
4. Install the New Light Cover
With the old cover removed, you can now install the new LED ceiling fan light cover. The process is generally the reverse of removal:
- Align the new cover: Carefully align the new light cover with the fan housing, ensuring it is centered and properly positioned. If the cover is not properly aligned, it may not fit securely or may affect the fan's balance.
- Secure the cover: Using the appropriate screws, secure the new cover to the fan housing. Tighten the screws firmly, but do not overtighten to avoid stripping the screw holes or damaging the cover.
- Check for proper connections: If the new cover has any wires or connections, ensure they are securely attached to the fan's wiring. Refer to the manufacturer's instructions or user manual for specific wiring diagrams and connections.
5. Restore Power and Test the Light
The final step is to restore power to the ceiling fan and test the light to ensure it is working correctly. Carefully reconnect the power to the circuit breaker and turn it back on. Once the power is restored, check the light by activating the light switch. The new LED light cover should illuminate properly.
If the light fails to work, double-check the connections to the new cover and ensure the power was fully restored.
Congratulations! You have successfully replaced a LED ceiling fan light cover.

How To Replace An Led Ceiling Fan Light Bulb

Change Integrated Led Light In Ceiling Fan Or Dome

How To Replace A Light Bulb In Ceiling Fan 4 Easy Methods

Hampton Bay Ceiling Fan Led Conversion

How To Change A Hampton Bay Ceiling Fan Led Light

How To Repair A Ceiling Fan Led Light Replace Broken Harbor Breeze Or Hampton Bay

How To Replace A Ceiling Light With Fan Diy Installation

How To Change Light Bulb In Ceiling Fan

Led Retrofit For Quartz Halogen Ceiling Fan Light 7 Steps With Pictures Instructables

How To Remove A Light Fixture With No Visible S
Related Posts