How To Build Cathedral Ceiling Trusses
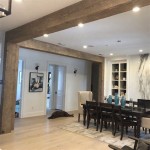
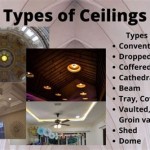
Cathedral ceilings, also known as vaulted ceilings, add a touch of grandeur and spaciousness to any room. They are particularly popular in living rooms, bedrooms, and great rooms. Building a cathedral ceiling requires careful planning and construction, with trusses being the backbone of the entire structure. This article will guide you through the process of building cathedral ceiling trusses, providing detailed instructions and helpful tips.
Understanding Cathedral Ceiling Trusses
Cathedral ceiling trusses are engineered structural components that support the weight of the roof and ceiling. They are typically made of wood, metal, or a combination of both. The design of the trusses depends on the span of the roof, the load they need to carry, and the desired aesthetic. They are designed to create a sloped ceiling that rises from the walls to a central peak, mimicking the architecture of a cathedral.
There are several types of cathedral ceiling trusses, each with its own advantages and disadvantages:
-
Standard Trusses:
These are the simplest type and are suitable for shorter spans. They consist of two main chords (top and bottom) connected by vertical and diagonal web members. -
Modified Trusses:
These trusses are designed for longer spans or heavier loads. They may include additional web members for increased strength. -
Laminated Veneer Lumber (LVL) Trusses:
LVL trusses are made from layers of thin wood veneer glued together. They offer greater strength and stability compared to traditional wood trusses.
Steps for Building Cathedral Ceiling Trusses
Building cathedral ceiling trusses involves several steps:
1. Design and Planning
Begin by determining the dimensions of the roof and ceiling. Consider the span of the roof, the pitch (angle) of the ceiling, and the desired ceiling height. This information will help you choose the appropriate truss design and materials.
Consult with a structural engineer or an experienced builder to ensure the trusses are strong enough to handle the load and meet local building codes. They can also advise on the appropriate material for the trusses, such as plywood, wood, or metal, depending on the size and weight of the roof.
2. Gathering Materials
Once the design is finalized, gather all the necessary materials. These may include:
-
Wood:
Choose lumber of appropriate size and quality. Common types include dimensional lumber (2x4, 2x6, etc.), plywood, or engineered wood products. -
Fasteners:
Purchase nails, screws, and other fasteners suitable for wood construction. Consider using galvanized fasteners for increased rust resistance. -
Joist hangers:
These metal brackets are essential for securely connecting the trusses to the walls and supporting the roof sheathing. -
Construction adhesive:
This helps improve the bond between wood components and adds strength to the trusses.
3. Cutting and Assembling the Trusses
Using a saw, cut the wood to the precise lengths specified in your design. Use a table saw or circular saw with a guide for accurate cutting, ensuring that all joints are perfectly square. You can employ a truss jig to ensure consistency and accuracy in the truss assembly.
To assemble the trusses, lay the pieces out according to the design, ensuring that they are aligned correctly. Secure the joints with strong nails or screws. Pre-drilling holes can prevent wood from splitting.
Apply construction adhesive to all joints before fastening. This will create a stronger bond and help prevent the trusses from coming apart over time. Make sure to use the correct type of adhesive for the specific wood species used in your project.
4. Truss Placement and Installation
Once the trusses are assembled, they need to be installed on the walls at the correct spacing and height. This is a critical step, as it will ensure that the roof is properly supported.
Use a level to ensure the trusses are installed straight and plumb. Use a building code-approved truss installation method. This may include using a crane to lift the trusses into place, or using a series of temporary supports to hold them in position until the wall is constructed.
Secure the trusses to the walls using joist hangers or other approved methods, ensuring that the connections are strong enough to support the weight of the roof. The placement and installation of the trusses will also impact the placement of the roof sheathing, so it's crucial to plan this step carefully.
5. Final Touches
Once the trusses are installed, inspect them for any imperfections or gaps in the joints. Repair any issues that may have occurred during the assembly and installation process. Then, you can proceed with the remaining roof construction: adding sheathing, roofing felt, and the shingles, or other roofing materials.
Always wear appropriate safety gear when building cathedral ceiling trusses, including gloves, eye protection, and hearing protection. Make sure you follow all building codes and regulations to ensure the safety and stability of your construction project.

Best Way To Build A Cathedral Roof For Garage Greenbuildingadvisor

Framing A Cathedral Ceiling Fine Homebuilding

Framing A Cathedral Ceiling Rafter Overview My Diy

Vaulted Ceiling Precautions Don T Get In Trouble On Your Project Armchair Builder Blog Build Renovate Repair Own Home Save Money As An Owner

How To Build Vaulted Roof For Crawlspace Home Addition Design Framing And Assembly Ideas

Spectacular Cathedral Ceiling Trusses Barron Designs

Spectacular Cathedral Ceiling Trusses Barron Designs

Explore Roof Truss Designs For Your Project A J Reliable Inc

Demo Does A Vaulted Roof Push Out At The Wall Plate

Vaulted Ceiling Opening Up Your Home For A Bigger Feel Armchair Builder Blog Build Renovate Repair Own Save Money As An Owner
Related Posts

